30
INSTALLATION
Check the appliance is electrically safe and gas sound when you have finished.
Hotplate
Check each burner in turn. There is a flame safety
device that stops the flow of gas to the burner if the
flame goes out. There is also a spark ignition system
that works when the knob is pressed in.
For each burner, push in and turn the knob to the
solid flame symbol (
).
The igniter should spark and light the gas. Keep
holding the knob pressed in to let the gas through to
the burner for few seconds. If, when you let go of the
control knob, the burner goes out, the safety device
has not held in. Turn the control to the off position
and wait one minute, then try again this time holding
in the control knob for slightly longer.
Turn off the burners.
Oven check
Set the clock to the time of day
When the clock is first connected the display will flash
(
) and ( ) alternately.
To set the clock to read the time of day turn and hold
the Timer knob to the clock symbol
and at the
same time turn the Adjusting knob left or right until
the clock shows the time of day. Remember this is a
24 hour clock. Let go of the Timer knob and it will
spring back to the vertical oven manual setting.
Turn on the oven and check that the oven fan starts to
turn and that the oven starts to heat up.
Check that the oven light is working.
NB. The oven light bulb is not included in the
guarantee.
Turn off the oven.
Fitting the plinths
The cooker is supplied with two stainless steel side
panel extensions, a black front plinth with stainless
steel end feet and a stainless front plinth trim plate.
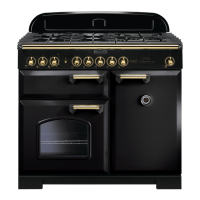
Fitting the side extensions (optional)
If the installed height of the cooker is less than 910mm
to the hotplate surround, or the distance from the
bottom of the side panel to the floor is less than
60mm, the side extension should not be fitted. If the
cooker is installed between 2 units the side extensions
are not necessary.
Hook the tab on the rear of the side extension into the
channel on the back of the cooker and fix in place
using one of the supplied screws.
At the front, hook the side extension under the
protruding screw and fix in place by fitting a screw in
the lower hole. Don’t tighten the upper screw - it must
stand proud so that the front plinth can hook onto it.
Fit the other side extension if required. Push the
cooker back into position.
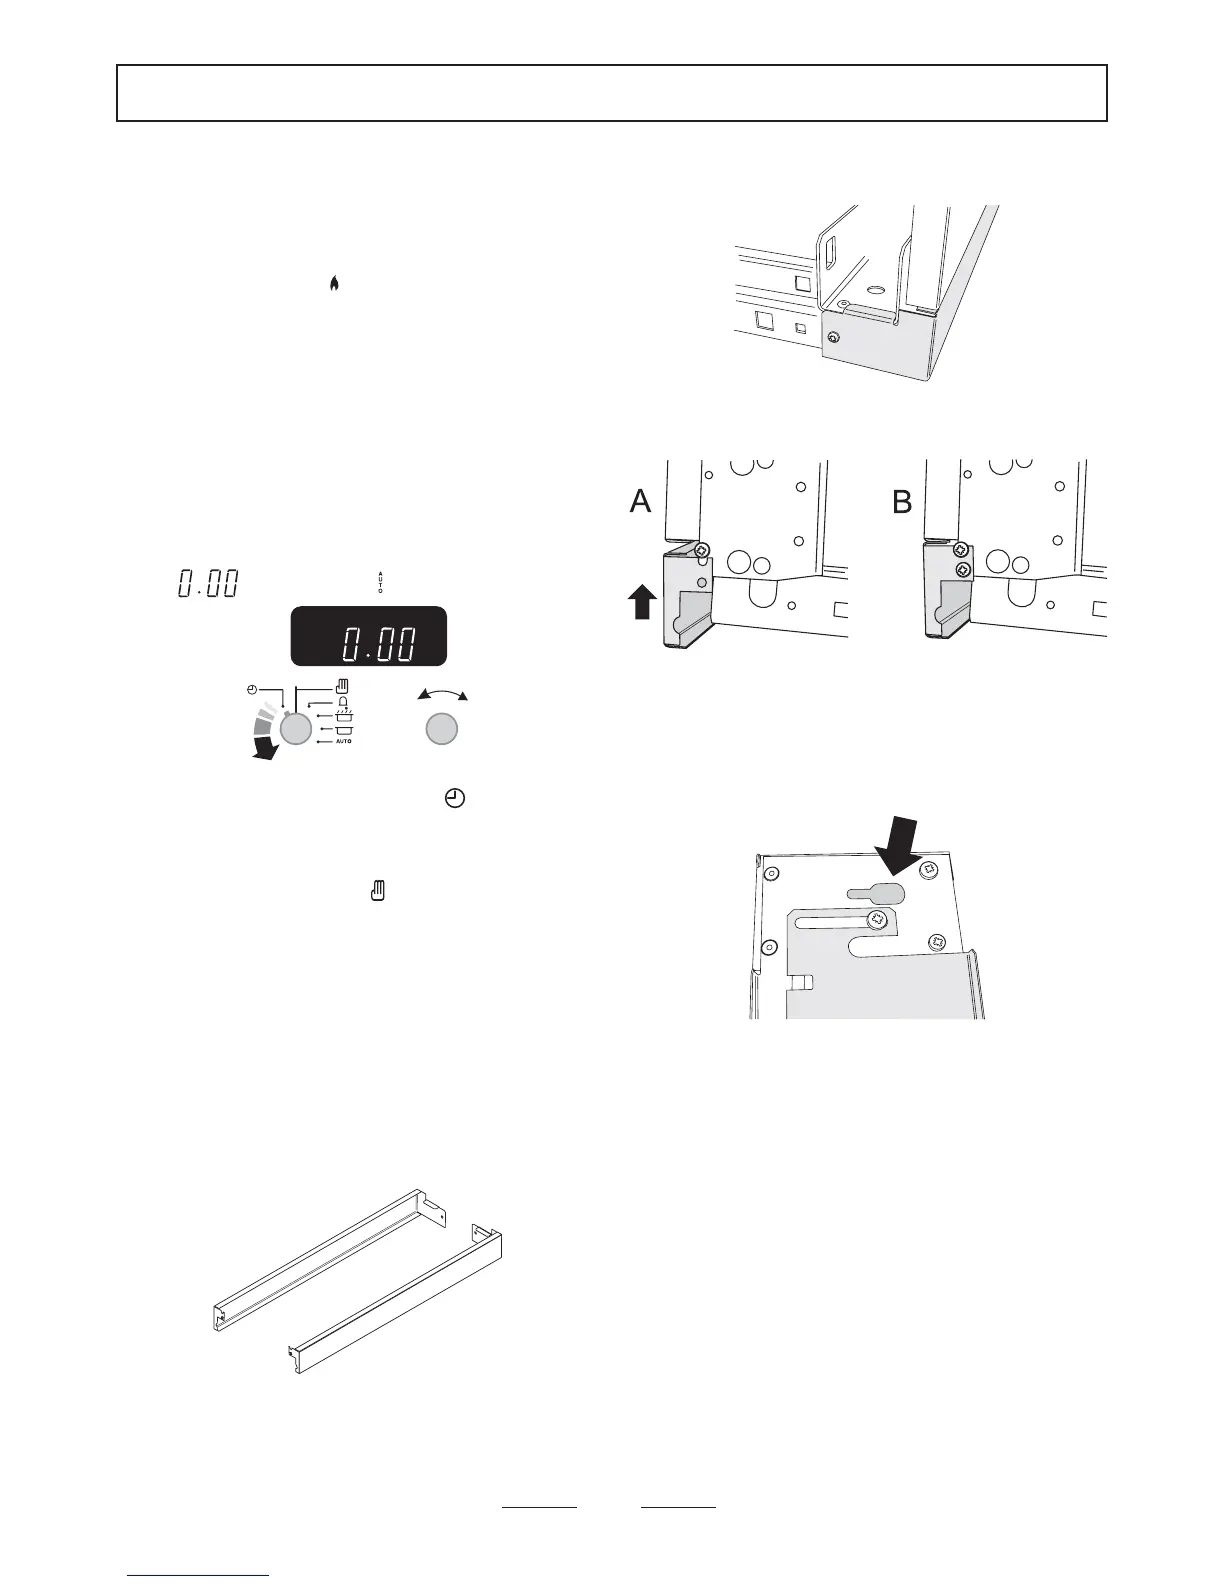
Fitting the front plinth
top of plinth bottom
On the back of the plinth assembly there is a keyhole
slot at each end. Hold the plinth in position in front of
the cooker. Hook the plinth onto the two end screws,
one side at a time. If you look from the side you can
check that the keyhole lines up as you do this. Check
that the sliding end feet and the rear sliding plate of
the plinth are siting down correctly on the floor.
The plinth is supplied with a loose stainless steel trim
plate. If the black finish is preferred, discard the trim
plate. Alternatively place the trim over the black finish
plinth. Fix the plinth and trim plate (if fitted) in place
with the 3 supplied screws.