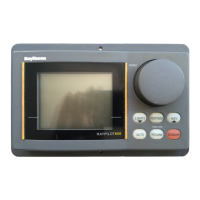
T150/150G/T400/400G Course Computers
24 Type 150/150G/400/400G Course Computers Service Manual 83156-1
Type 150/400 Course Computers
Chapter 4: Disassembly and Reassembly
CAUTION: Electrostatic Discharge (ESD)
This product contains components that can be damaged by electrostatic discharge.
If the cover is removed, any work on the product must be carried out at a properly
equipped anti-static station by personnel wearing anti-static straps.
Note: The numbered parts in the following instructions refer to the annotations on the
exploded views.
4.1. Tools required
To assemble/disassemble the Course Computer you will need:
• 3 mm Allen key
• pozi-drive (cross-head) screwdriver
• 7 mm socket spanner (or adjustable spanner)
• 2 mm Allen key (to remove or fit the GyroPlus yaw sensor)
4.2. Disassembly
1. Unscrew and remove the 4 main cover screws (5).
2. Remove the main cover (6) and connector cover (1). Make sure that the 4 EMC
washers (7) are retained on the underside of the main cover.
3. Unscrew the FET clamp screws (10), and then remove the screws, washers (11) and
FET clamps (12). Note: Type 150/150G PCBs have 2 FET clamps/screws/washers;
Type 400/400G PCBs have 4 FET clamps/screws/washers.
4. To remove the PCB:
• unscrew and remove the 4 hexagon pillars (8)
• unscrew and remove the 3 PCB screws (5), then remove the screws and 2 cup
washers (9)
• lift the PCB (13) out of the base casting (17)
4.3. Reassembly
Note: If you have removed the PCB, we recommend fitting a replacement FET pad and
insulation spacer in case the originals have been damaged. Replacements are supplied
with the relevant spares packs.
1. Fit the replacement FET pad (15) and insulation spacer (16) onto the base casting (17).
2. Place the PCB (13) into position on the base casting (17).
3. To secure the PCB:
• fit the 3 PCB screws (5) and 2 washers (9), and tighten the screws
• fit and tighten the 4 hexagon pillars (8)
 Loading...