14
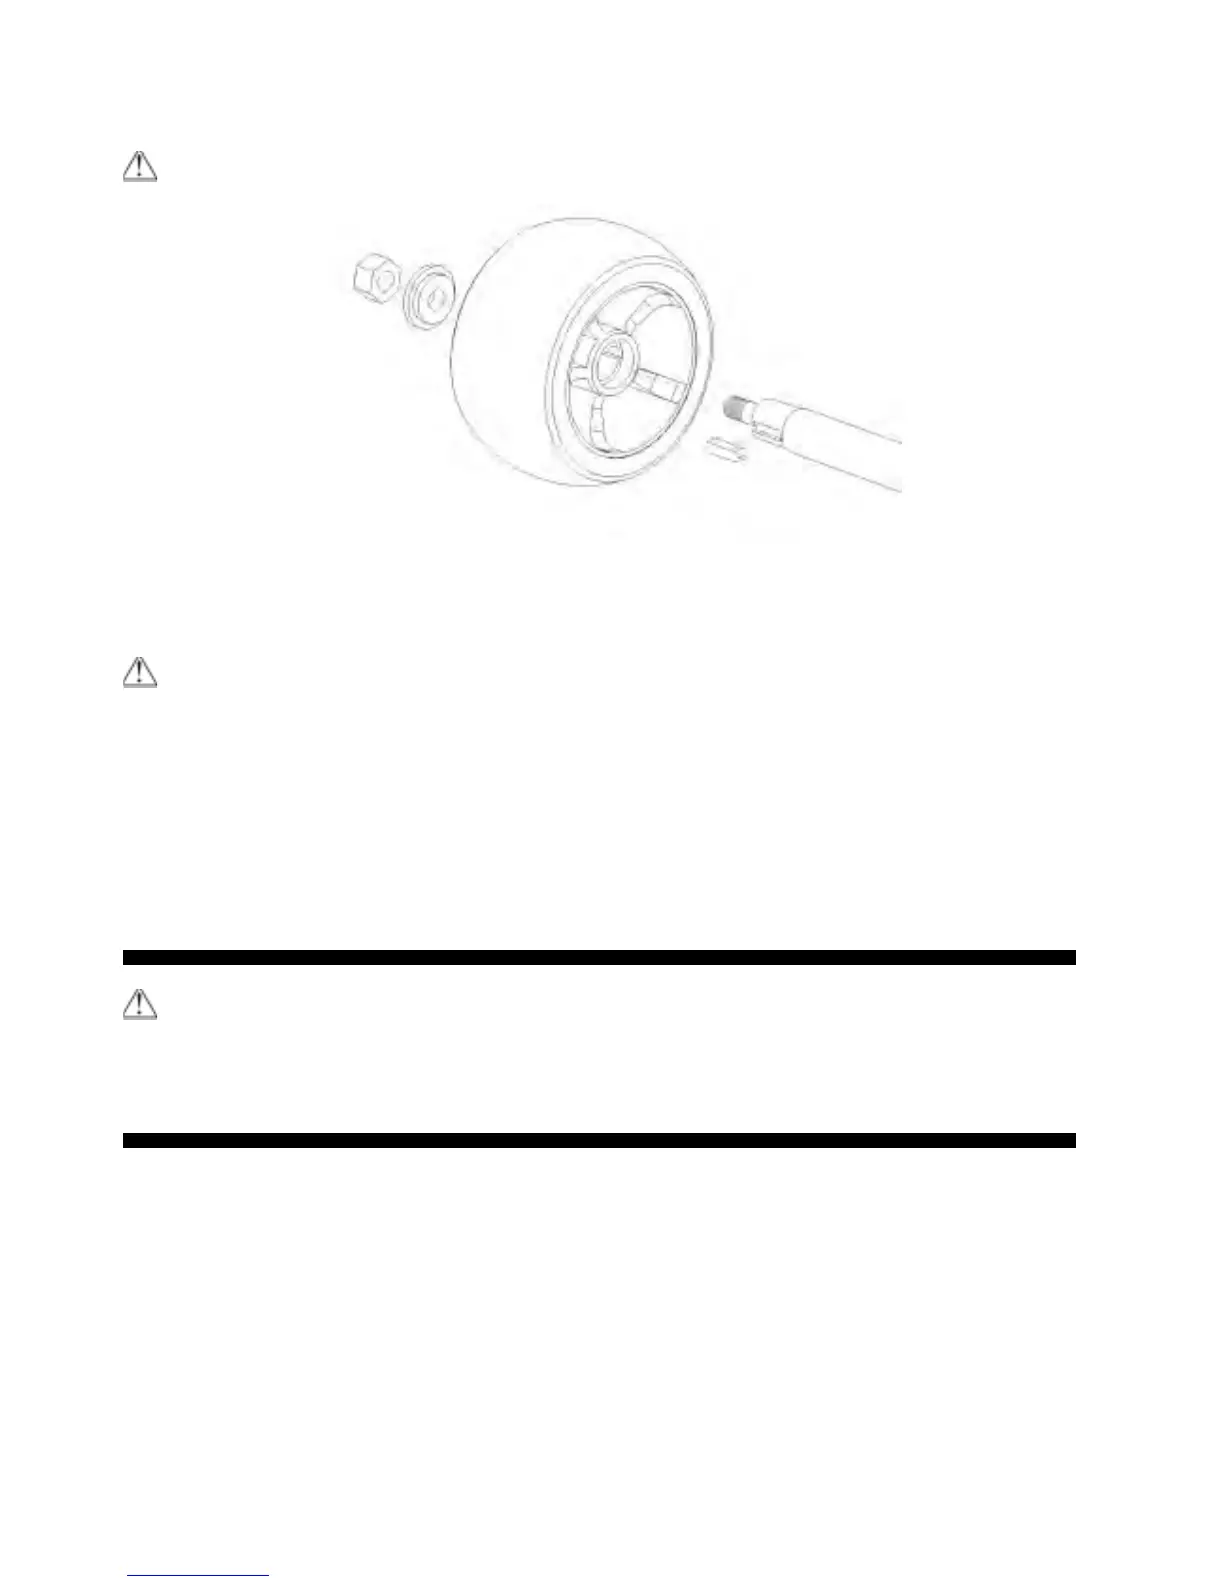
aligned with the key way in the wheel (Figure 11). Tighten the self-locking nut securely.
NOTE: The Razor logo on the tread must face out.
Figure 11.
5C. Replacing the Chain
NOTE: Initial production versions of the Ground Force utilized a chain drive.
Subsequent production was switched to a roller-chain drive system. Due to publication
deadlines, the following photos show the chain configuration. In either case, the
procedure to remove the axle is the same.
Occasionally the chain needs to be replaced when worn out.
Tools required for rear wheel and axle removal: (1) 17mm open end or socket wrenches,
(1) 5mm Allen key, (1) 2mm Allen key, (1) rubber mallet.
NOTE: The exact procedure for chain replacement may vary depending on how your
Ground Force is configured. The following procedure is based on the design at time of
publication of this Owner’s Manual. If your Ground Control does not look exactly like this,
please check the Razor website (www.razor.com) for updates.
5C1. Remove the seat and motor cover. Loosen the chain adjustment jackscrew as
described in 5C2. Loosen and remove the axle nut on the right side rear wheel (Figure
12a).
5C3. Loosen and remove the axle guard (Figure12b). Remove the spacer tube and any
shims or rings that the factory may have used to fine-tune the fit.