11
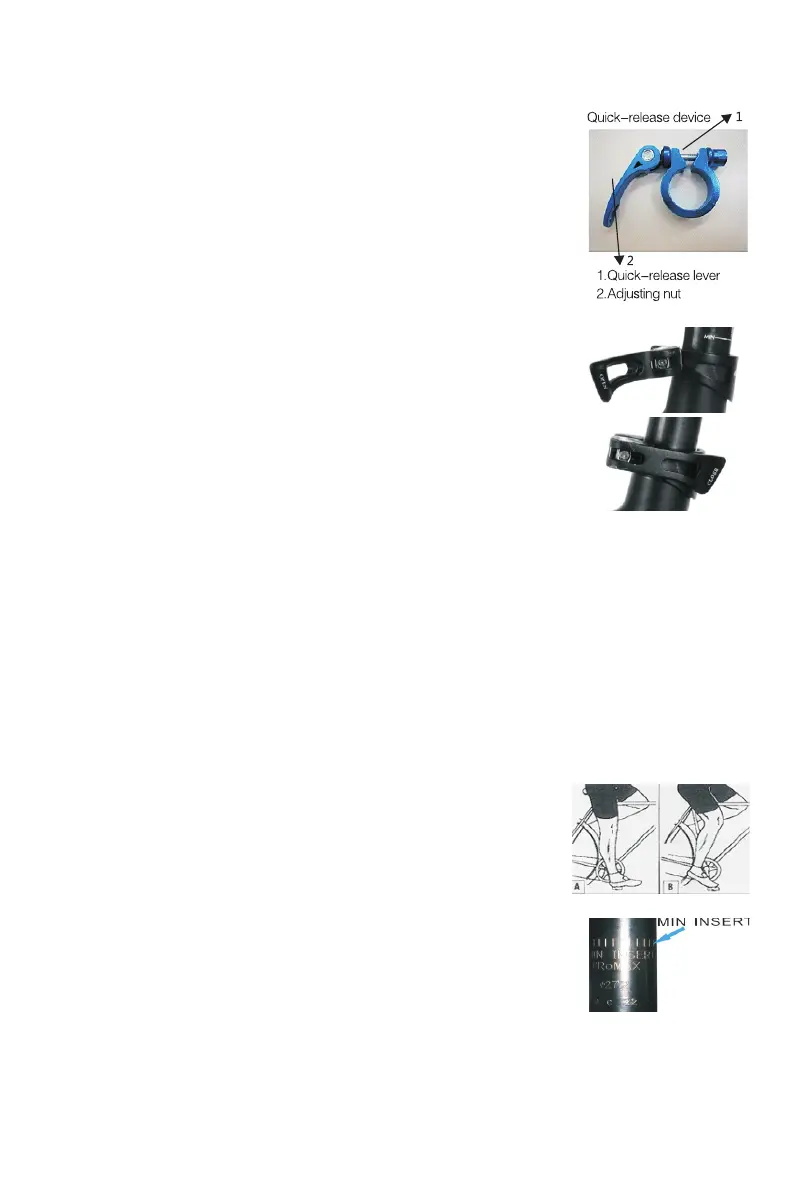
III-2.2: Operating the quick-release device
WARNING:
• All quick-release devices must be tightened securely before
you set off. Check this before every journey.
• If you leave your bike unattended, check that all quick-release
devices are correctly secured before setting off again.
• When closing the quick-release lever to lock it, it must be
necessarytoapplyaforcethatcausesyoutomakearst
with your hand as otherwise the quick- release device could
come loose.
To open the quick-release device, proceed as follows:
• Throw back the quick-release lever so that its inner face or the
lettering •Open the quick-release device as far as possible.
• Turn the adjusting nut anticlockwise to further slacken the
quick-release device.
To close the quick-release device, proceed as follows:
• Adjust the clamping strength by turning the adjusting nut.
• If the quick-release device closes too easily, open it again and
turn the adjusting nut clockwise.
• If the quick-release device still closes too easily repeat the previous step.
• If the quick-release device is too difcult to close, turn the adjusting nut anticlockwise.
• Turn back the quick-release lever from the OPEN position so you can see the outer side of
the lever or the lettering CLOSE.PEN is visible.
WARNING:
Whenclosed,quick-releaseleversmustlieatagainsttheframe,forkandsaddleclamp.
Make sure friat quick-release devices for frie hubs point backwards when closed as of-
rierwise they could snag on obstructions when the bike is moving and open. This could
lead to serious accidents.
III-2.3: Determining the correct saddle height
• Sit on the bike saddle.
• Try to reach the pedal with your heel when It is in the bottom
position. Your knee should be more or less fully straightened
out.
• Place the balls of your feet on the centre of the pedal.If your
knee is now slightly bent, the saddle height is correct.
WARNING:
Never tighten the seat post rf the maximum mark or stop mark
is above the top of the | seat tube as otherwise you could injure
yourselfordamagetheseatpost.Alwaysobservethespecied
tightening torques.
CAUTION:
The minimum insertion depth is marked on the seat post. If this is not the case, the mini-
mum insertion depth must be 7.5 cm. In frames with long seat tubes that project beyond
the top tube, the minimum insertion depth is 10cm.
 Loading...