6
Getting Started
The next screen in the App lets
you name the camera you’re
setting up and prompts you
to scan the QR code on the
bottom of the camera.
To name the camera you’re
setting up: Press in the
Camera name eld and enter
the name you want to use.
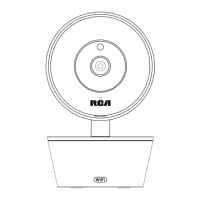
To scan the QR code on
the WiFi camera: Find the
QR code on the bottom of
the WiFi camera. Position
your smartphone or tablet so
that its camera can scan this
QR code. Then press where
indicated in the App to scan
this QR code.
Add Camera
Scan QR code located
on bottom of camera
ID:
The App will prompt you to make sure your
camera is on. If you haven’t already turned it on,
press the Power button on the right side of the
camera (the camera’s LED lights up), then press
the Next step button in the App.
After you’ve scanned the QR
code on the bottom of the
WiFi Camera, the App will
ask you to press the Set Up
button on the bottom of the
camera and enter the name
(WIFI SSID) and password of
your WiFi network.
Find the SET button on the
bottom of the WiFi camera.
Press it until the camera
gives an audio signal.
Configure WiFi
Next step
1. Your camera should be plugged in and turned ON.
Press the “Set” button on the bottom of your camera for 1
second.You will hear one beep and the LED will start
blinking red.
2. Choose WiFi SSID (or network name) and enter
password below. Make sure you enter the info correctly.
If your WiFi SSID does not have a password, you will need to
create one. This is for your safety and security. Consult the
user guide for your WiFi router/AP to add a password.
Helpful Hint: Click on the lock icon in the password area
to hide or display text.
3. After you’ve entered your WiFi info below, press “Next
step.” Your camera will begin connecting to your WiFi
network. This can take 2–3 minutes to complete.
When you hear two beeps and the LED turns solid green,
your camera is successfully connected and ready for you to use.
 Loading...