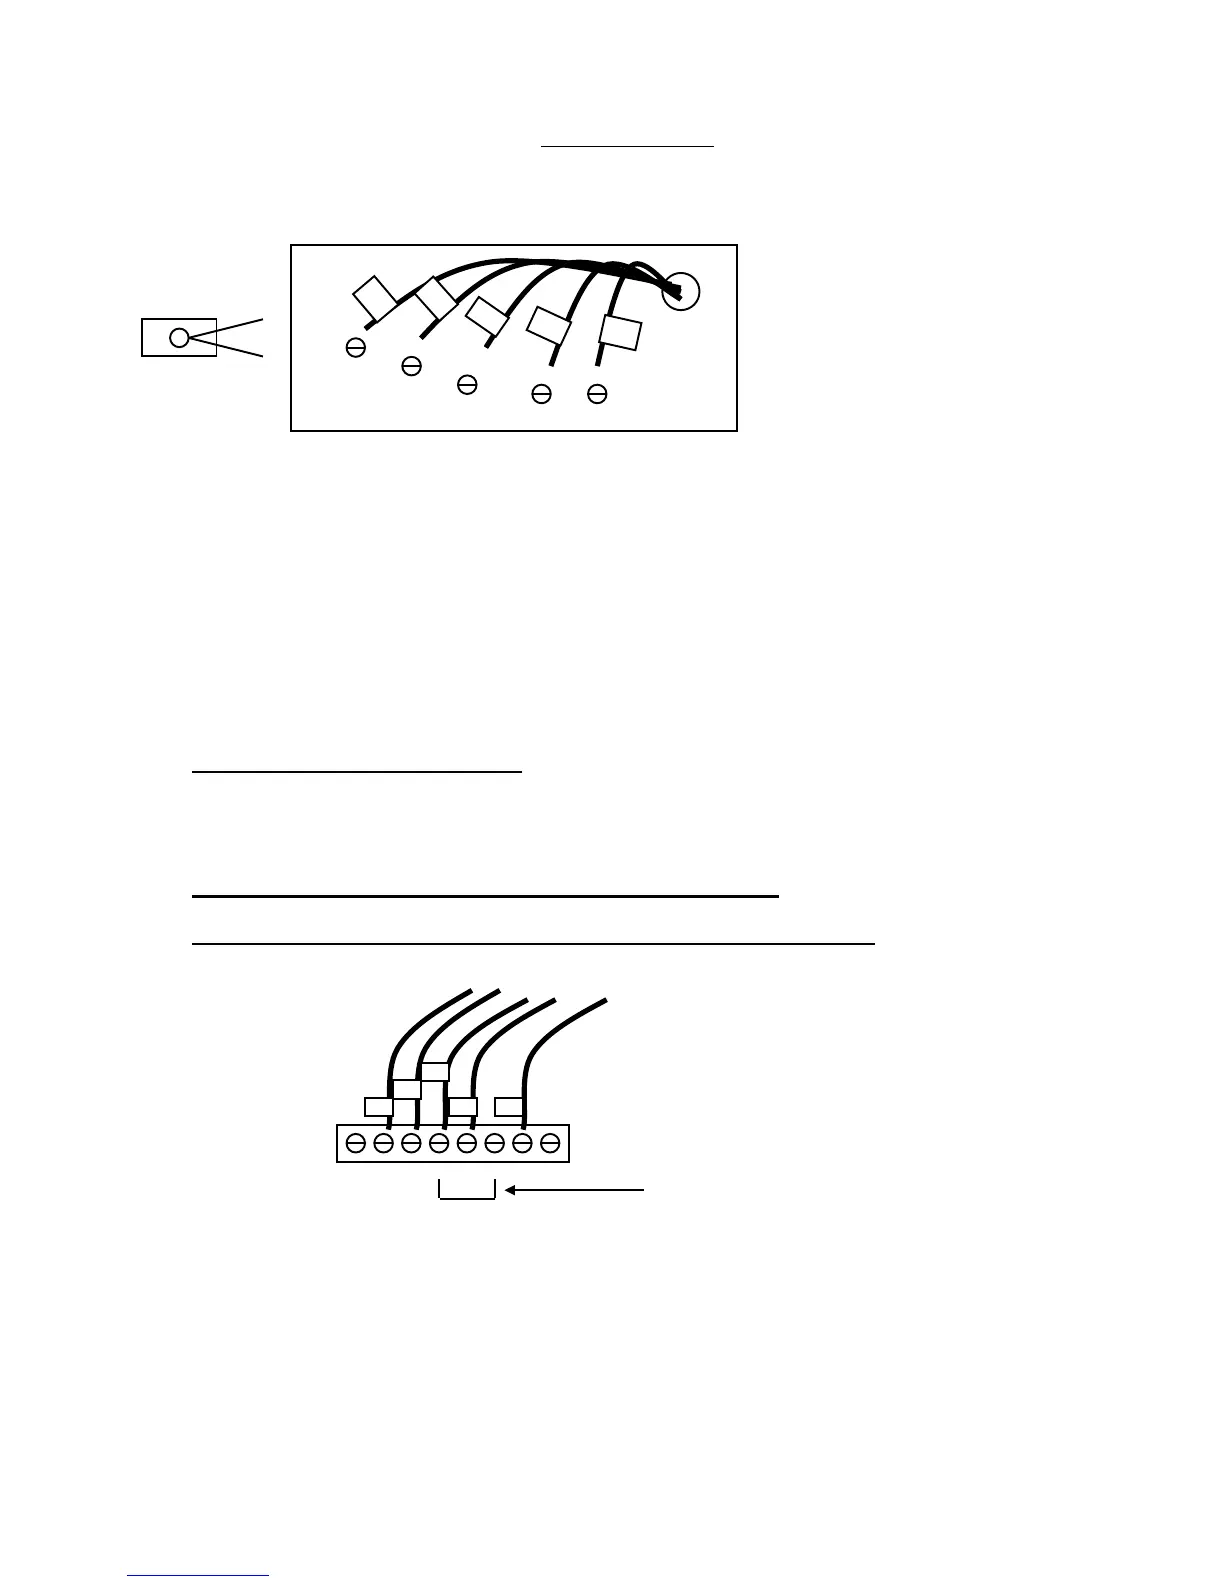
• Mark the wires attached to the terminals with the wiring labels included
• Use the terminal labels and not the wiring color to mark the wires
• Remove the old thermostat base
• Caution. Don’t let the wires slip into the wall.
Wiring colors. While the wiring terminals markings are intended to match the wire color
(R=red, G=green, W=white, Y=yellow), not all installations were correctly installed this way.
Be sure to follow the terminal marking when marking the wires, even if the wire color
doesn’t match.
The C wire. If the 24VAC Common wire (usually Blue) is present and is connect to 24VAC
common at the HVAC system end, the thermostat can be powered from the HVAC system
and batteries are not required. If there is no Common wire, batteries are required.
Mount the thermostat base
Mount the thermostat base to the wall using the wall anchors and screws provided.
Level as needed.
Connect the wires – most common connections
Single Stage Gas Heating/Cooling HVAC System Wiring to the Thermostat
R vs RC and RH Connections:
Typical installations will have a common heating and cooling system 24VAC transformer in
the HVAC system. For these systems, there is only one “R” wire and it can connect to
either the RC or RH terminal on the thermostat. (RC and RH are internally connected in
the thermostat)
Some installations have separate heating and cooling transformers. For those systems
there will be separate “R” wires for the heating and cooling transformers. Connect the
heating “R” wire to the RH terminal and the cooling “R” wire to the RC terminal on the
thermostat.
There may be additional wires. Mark these according to the
terminals. Y1, Y2, W1, W2, O, B.
system to the corresponding terminals on the
thermostat back.
*C wire (24VAC common) may not be present.
If not, batteries must be installed.
Internal RC and RH jumper
 Loading...