Bring the pedal in the centre position and then ac-
tuate the brakes of the rear castors (see section
11.).
Attention!
• Before raising the column, bring the pedal first to
the centre position in order to avoid any damage.
See also notice on the column.
It is recommended to remove the packaging
material at the column and arm only after the
column has been set up.
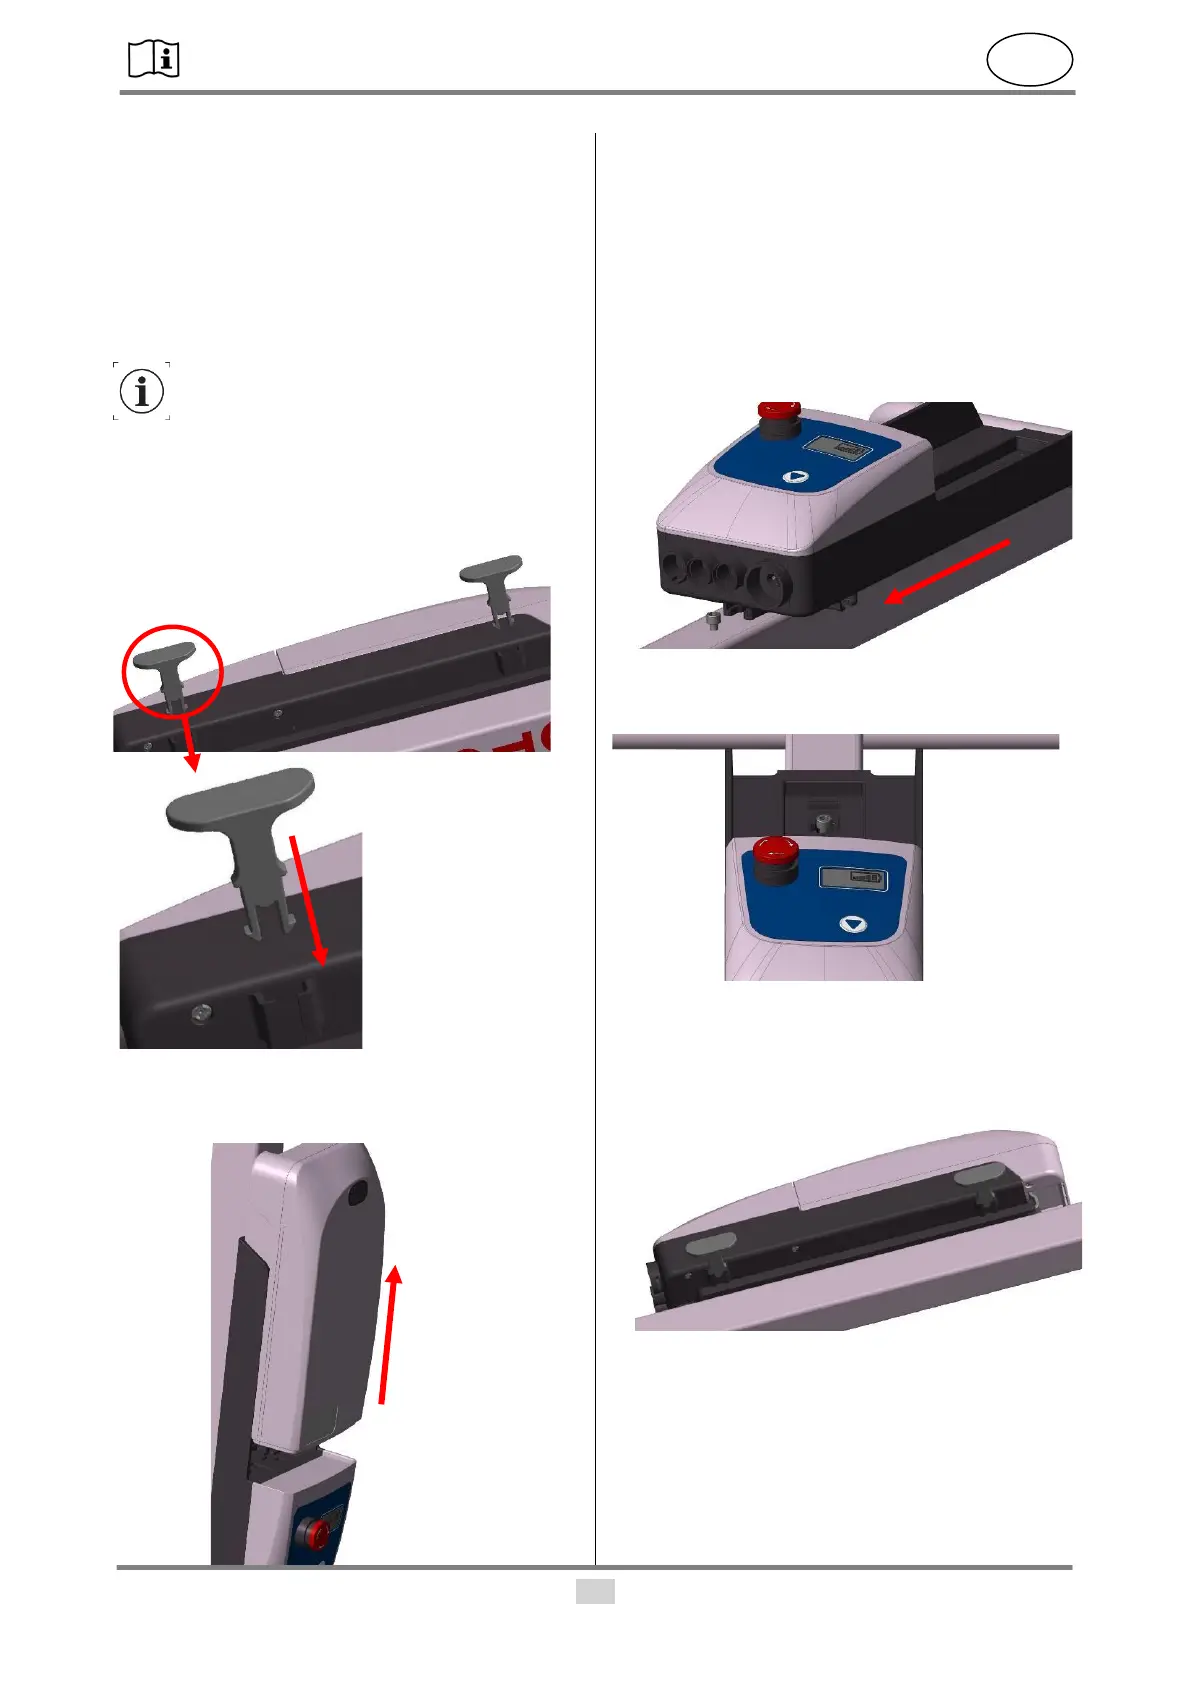
9.2. Installing the control unit
• Insert the two clamps of the cable holder into the
support.
• Remove the rechargeable battery from the control
unit by pressing the button in position 1 and then
carefully remove rechargeable battery.
• Use the two M6x16 screws (1) (included in the de-
livery) and an Allen key (size 5) to screw the con-
trol unit to the column.
• The EMERGENCY OFF switch must face down-
wards to the pedal!
• Remove the M6x16 screw at the column on the
handle side.
• Then slide the control unit with the lower guide (2)
over the remaining screw.
• Then screw the screw back in again in pos. 3.
Tighten the screw hand-tight.
• Reinsert the rechargeable battery. Make sure that
the rechargeable battery in pos. 4 clicks into posi-
tion properly.
9.3. Installing the column
• Remove the key ring (1) from the bolt and then pull
the bolt completely out of the hole.