10.1. Connecting & charging
Observe the safety instructions
• Check the cable or plug to be sure that they are
not damaged.
• Do not use any damaged components!
• Pay attention to the power supply voltage (see 15.)
and corresponding power supply fuse protection
for the charging unit.
• Do not open the housings of the electronic compo-
nents.
• During the charging process, the medical de-
vice must not be operated! The electrical func-
tions are then out of operation.
• Insert the flat plug of the charging cable in the con-
trol unit (3) and then secure it using the cable clip
(4).
• Please pay attention to the positioning of the re-
cesses. Afterwards, insert the power plug into the
wall socket.
• The charging process may take up to ten hours de-
pending on the charge level of the rechargeable
battery. During the charging process, the battery
display of the control unit is flashing.
• If the battery bar display lights up continuously, the
rechargeable battery is fully charged (see 8.3). If
the charging process takes longer than 14 hours,
the rechargeable battery or control unit may be de-
fective.
• After charging, pull out the power plug from the
wall socket and wind the charging cable around
the cable holder of the control unit.
• Use the seal plug included in the scope of delivery
to close the connection after each charging pro-
cess in order to prevent the ingress of moisture.
After the power plug has been removed, the
function of the control unit will be blocked for
a few seconds.
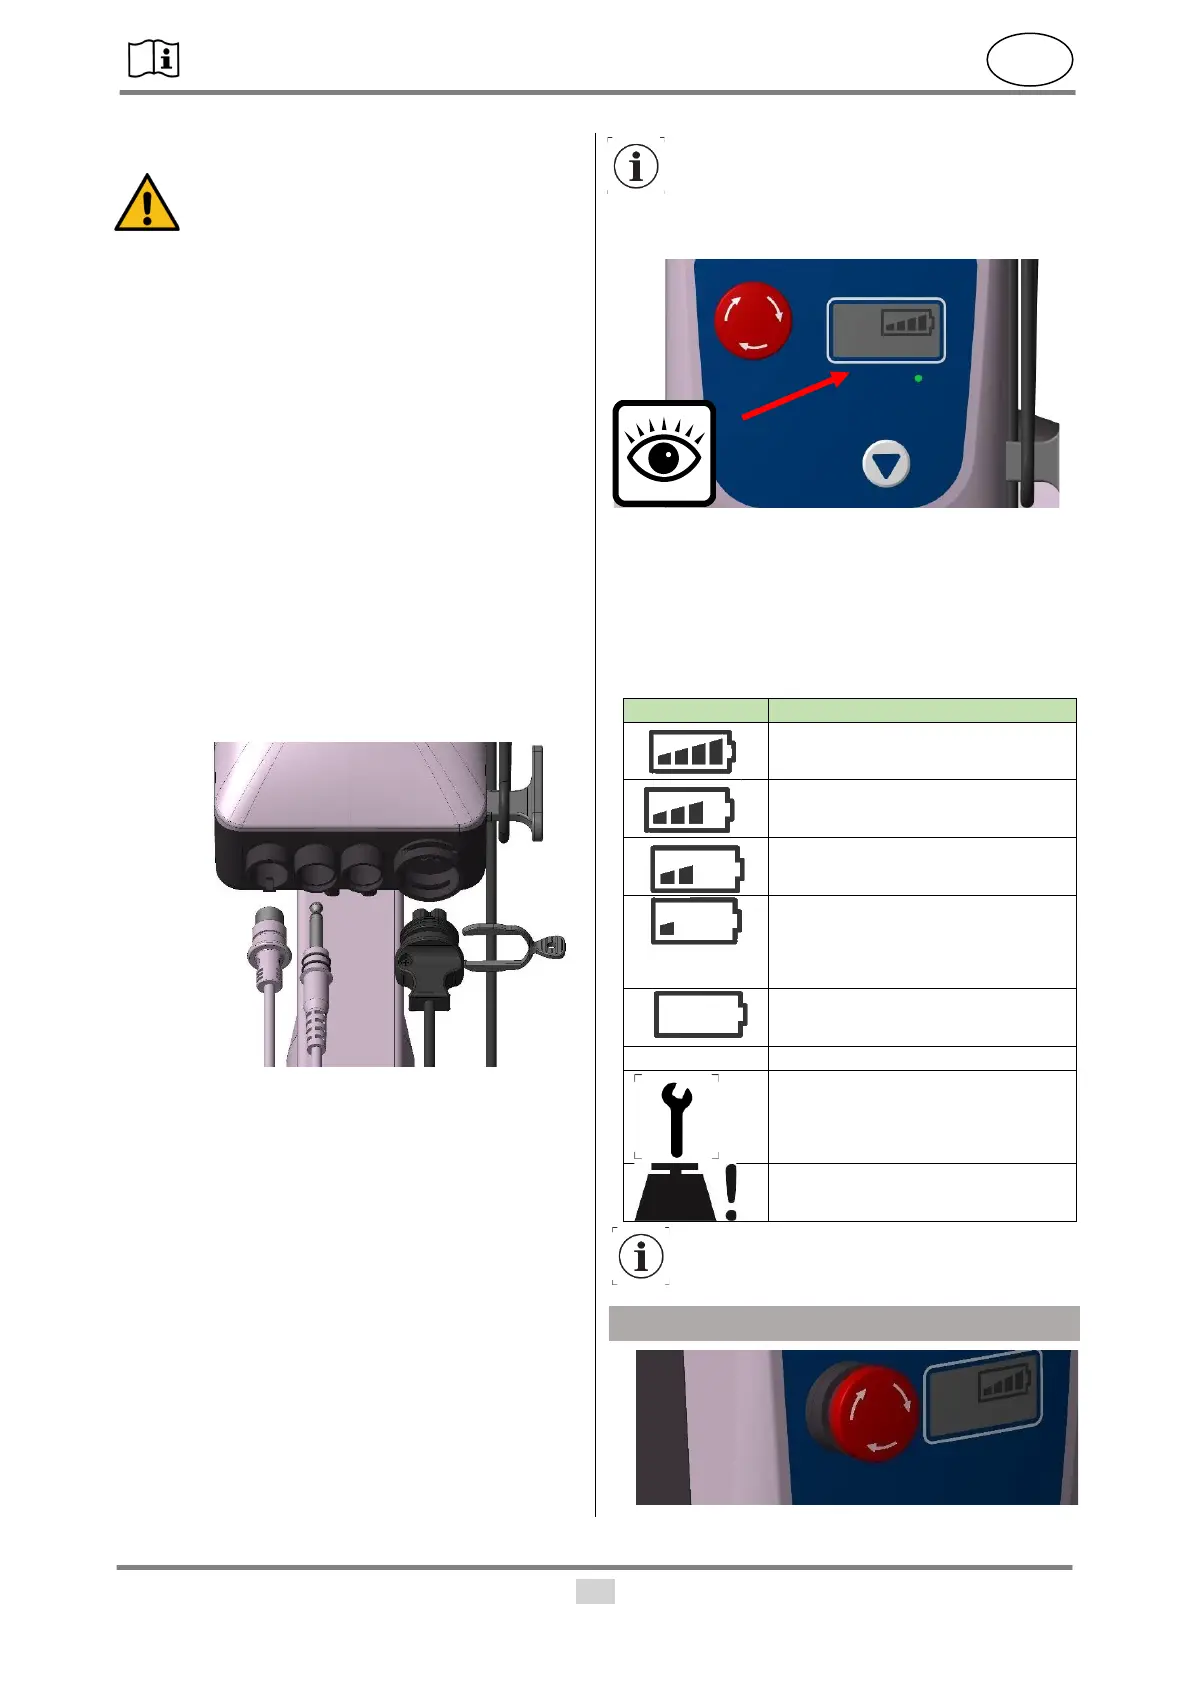
10.2. Charge level & control display
• The charge level of the rechargeable battery can
be read from the control unit. To switch on the dis-
play, the manual switch must be pressed once.
The EMERGENCY OFF switch must be released
(see 9.).
10.3. Display symbols: