Owners/Installation Manual – Controller v2 | Reclaim Energy
RECLAIMENERGY.COM.AU
7
The following steps are required during the
commissioning of controller:
1. The controller is connected to the power point and has
power on it.
2. The correct version of controller is chosen on the heat
pump.
a. V2 controller required “r1” to be set at “2”. This can
be checked as follows on the PCB main of the heat
pump. Change the value of “r1” to “2” as follows:
i. Press and hold UP (▲) and DOWN (▼) buttons.
ii. The value displayed is “r1” & “1”.
iii. Change the value of “r1” to “2” by pressing the
RIGHT ( ) or LEFT ( ) button.
iv. Press and hold UP (▲) and DOWN (▼) button to
complete the setting when display returns to its
original display (i.e. blank display).
v. To check if “r1” & “2” is established, try step 1 one
additional time and then go to step 4 to exit.
3. The controller shows the correct time of day:
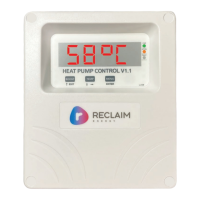
SETTING THE TIME OF DAY
a. If the LCD backlight is OFF, press any key once to
turn it ON.
b. Press the OK button once to enter the Setup Menu,
“1. OPERATION MODE” is displayed.
c. Press the ↓ button once, “2. CLOCK” is displayed.
d. Press the OK button once, “AUTO SET TIME > YES”
is displayed.
i. If the controller is not connected to Wi-Fi:
• press the ↑ button or ↓ button to change
the option to NO.
• press the OK button to proceed,
e.g. “SET DATE > 2023/01/01” is displayed.
o press the ↑ button or ↓ button to change
the value of the Year/Month/Day.
o press the ← button or → button to move the
position of the blinking cursor.
• press the OK button to proceed and validate the
date, e.g., “SET TIME > 12:00 AM” is displayed.
o press the ↑ button or ↓ button to change
the value of the Hour/Minute.
o press the ← button or → button to move the
position of the blinking cursor.
• press the OK button to proceed and validate the
time.
ii. If the controller is connected to Wi-Fi:
• press the OK button to proceed, “LOCATION >
VIC” is displayed.
• press the ↑ button or ↓ button to change the
location as required.
• press the OK button to validate, “AUTO ADJUST
DST > YES” is displayed.
• press the ↑ button or ↓ button to change the
option to YES or NO as required (select YES if
Daylight Savings Time is applicable at the
selected Location)
• press the OK button to validate.
The controller will then sync the clock with
internet time according to the Location and
DST settings.
To validate the clock time is correct scroll to the Date/Time
status display screen.
FIRST TIME COMMISSIONING PROCEDURE
Note: If no button is pressed for
60 seconds, the display reverts
to Status Display Mode.
NOTE
 Loading...