Owners/Installation Manual – Controller v2 | Reclaim Energy
RECLAIMENERGY.COM.AU
9
MOUNTING
• Fix mounting bracket to a solid structure with the
screws and wall plug kit provided.
• Slide the controller on, locking it in place.
• To remove unit, lift and gently pull away from structure.
SENSOR MOUNTING
WARNING: IT IS CRITICAL THE SENSOR IS
MOUNTED CORRECTLY FOR ACCURATE
READINGS, SAFE AND EFFICIENT OPERATION
OF THE SYSTEM, DURABILITY OF THE SENSORS.
• The sensor should be fitted into a dry metal immersion
‘pocket’ in the hot water cylinder.
• Apply plenty of heat transfer compound (available from
your distributor) between the sensor and the lining of
the ‘pocket’.
• Insert the rubber sleeve into the ‘pocket’ and tighten
the cable gland.
• Seal against water ingress where the cable exists the
cylinder with neutral cure silicon.
CONNECT TO HEAT PUMP
• Connect the ring terminals of the Modbus cable to the
Modbus Port of the Heat Pump
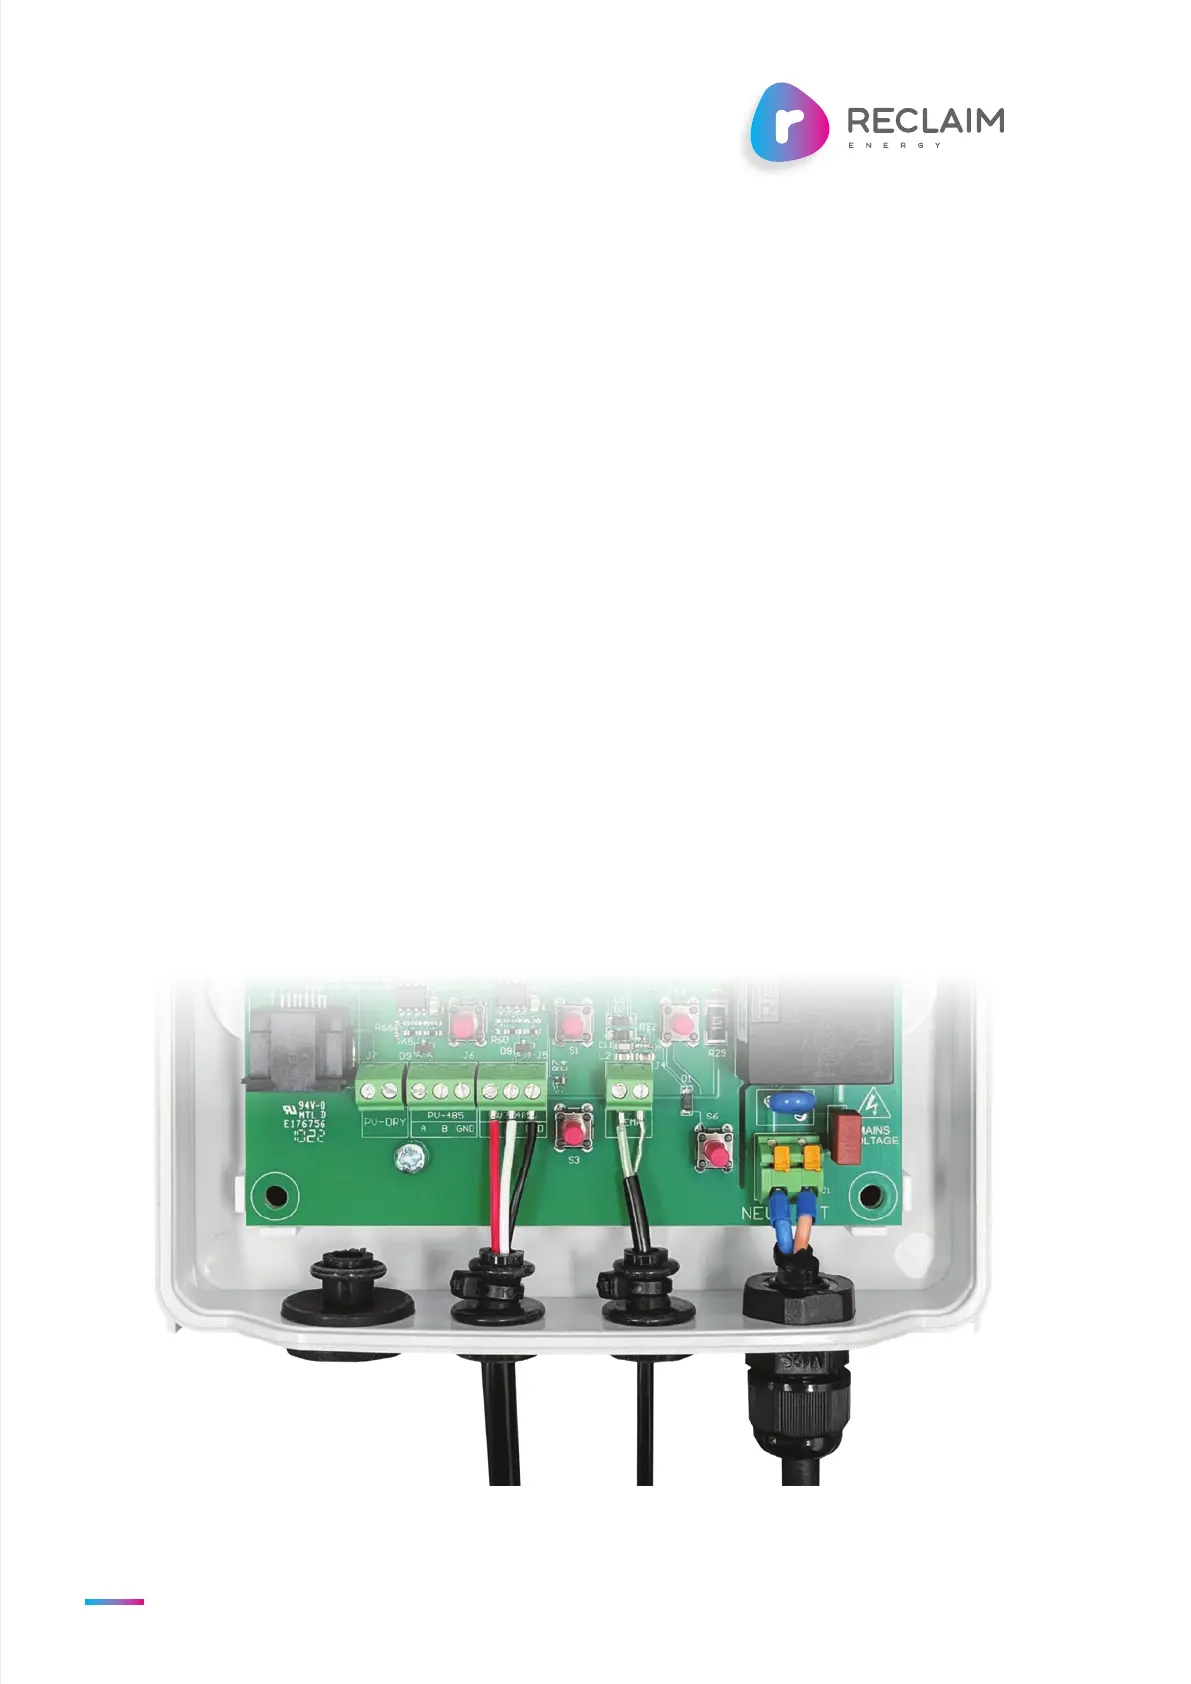
CONNECT PV REMOTE WIRES
ONLY IF APPLICABLE
• Push the PV Remote Wires through the slit rubber
grommet and connect them to terminal block J7.
PLUG IN THE CONTROLLER TO
THE POWER SOURCE
• Before powering up read all safety instructions,
warnings and liability statements.
• Controller will run through start up checks and begin
operating according to default settings. The controller
will display the date/time it thinks it is. Page 7 has
details on how to adjust the date/time.
INSTALLING THE RECLAIM CONTROLLER
Figure 3. PV Remote Connection
 Loading...