Reebok i-Trainer.SE
04
Customer Support 0800 440 2459 Reebok i-Trainer.SE
05
reebokfitness.info
Assembly
Stabiliser
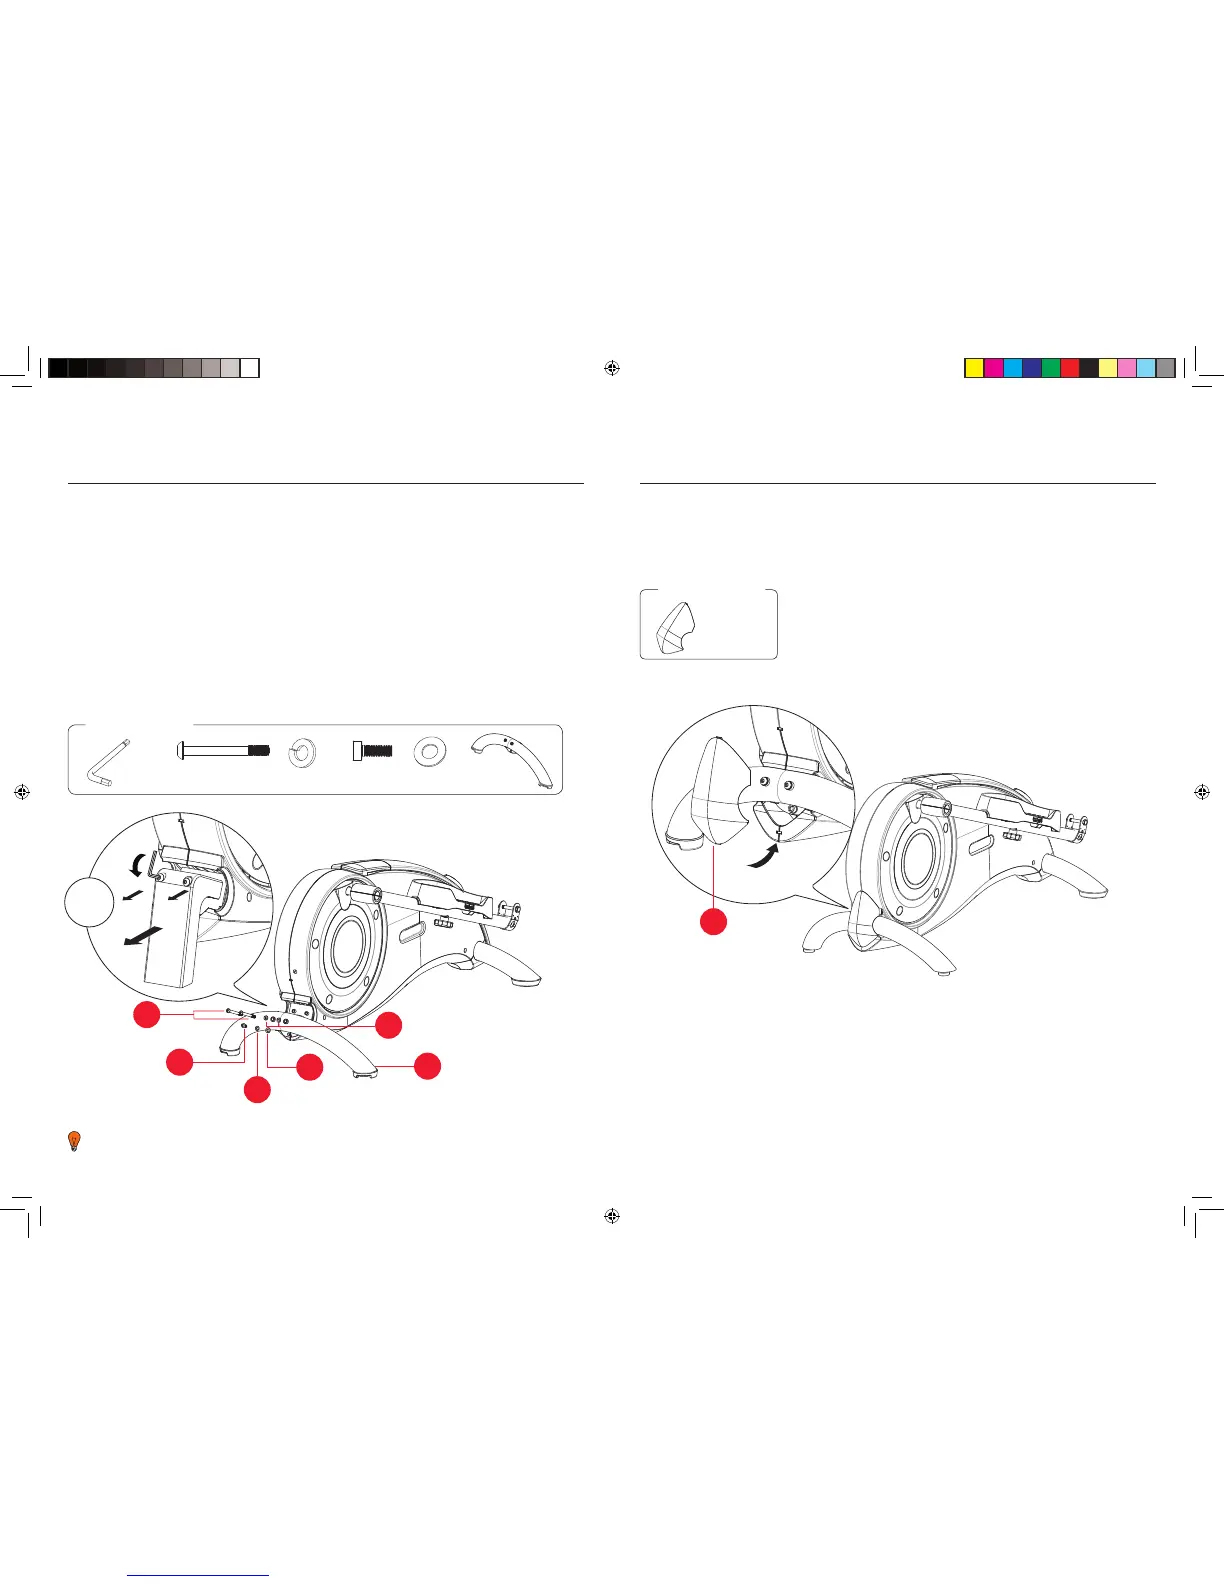
1. Remove the crosstrainer from the box.
2. Remove the transport stabiliser (fig.1). This is located at the back of the product
by loosening the 2 x 854 bolts . Retain the bolts for use in step 3.
3.
There are three holes in the rear stabiliser (103). Attach the rear stabiliser to the
main frame, as shown, by fixing the 2 x 854 bolts and 2 x 807 spring washers
from the discarded transport stabiliser into the top two holes.
4.
Now fix the rear stabiliser by inserting 1 x
215 bolt in the bottom hole, along with
1 x 807 spring washer and 1 x 373 flat washer.
1
854
807
215
373
103
807
Stabiliser continued
5. Once complete, clip the plastic cover (340) over the stabiliser.
You will require:
340 x 1
You will require:
807 x 3
215 x 1 373 x 1 103 x 1854 x 2
5mm
6mm
To aid access to the bolt holes during assembly, it may help to place the cross
trainer body on a piece of polystyrene packaging.
RFE 4489_RE014201_iTrainerSE_UMFINAL.indd 4-5 25/06/2010 16:09
340