42
f) Operating the vehicle
First,switchonthetransmitter,seechapters10.b)and10.e).TheredLED(7)onthetransmitterashes
slowly(1xash,pause,1xash,etc.)Thisindicatesthatthetransmitterisattemptingtoconnecttothe
receiver.
IftheLEDashes2xfollowedbyapause,thebatteriesareweakandmustbereplaced.
Then. release the throttle/brake lever (3) on the transmitter so that it is in the centre (neutral) position.
In order to prevent the wheels from starting suddenly and the model driving away uncontrolled, place the
vehicle on a suitable base so that the wheels can turn freely.
Do not touch the drive mechanism, do not hold the wheels.
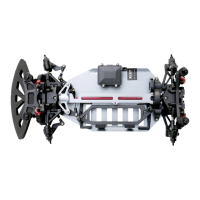
Switch the vehicle on (for the position of the sliding switch,
seethearrowintheguretotheright).
The white LEDs on the vehicle are activated.
Then, wait for a few seconds (throttle/brake lever on the
transmitter in the neutral position, do not move it) until the
receiver/control unit have completed their self-test and the
red LED (7) lights up continuously. This indicates that the
transmitter is connected to the receiver (this is known as
"pairing").
Now, check the drive mechanism and steering functions of the vehicle, move, for example, the steering wheel (2) to
the left or right or carefully actuate the throttle/brake lever.
If the drive mechanism of the vehicle does not stop when the throttle/brake lever is in the centre (neutral)
position, set the "THROTTLE TRIM" dial (9) accordingly.
f) Attaching the body
Fold the body down again and secure it with the clips removed in chapter 10. c).