EasyManua.ls Logo

Reese SWAY CONTROL - User Manual

Reese SWAY CONTROL
2 pages
Print Icon
To Next Page IconTo Next Page
Loading...
INSTALLATION INSTRUCTIONS
Product No.
26660
Y
t k it ith
SMALL PARTS
STANDARD FRICTION
SWAY CONTROL
Y
ou can
t
a
k
e
it
w
ith
you.
SMALL
PARTS
PACKAGE 26673
ELKHART, IN., OAKVILLE, ONT.
DEALERS: GIVE THESE INSTRUCTIONS TO YOUR CUSTOMER
1
1a
6
105
811
2b
2
3
4
1c
1b9
7
2
3
4
2b
2a
REF. QTY DESCRIPTION
1 1 Ball Assembly
1a* 1 Ball
1b* 1 Nut, Hex, 5/8-11
1c* 1 Lock Washer
2 1 Fastener Kit
2a** 6 Screw, Self Tapping
REF. QTY DESCRIPTION
4 1 Bar-Ball Mounting (not included)
5 1 Handle, On/Off
6 1 Slide Bar
7 1 Bolt, Tension Adjusting
8 1 Grip, Handle
9 1 Compression Plate Ass'y
24-9 x 11
2b** 2 Clip
3 1 Ball/Plate Assembly
10 1 Washer, Hardened
11 1 Main Body Ass'y
IMPORTANT:
1. SWAY CONTROL CANNOT BE USED ON TRAILERS WITH SURGE BRAKES.
2
Trailer loading Proper trailer loading is o r first
line defense against dangero s instabilit and s a Hea items sho l
dbeplacedon
*INCLUDED IN BALL ASSEMBLY
**INCLUDED IN FASTENER KIT, ALSO SOLD SEPARATELY
2
.
Trailer
loading
:
Proper
trailer
loading
is
y
o
u
r
first
-
line
defense
against
dangero
u
s
instabilit
y
and
s
w
a
y.
Hea
vy
items
sho
u
l
d
be
placed
on
the floor in front of the axle. The load should be balanced side-to-side and secured to prevent shifting. Tongue weight should be about
10-15 percent of gross trailer weight for most trailers. Too low a percentage of tongue weight can cause sway. Load the trailer heavier in
front.
3. The handle (5) is an on/off device. The bolt (7) below is for adjustment only.
4. When towing during slippery conditions such as wet, icy, or snow-covered roads or on loose gravel, turn on/off handle (5)
counterclockwise until all tension is removed from unit. Failure to do so could prevent tow vehicle and trailer from turning properly.
(OVER)
For Installation Assistance or Technical Help, Call 1-800-758-0869
© 1996 REESE PRODUCTS, INC.
5. ` Do not speed up if sway occurs. Sway increases with speed. Do not continue to operate a swaying vehicle. Check trailer loading, sway
control adjustment, and all other equipment, until the cause of sway has been determined and corrected.
6. Never paint or lubricate slide bar (6).
Question and Answer IconNeed help?

Do you have a question about the Reese SWAY CONTROL and is the answer not in the manual?

Summary

Important Safety and Operational Notes

Sway Control Restriction

Sway control cannot be used on trailers equipped with surge brakes.

Trailer Loading Guidelines

Place heavy items forward of the axle, balance load side-to-side, aim for 10-15% tongue weight.

Component Functionality

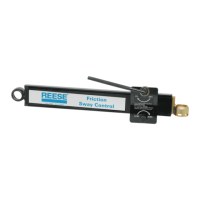
The handle is the on/off device; the bolt below it is solely for adjustment.

Slippery Condition Operation

Turn handle counterclockwise to remove tension in slippery conditions to ensure proper turning.

Response to Sway Events

Do not increase speed during sway. Check loading, adjustment, and equipment to correct the cause.

Maintenance Precautions

Never paint or lubricate the slide bar of the sway control unit.

Installation Procedure

Mounting Ball Assembly

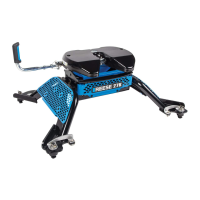
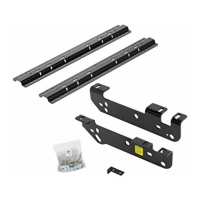
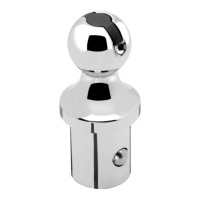
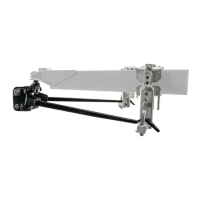
Mount sway control ball to hitch using nut and lock washer, torque to 100 lb-ft. Weld mounting bar if needed.

Marking Trailer Tongue

Measure and mark a point 24 inches from the center of the hitch ball on the trailer tongue.

Drilling and Securing Plate

Align ball/plate assembly, punch holes, drill using appropriate bit, and secure with self-tapping screws.

Hook-Up and Initial Setup

Connecting Sway Control

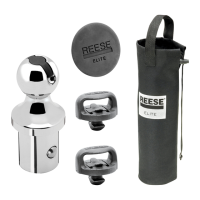
Lubricate balls, place socket over trailer ball, secure with clips, loosen handle, extend, and secure to trailer ball.

Setting Initial Tension

Retighten handle to its original position. Factory preset tension is suitable for most light trailers.

Sharp Turning Clearance

Check for potential damage during sharp turns; remove sway control if bumper contact or bottoming out is possible.

Adjustment and Maintenance

Adjusting Sway Control Tension

Perform road tests and adjust tension in 1/4 turn increments via bolt (7) to achieve desired control.

Periodic Friction Surface Cleaning

After 1000 miles, remove slide bar and clean friction surfaces with a wire brush. Repeat every 10,000 miles.

Unhooking Procedure

Releasing Tension

Release tension by turning the on/off handle counterclockwise.

Removing Sway Control

Remove both clips securing the sway control assembly.

Reese SWAY CONTROL Specifications

General IconGeneral
BrandReese
ModelSWAY CONTROL
CategoryAutomobile Accessories
LanguageEnglish

Related product manuals