19
Cosmetic Care & Maintenance
Make sure the ignition keys are in the “OFF” position
along with the battery switch.
It is recommended that you wear a pair of leather gloves
to protect yourself from sharp propeller blades. With dual
propeller units you may be able to use a piece of wood
between the top of the gear housing and the propeller to
hold it from turning while you are removing the prop
nuts and hardware to access the props. Some of these
units use 2 lock nuts, one for each propeller. You may
need a special socket and rachet set to remove the propeller
nuts. Line up the hardware according to its disassembly
for reassembly purposes. Below are drawings showing
selected propeller shaft hardware for both Volvo and
Mercruiser units. See the engine manufacturer’s owners
manual for further information.
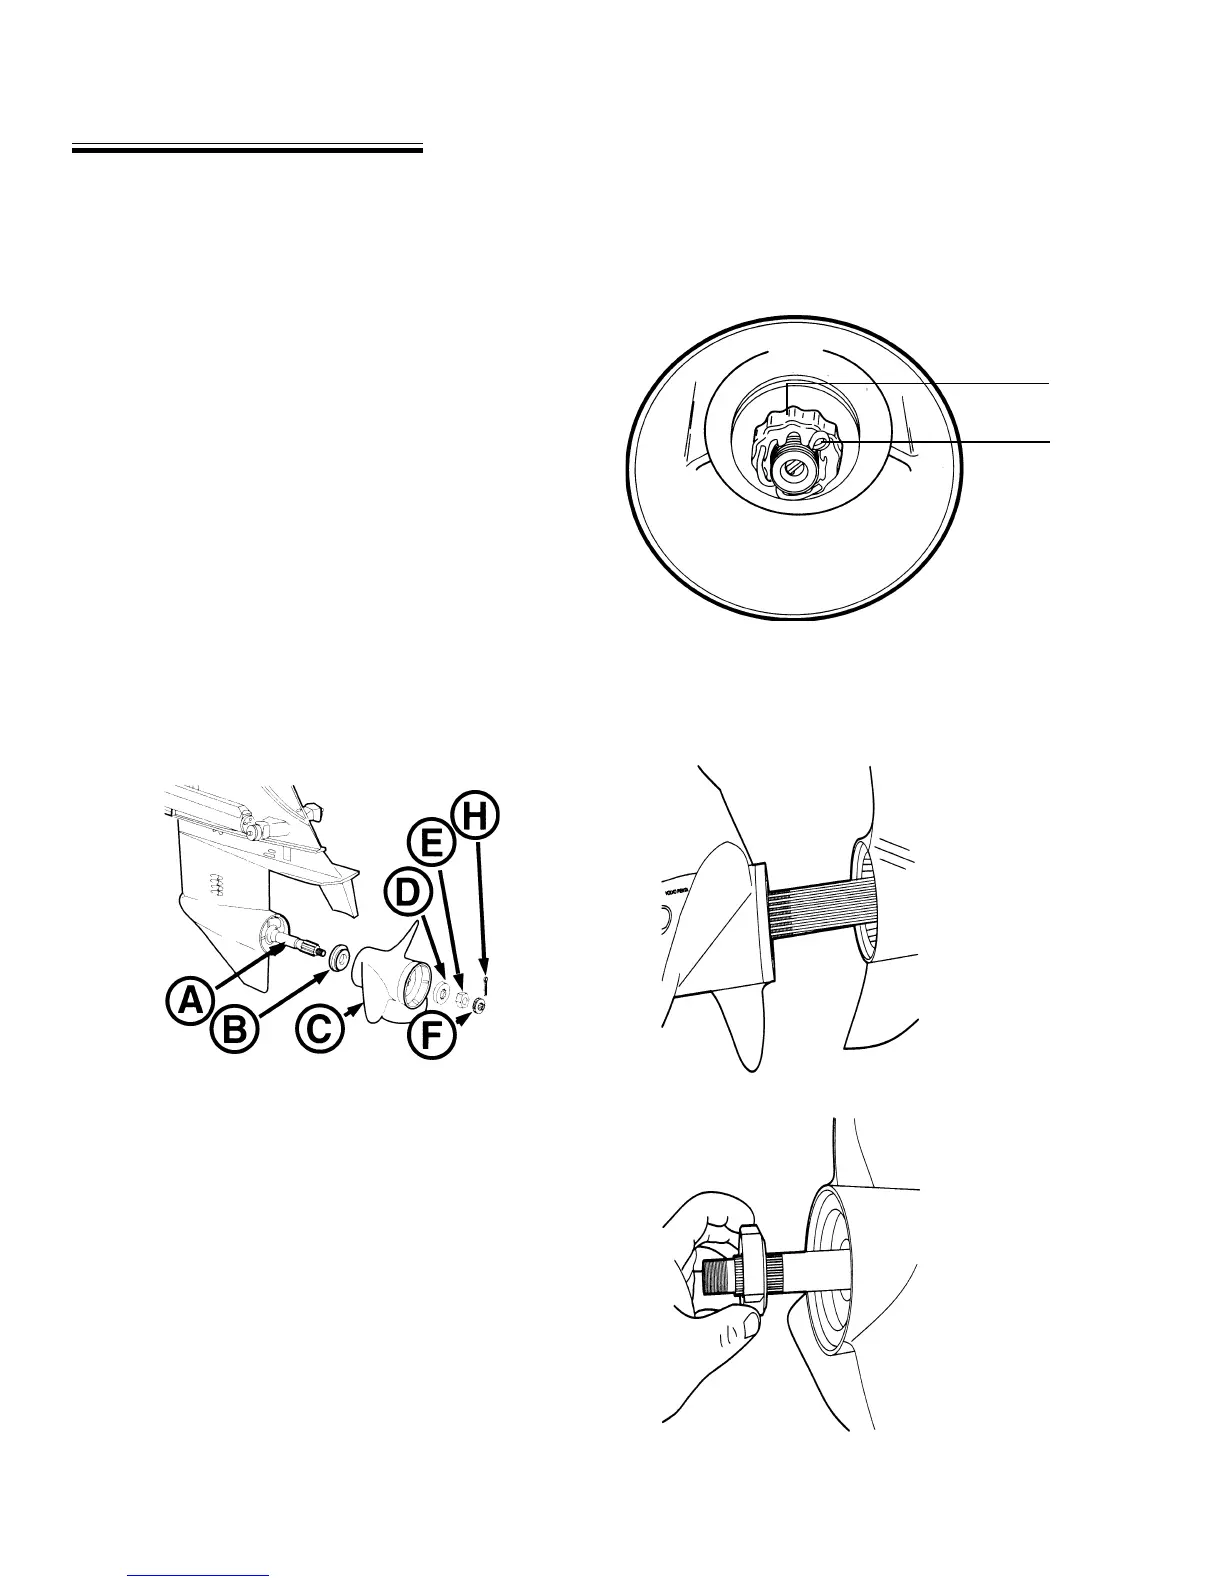
VOLVO SX PROPELLER INSTALLATION
1. Coat the propeller shaft with marine grease.
2. Place the thrust bushing on prop shaft with inner taper
toward gearcase to match taper on propeller shaft (A &
B).
3. Slide propeller on shaft completely (C).
4. Place thrust washer (D) on propeller shaft splines.
5. Shift the remote control into reverse with the key switch
in the off position.
6. Install & tighten the propeller nut (E)to 70-80 ft. lbs.
7. Install keeper (F) on prop nut until aligned with cotter
key hole.
8. Install cotter key (H) and bend tabs over. See illustration
below.
Cotter Key
Keeper
Coat both shafts with
marine grease. Place the
remote control in
forward position to lock
shafts. Install the front
propeller.
Install propeller nut.
Tighten to 45 ft. lbs. (Use
torque wrench) Make
sure the chamfered edge
of the prop nut is facing
forward. Failure to
install prop nut correctly
could result in loss of
prop or damage to lower
unit.
VOLVO DUO PROP INSTALLATION
VOLVO SX PROPELLER INSTALLATION
(CONTINUED)