Regency
®
P121-10/P131-10 Zero Clearance Direct Vent Gas Fireplace | 27
27
|
installation
CONVERSION FROM NG TO LP
FOR P121-10/P131-10 USING SIT 829 NOVA GAS VALVE
THIS CONVERSION MUST BE DONE BY A QUALIFIED GAS FITTER
IF IN DOUBT DO NOT DO THIS CONVERSION !!
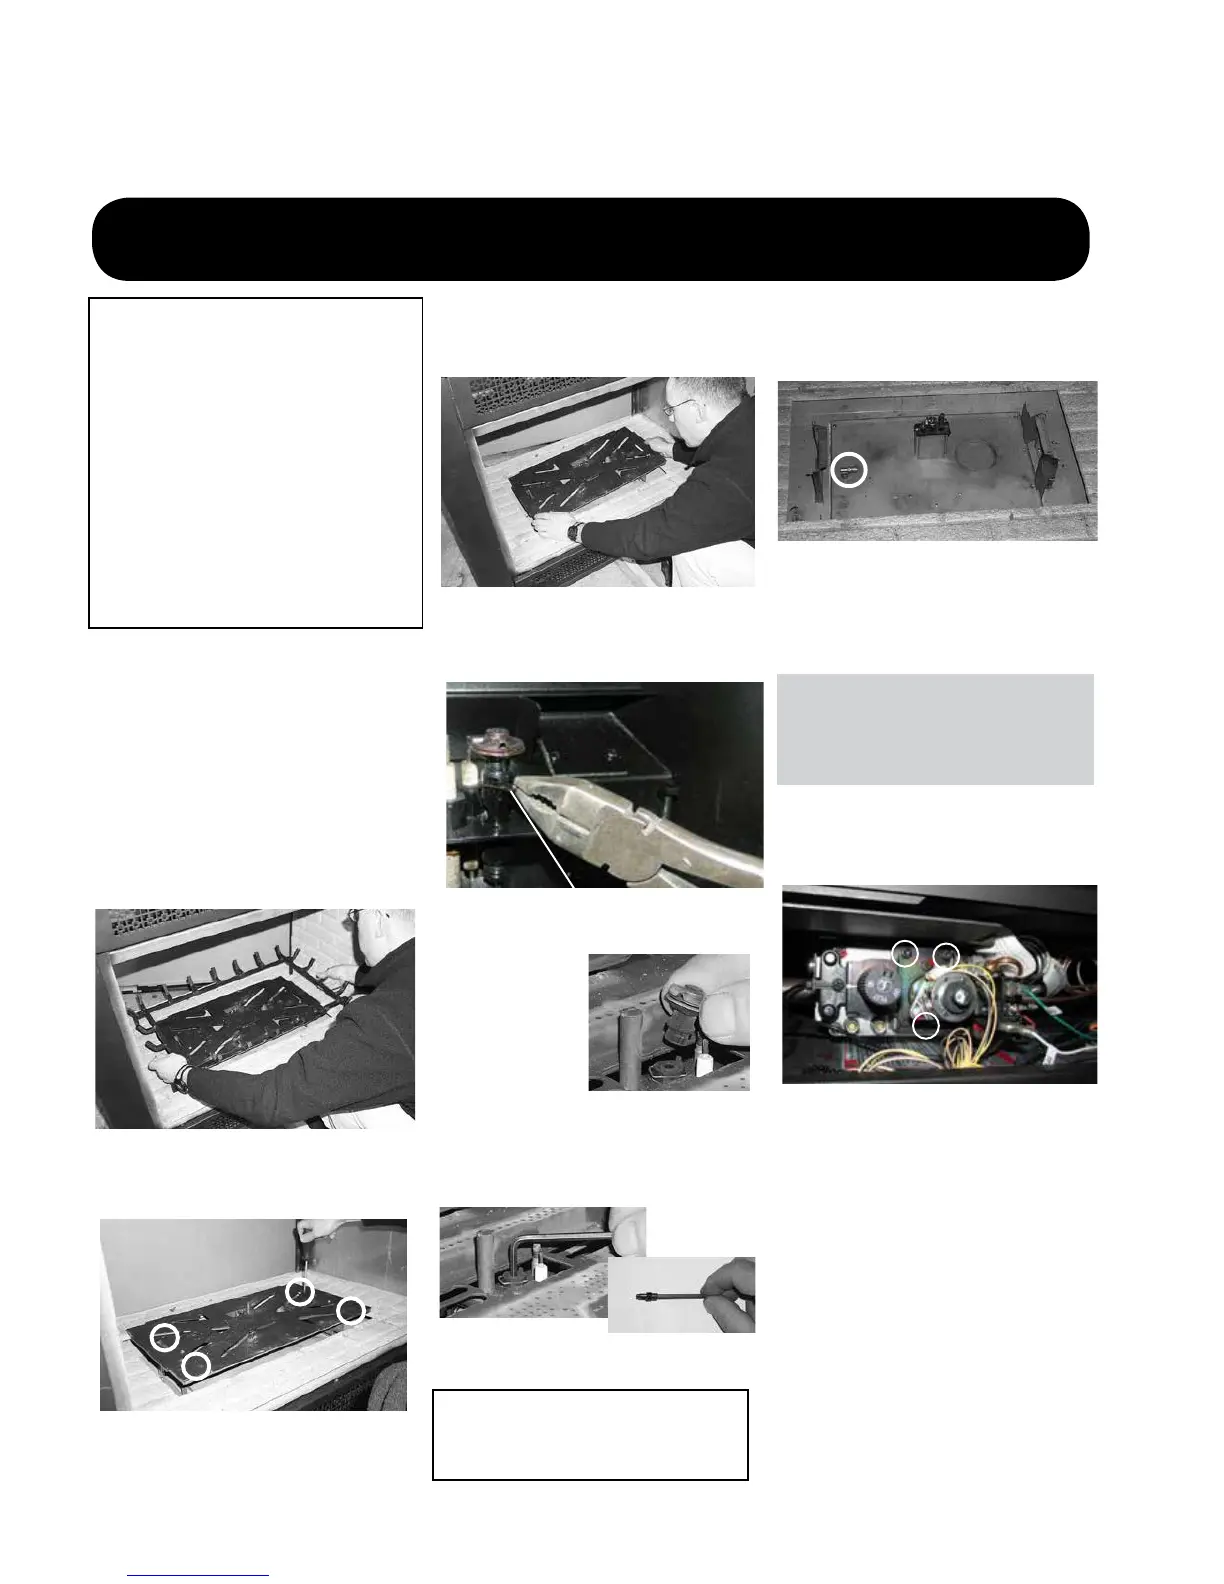
6. Pull off the pilot
cap to expose
the pilot orice.
7. Unscrew the pilot orice with the allen key
and replace with the LPG pilot orice in
the kit and replace pilot cap.
8. Remove burner orice with a 1/2" wrench
to hold onto the elbow behind the orice
and discard the orice.
Burner Orice
1. Remove the louvers and trim kit. Remove
the safety screen and glass door.
2. Remove the logs, embers.
Each Kit contains one LP
Conversion Kit
LP Conversion Kit Contains:
Qty. Part # Description
1 904-529 5/32" Allen Key
1 904-641 Burner Orice #50
1 918-590 Decal "Converted to
LPG"
1 908-528 Red "LPG" label
1 910-037 LPG Injector
(Pilot Orice
1 910-582 LPG Stepper Motor
1 919-499 Instruction Sheet
Diagram 1 and 2: Remove the left and right
screws and then slide the burner assembly
away from the orice and lift out.
4. Remove the burner assembly by remov-
ing the 4 screws - then slide the burner
assembly away from the orice and lift
out.
9. Reinstall new burner orice LPG stamped
#50 and tighten.
10. Turn control knob to the “OFF” position.
Conversion from NG to LPG
for P121-10 / P131-10 using SIT 829 NOVA Gas Valve
3. Remove the grate by lifting straight up.
Remove the side brick panels (if
installed). The brick panel is very
fragile - handle with care.
Installation of LPG
Conversion Kit:
Diagram 1
Diagram 2
Diagram 3
Diagram 4
Diagram 5
12. Reverse steps 4) to 1).
13. Attach the label "This unit has been
converted to LPG" near or on top of the
serial # decal.
14. Replace yellow "NG" label with red "LPG"
label.
15. Check for gas leaks.
16. Check inlet and outlet pressures.
17. Check operation of ame control.
18. Check for proper ame appearance and
glow on logs.
WARNING!
Also check that the pilot and main burner
injectors are appropriate for the gas
type.
11. Remove NG stepper motor by removing 3
screws in locations shown below–replace
with LP stepper motor, secure in place with
3 screws.
Remove NG Stepper motor and
replace with LP Stepper motor
5. Remove pilot clip below pilot cap.
Clip
Pilot Cap
Installer Notice:
These instructions must be left
with the appliance.