10
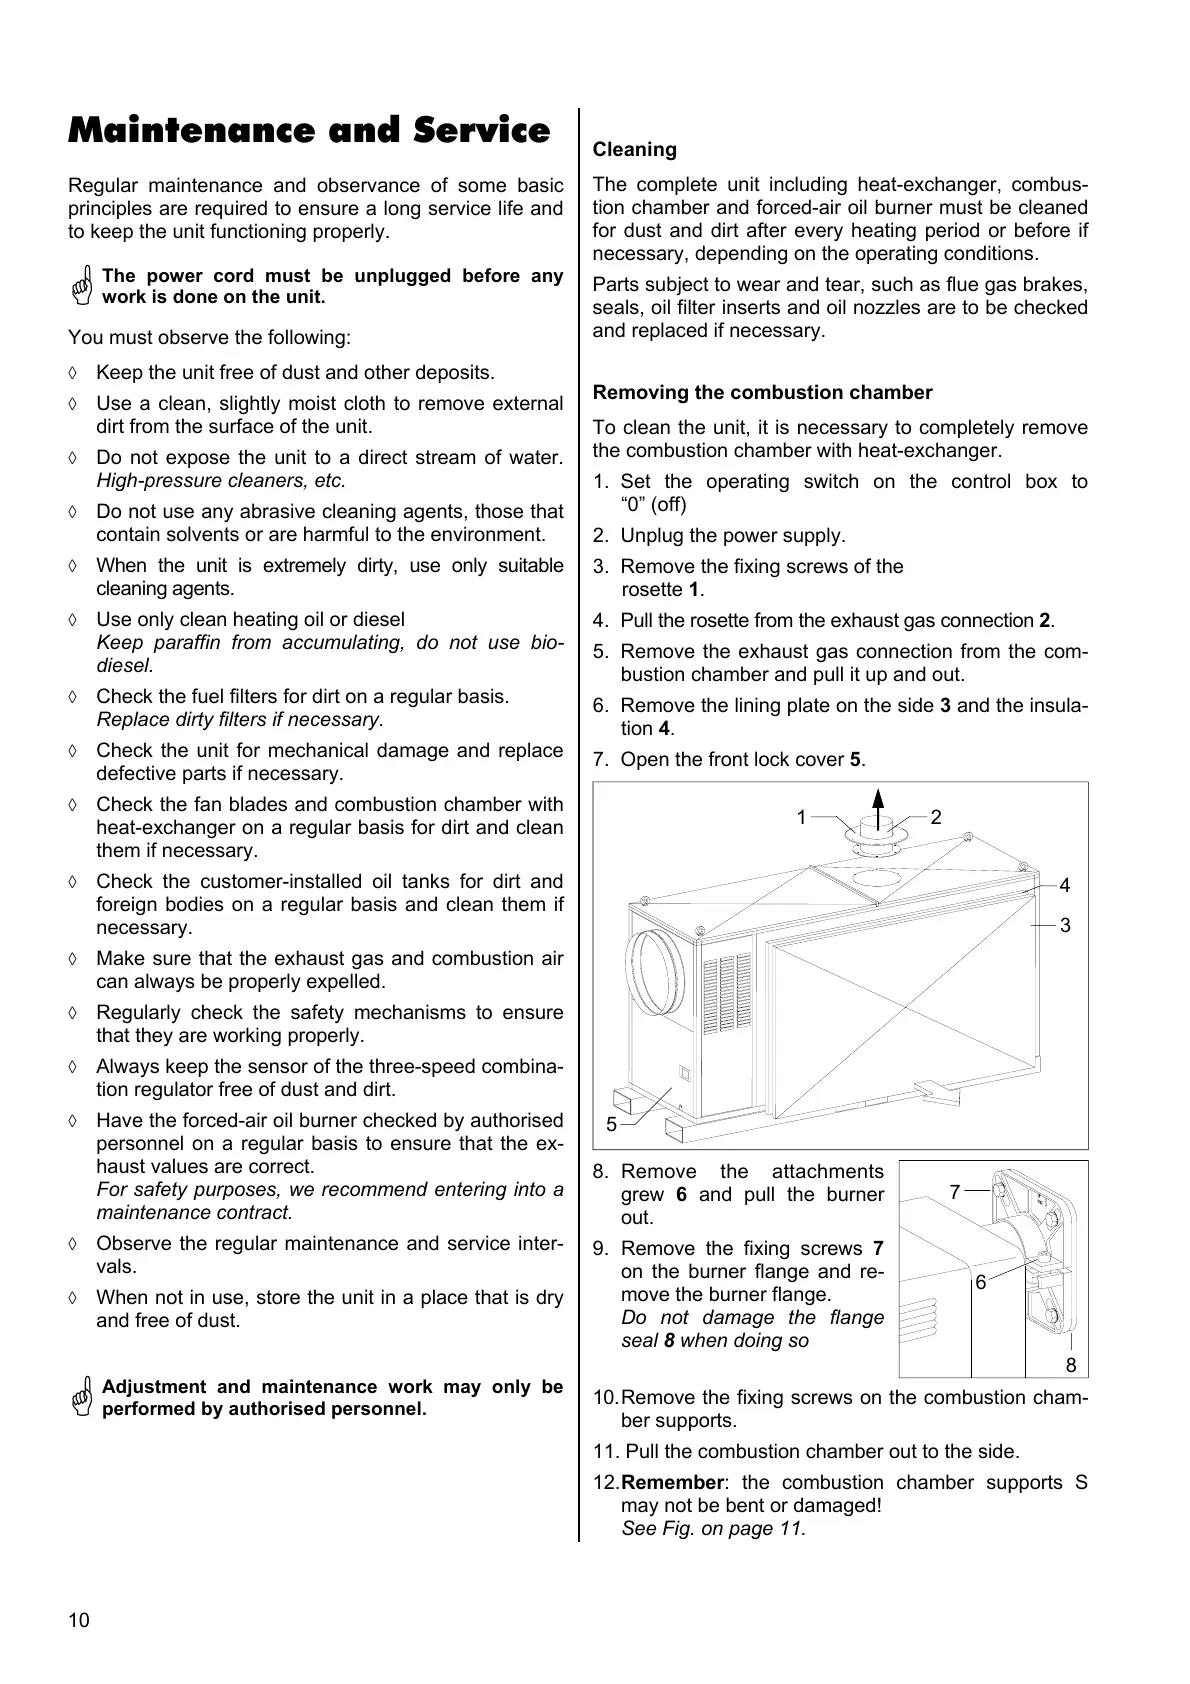
Removing the combustion chamber
To clean the unit, it is necessary to completely remove
the combustion chamber with heat-exchanger.
1. Set the operating switch on the control box to
“0” (off)
2. Unplug the power supply.
3. Remove the fixing screws of the
rosette 1.
4. Pull the rosette from the exhaust gas connection 2.
5. Remove the exhaust gas connection from the com-
bustion chamber and pull it up and out.
6. Remove the lining plate on the side 3 and the insula-
tion 4.
7. Open the front lock cover 5.
8. Remove the attachments
grew 6 and pull the burner
out.
9. Remove the fixing screws 7
on the burner flange and re-
move the burner flange.
Do not damage the flange
seal 8 when doing so
1
2
3
4
5
Maintenance and Service
Regular maintenance and observance of some basic
principles are required to ensure a long service life and
to keep the unit functioning properly.
You must observe the following:
◊ Keep the unit free of dust and other deposits.
◊ Use a clean, slightly moist cloth to remove external
dirt from the surface of the unit.
◊ Do not expose the unit to a direct stream of water.
High-pressure cleaners, etc.
◊ Do not use any abrasive cleaning agents, those that
contain solvents or are harmful to the environment.
◊ When the unit is extremely dirty, use only suitable
cleaning agents.
◊ Use only clean heating oil or diesel
Keep paraffin from accumulating, do not use bio-
diesel.
◊ Check the fuel filters for dirt on a regular basis.
Replace dirty filters if necessary.
◊ Check the unit for mechanical damage and replace
defective parts if necessary.
◊ Check the fan blades and combustion chamber with
heat-exchanger on a regular basis for dirt and clean
them if necessary.
◊ Check the customer-installed oil tanks for dirt and
foreign bodies on a regular basis and clean them if
necessary.
◊ Make sure that the exhaust gas and combustion air
can always be properly expelled.
◊ Regularly check the safety mechanisms to ensure
that they are working properly.
◊ Always keep the sensor of the three-speed combina-
tion regulator free of dust and dirt.
◊ Have the forced-air oil burner checked by authorised
personnel on a regular basis to ensure that the ex-
haust values are correct.
For safety purposes, we recommend entering into a
maintenance contract.
◊ Observe the regular maintenance and service inter-
vals.
◊ When not in use, store the unit in a place that is dry
and free of dust.
*
The power cord must be unplugged before any
work is done on the unit.
*
Adjustment and maintenance work may only be
performed by authorised personnel.
Cleaning
The complete unit including heat-exchanger, combus-
tion chamber and forced-air oil burner must be cleaned
for dust and dirt after every heating period or before if
necessary, depending on the operating conditions.
Parts subject to wear and tear, such as flue gas brakes,
seals, oil filter inserts and oil nozzles are to be checked
and replaced if necessary.
8
7
6
10. Remove the fixing screws on the combustion cham-
ber supports.
11. Pull the combustion chamber out to the side.
12. Remember: the combustion chamber supports S
may not be bent or damaged!
See Fig. on page 11.
 Loading...