- 4 -
EN
2.3 Electrical connection
Ensure the mains supply and voltage marked on the nameplate is identical.
Plug in at the mains.
2.4 Switching on/off
MT3:
MT3 pro:
If the operating screen is damaged or defect in any way, please remove the device from operation and send in
for repair.
The blue LED (3, Fig. 2) remains illuminated when the appliance is in operation.
3. Operation
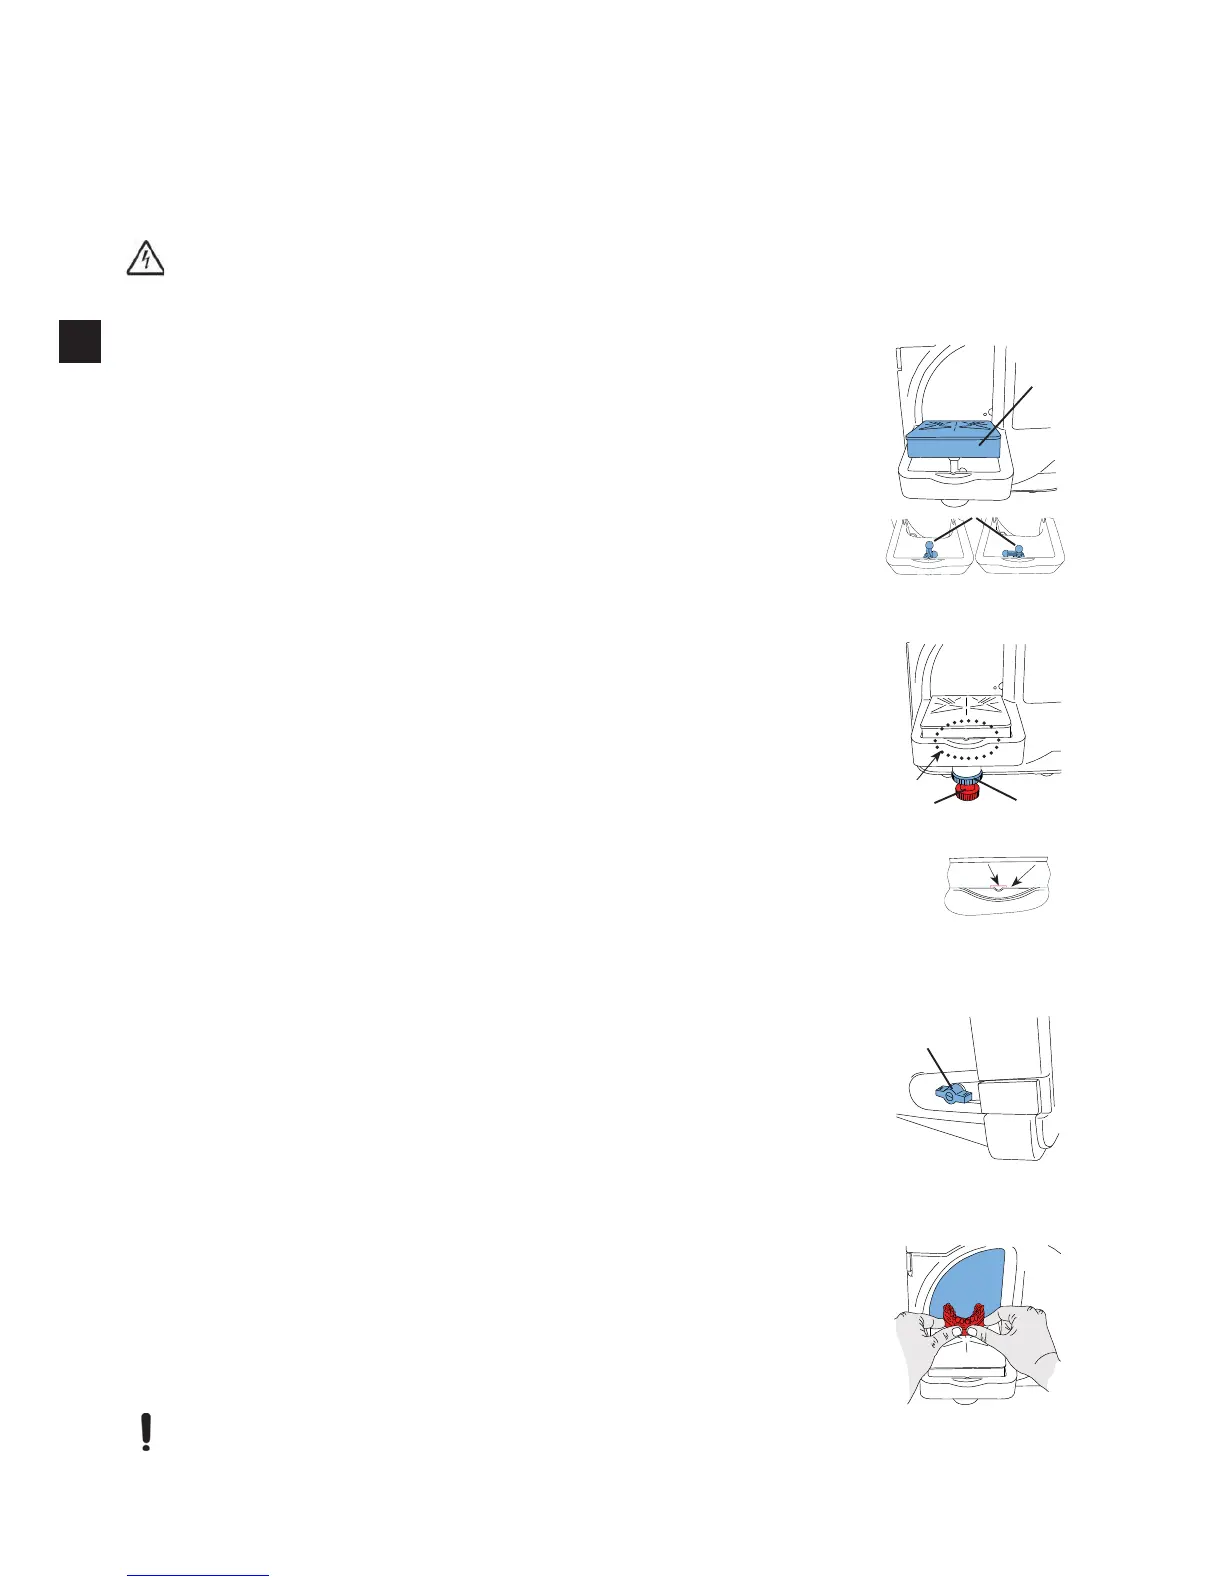
3.1 Grinding Angle Adjustment
3.1.1 MT3
Turn off appliance and wait, until the trimmer disk comes to an complete standstill.
Pull grinding table (5) at leading edge upward from ball head.
Turn bracket (21) to desired position.
-
-
Press grinding table back onto ball head.
Fig. 5
21
5
3.1.2 MT3 pro
Turn off appliance and wait, until the trimmer disk comes to an complete standstill.
Loosen the knurled nut (20)
Adjust the grinding angle with the adjusting screw (19).
Retighten the knurled nut (20).
19
20
Fig. 6
Fig. 6a
edge of the grinding table holder (Fig. 6a).
The angle bracke can be stored away at the back of the appliance.
Fig. 6a
3.2
Turn on appliance.
14
Fig. 7
3.3 Trimming
If necessary check and adjust the grinding angle.
Turn on appliance.
Using both hands, securely set the model on the grinding table and press it against the disc
Switch off the appliance.
The water supply shutoff tap should be closed when work is interupted for longer peri-
ods and when the appliance is unattended (e.g. over night)
.
Fig. 8
EN