EasyManuals Logo

Reolink Argus 3 User Manual

Reolink Argus 3
115 pages
To Next Page IconTo Next Page
To Previous Page IconTo Previous Page
Page #20 background imageLoading...
Page #20 background image
Reolink Wireless Battery-powered Camera
19
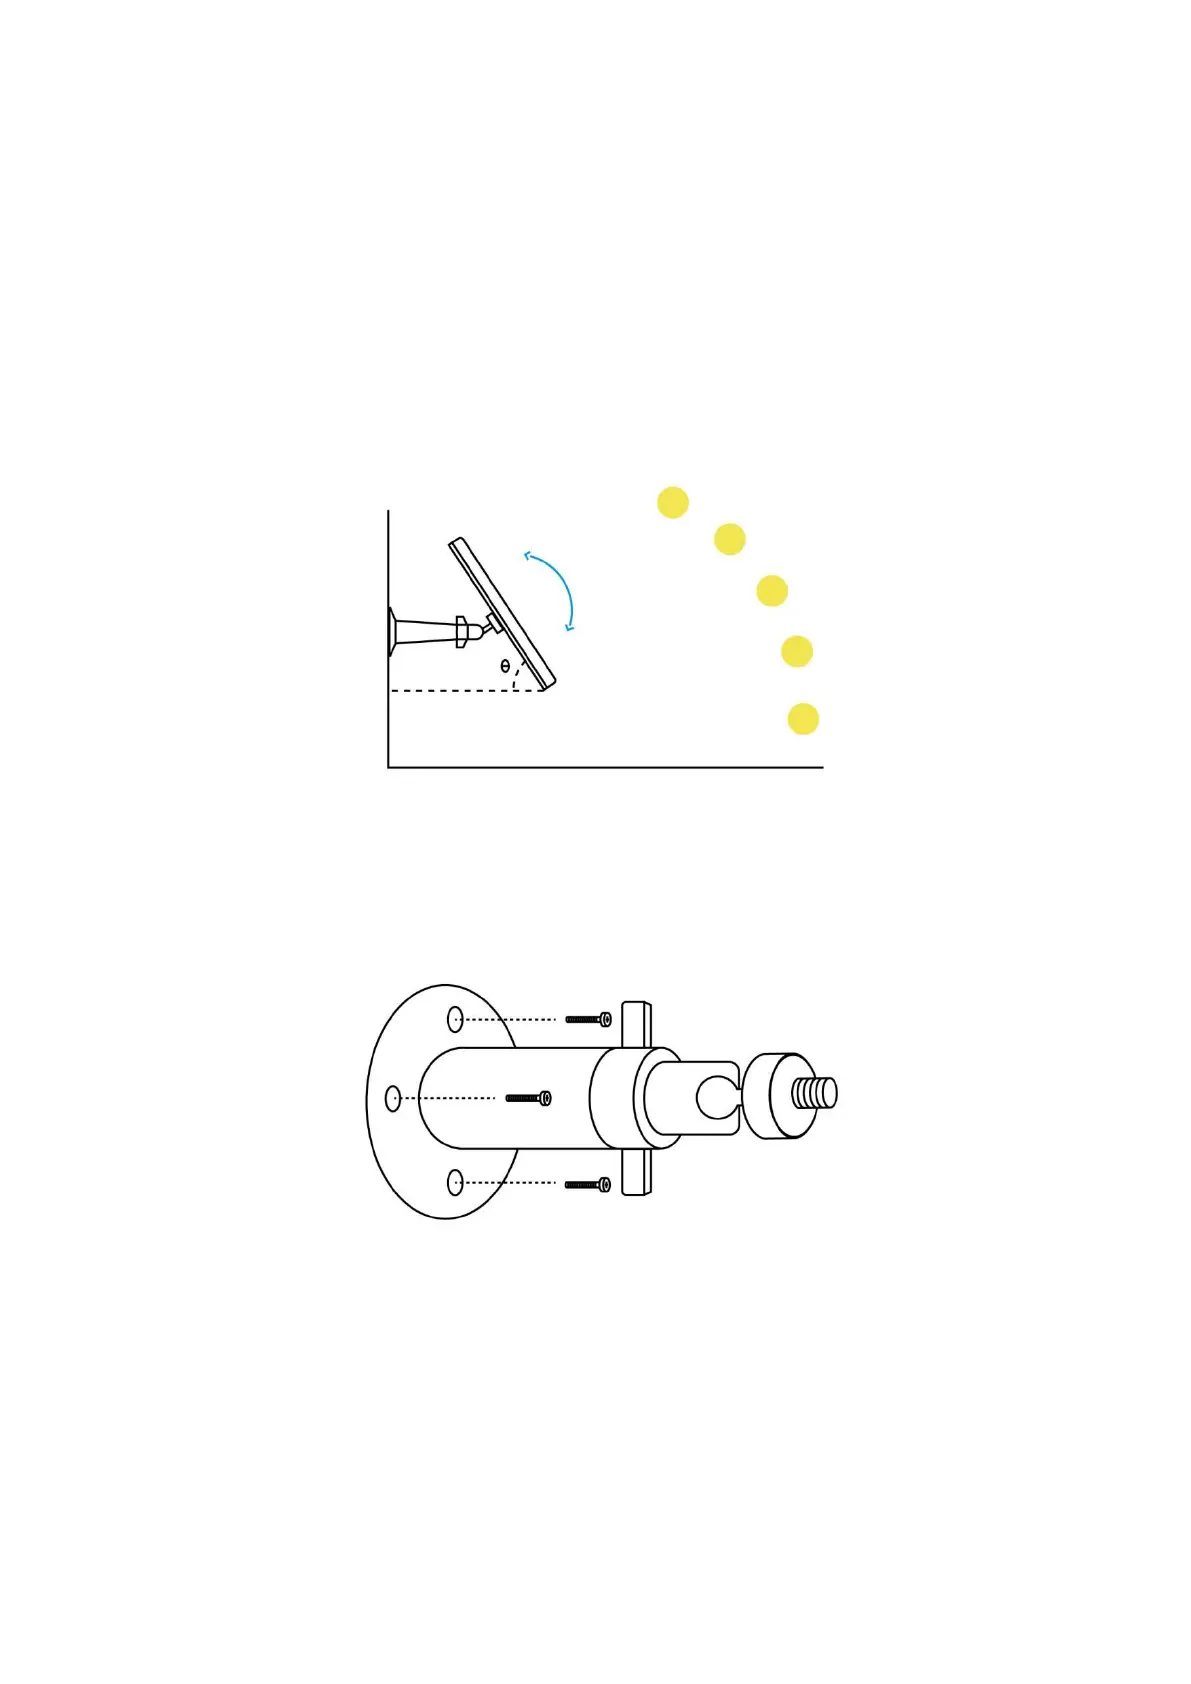
Install the Solar Panel
You may refer to the following steps to connect your Reolink solar-powered
cameras to a Reolink Solar Panel to get non-stop power.
1. Please select a position with the maximum sunlight exposure throughout the
year for your solar panel.
For Reolink Solar Panel, it only needs a few hours of direct sunlight exposure to
sufficiently power your camera daily. The amount of energy that the solar panel
can generate is affected by weather conditions, seasonal changes, geographic
locations, etc.
2. Mount the bracket with the mounting template and the screws provided in the
package.

Other manuals for Reolink Argus 3

Questions and Answers:

Question and Answer IconNeed help?

Do you have a question about the Reolink Argus 3 and is the answer not in the manual?

Reolink Argus 3 Specifications

General IconGeneral
Field of View120°
AudioTwo-Way Audio
WeatherproofIP65
Wireless StandardIEEE 802.11b/g/n
Operating Temperature-10°C to 55°C (14°F to 131°F)
Dimensions121 x 90 x 56 mm
Resolution2K (4MP)
Power SourceRechargeable battery or solar panel
ConnectivityWi-Fi (2.4GHz)
Image SensorCMOS Sensor
Video Resolution2560 x 1440
Infrared Night VisionUp to 10 meters (33ft) (IR LED)
Color Night VisionYes
PIR Detection DistanceUp to 10 meters
PIR Detection Angle100°
Wireless SecurityWPA-PSK/WPA2-PSK
Battery5200mAh Rechargeable Battery
PowerSolar panel compatible
Local StoragemicroSD card (up to 128GB)
StorageMicro SD card
Motion DetectionPIR motion detection
Weight330g
LensFixed Lens, f=2.8mm

Related product manuals