EasyManuals Logo

Reolink Argus 3 User Manual

Reolink Argus 3
115 pages
To Next Page IconTo Next Page
To Previous Page IconTo Previous Page
Page #91 background imageLoading...
Page #91 background image
Reolink Wireless Battery-powered Camera
90
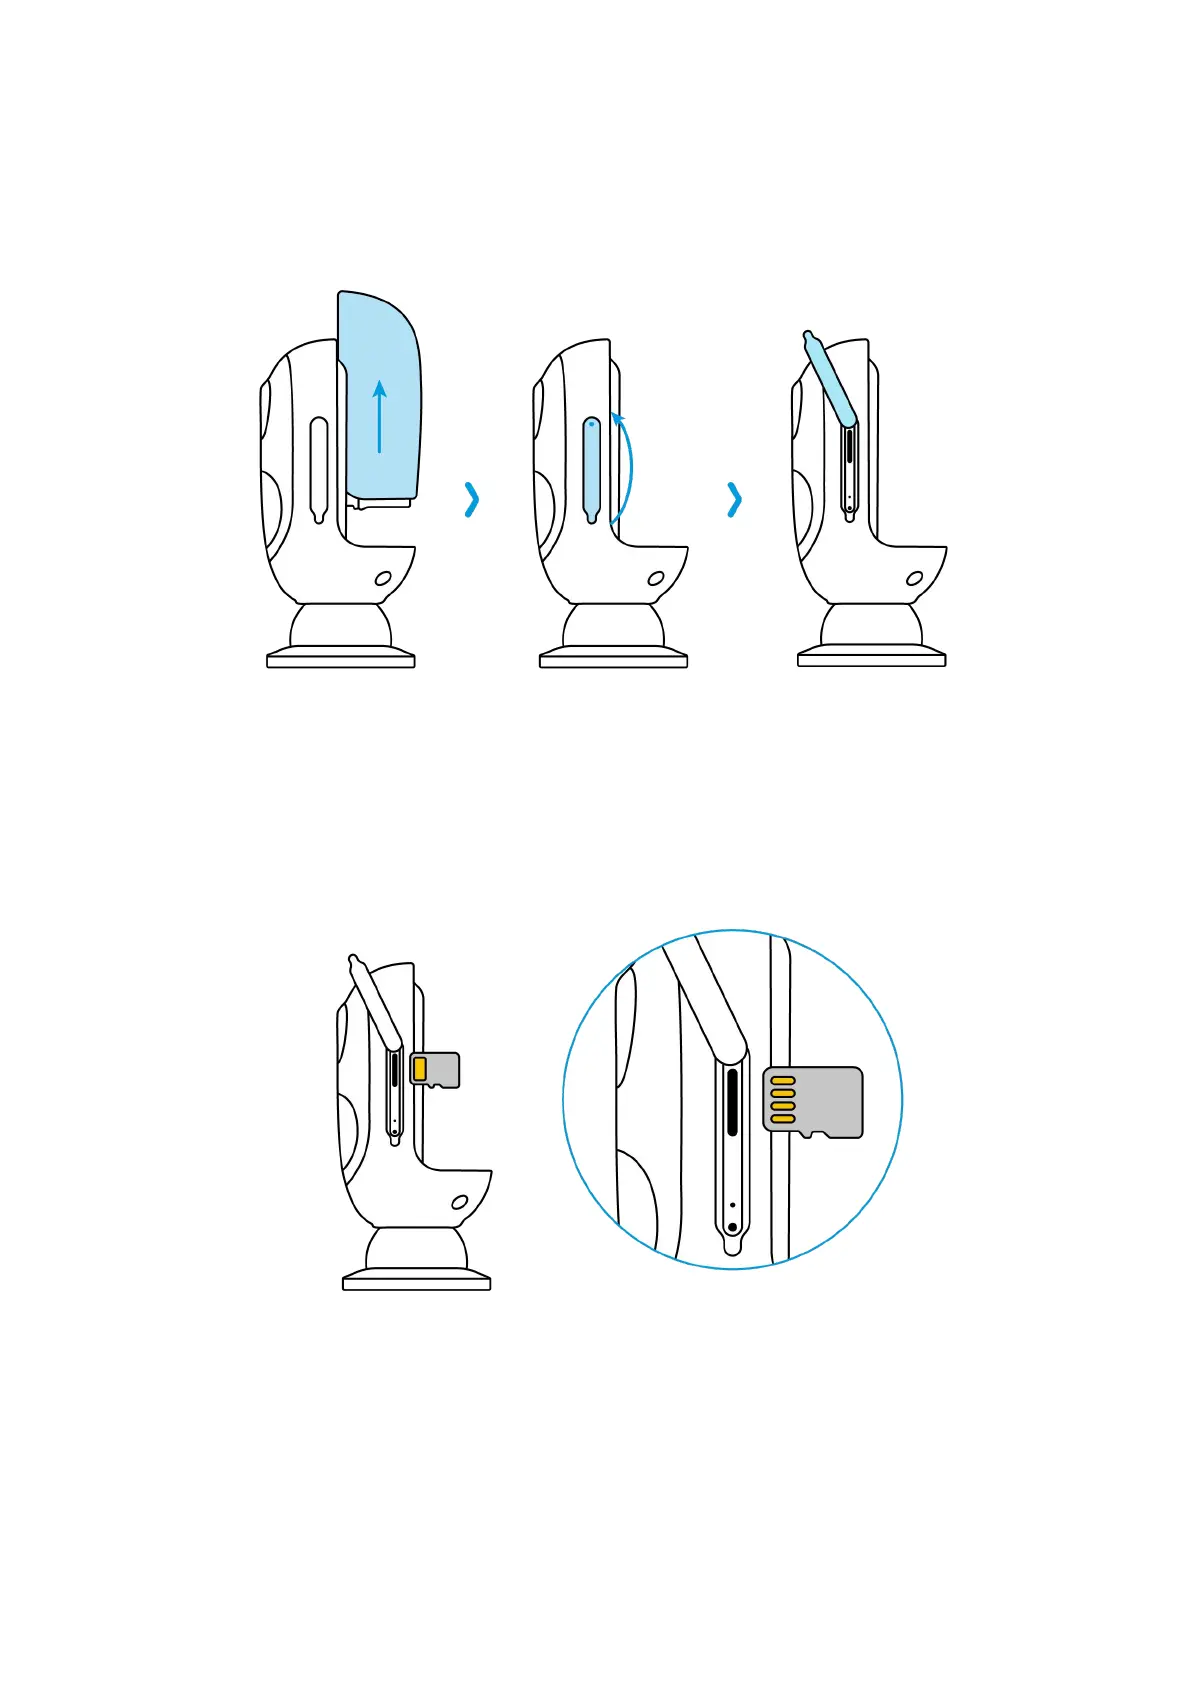
Install the Micro SD card (example: Argus 2)
1.Switch off the camera before installing the micro SD card.
2.Insert the micro SD card into the micro SD card slot on the right side of the
camera.
Note:
Please use your fingernail (or use the provided reset needle) to push the SD card in
until you feel that it's locked or you hear a "Tap".

Other manuals for Reolink Argus 3

Questions and Answers:

Question and Answer IconNeed help?

Do you have a question about the Reolink Argus 3 and is the answer not in the manual?

Reolink Argus 3 Specifications

General IconGeneral
Field of View120°
AudioTwo-Way Audio
WeatherproofIP65
Wireless StandardIEEE 802.11b/g/n
Operating Temperature-10°C to 55°C (14°F to 131°F)
Dimensions121 x 90 x 56 mm
Resolution2K (4MP)
Power SourceRechargeable battery or solar panel
ConnectivityWi-Fi (2.4GHz)
Image SensorCMOS Sensor
Video Resolution2560 x 1440
Infrared Night VisionUp to 10 meters (33ft) (IR LED)
Color Night VisionYes
PIR Detection DistanceUp to 10 meters
PIR Detection Angle100°
Wireless SecurityWPA-PSK/WPA2-PSK
Battery5200mAh Rechargeable Battery
PowerSolar panel compatible
Local StoragemicroSD card (up to 128GB)
StorageMicro SD card
Motion DetectionPIR motion detection
Weight330g
LensFixed Lens, f=2.8mm

Related product manuals