EasyManuals Logo

Reolink E1 User Manual

Reolink E1
109 pages
To Next Page IconTo Next Page
To Previous Page IconTo Previous Page
Page #21 background imageLoading...
Page #21 background image
Reolink Wireless Camera
User Manual
15
Install the Camera
Mount E1/E1 Pro/E1 Zoom
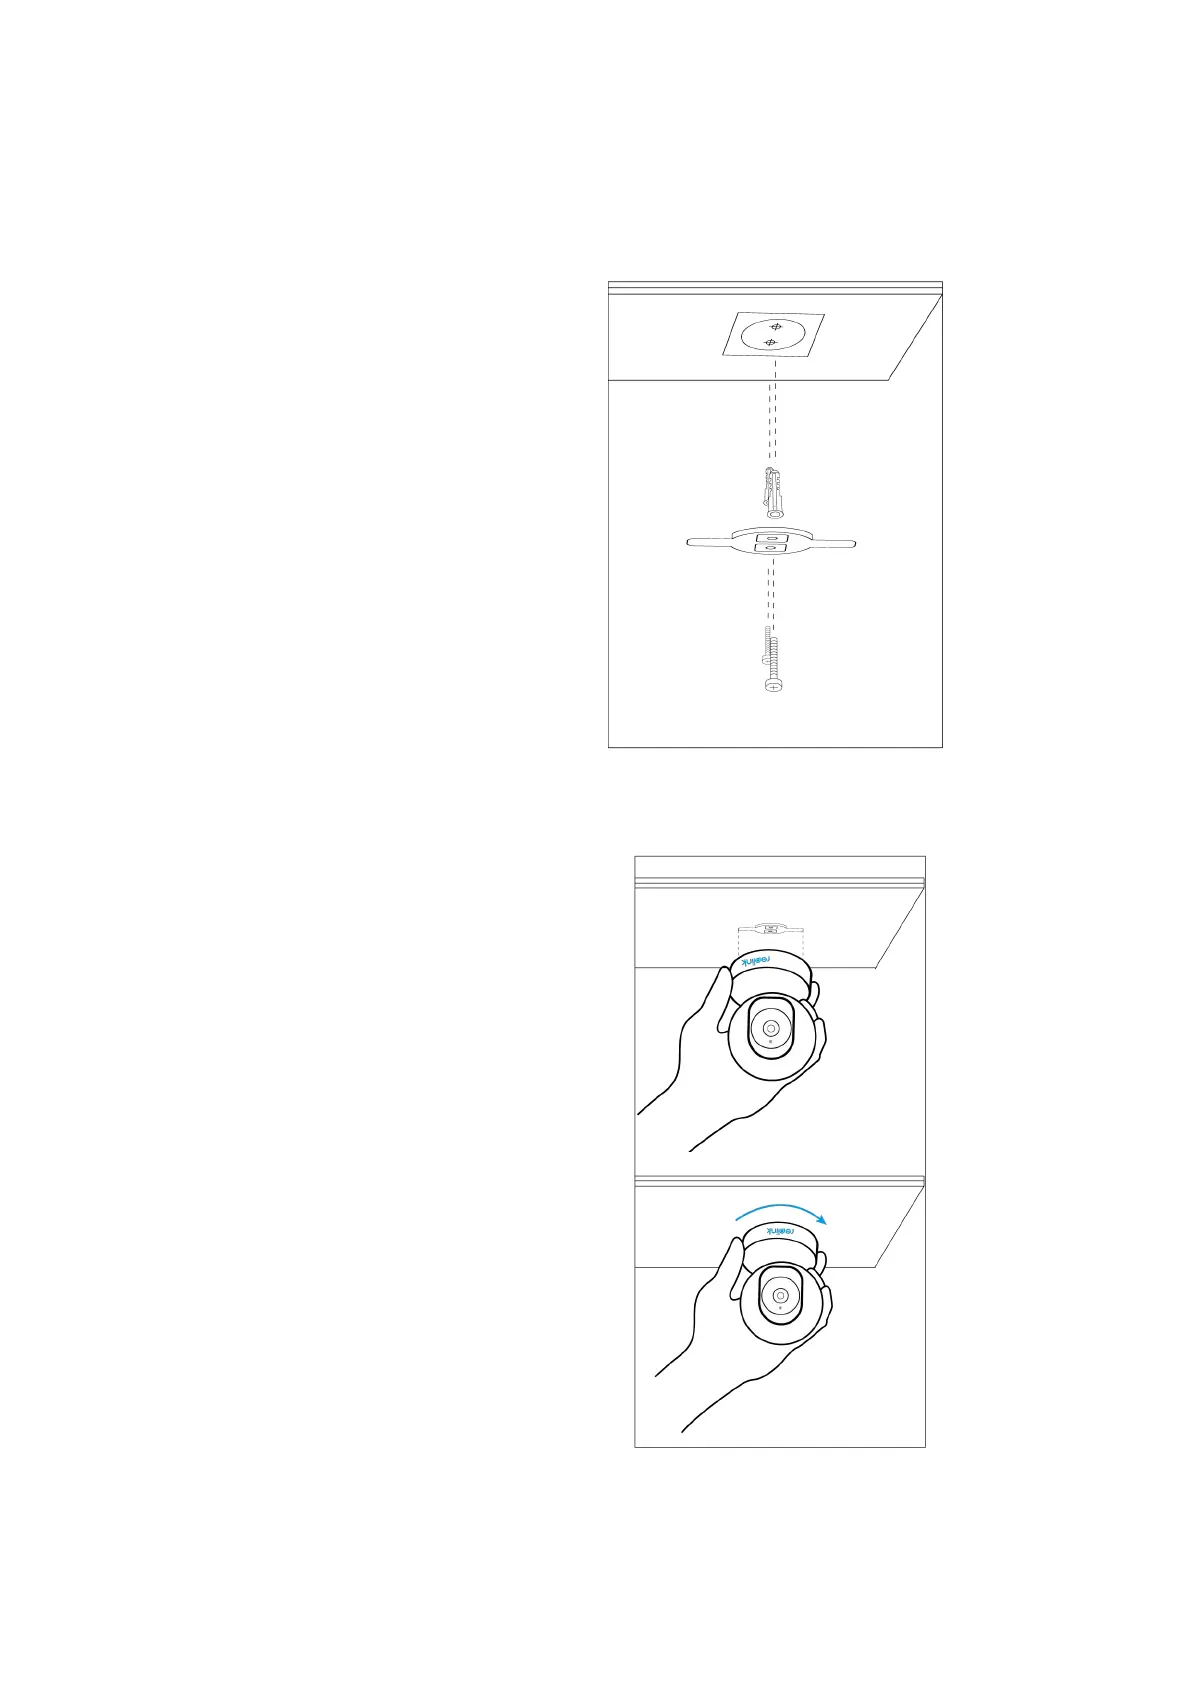
Step 1 Drill two holes on the
wall according to the mounting
hole template.
Step 2 Insert the two plastic
anchors into the holes.
Step 3 Secure the base unit in
place by tightening the screws
into the plastic anchors.
Step 4 Align the camera with the
bracket and turn the camera unit
clockwise to lock it in position.
NOTES:
1. To remove it from the wall, turn
the camera anticlockwise.
2. In case your camera is mounted
upside down, its picture shall be
rotated as well. Please go to Device
Settings -> Display on Reolink
App/Client and click Rotation to
adjust the image.

Other manuals for Reolink E1

Questions and Answers:

Question and Answer IconNeed help?

Do you have a question about the Reolink E1 and is the answer not in the manual?

Reolink E1 Specifications

General IconGeneral
Pan & Tilt355° Pan, 50° Tilt
AudioTwo-way audio
StoragemicroSD card slot (up to 128GB)
Image Sensor1/2.7" CMOS Sensor
Wireless StandardIEEE 802.11b/g/n
Wireless SecurityWPA-PSK/WPA2-PSK
EthernetNo
Operating Temperature-10°C to 55°C (14°F to 131°F)
Weight200g
Motion DetectionYes
Resolution2304x1296 (3MP)
Night Vision40 ft (12m)
ConnectivityWi-Fi
PowerDC 5V/1A
IR Distance40 ft (12m)
Day/Night ModeAuto-switching
Viewing AngleHorizontal: 87.5°, Vertical: 47°, Diagonal: 100°

Related product manuals