EasyManuals Logo

Reolink E1 User Manual

Reolink E1
109 pages
To Next Page IconTo Next Page
To Previous Page IconTo Previous Page
Page #23 background imageLoading...
Page #23 background image
Reolink Wireless Camera
User Manual
3
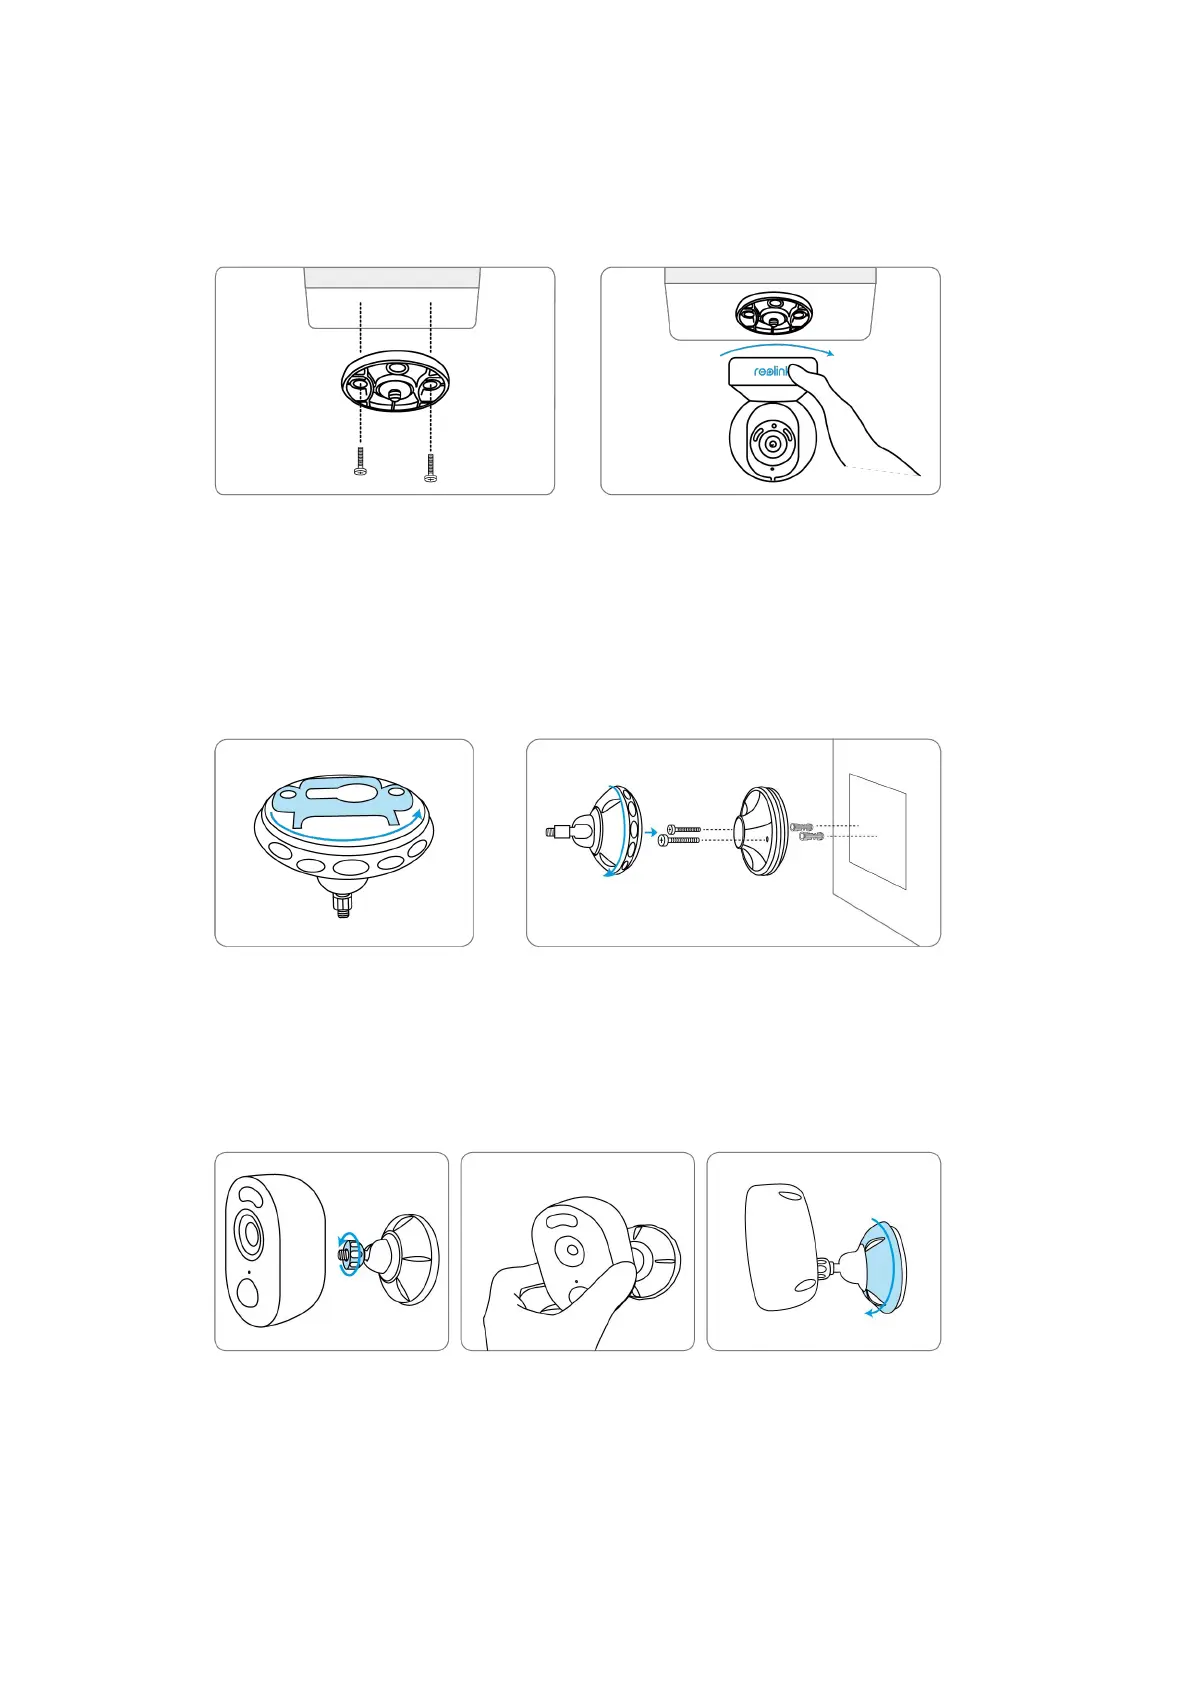
Mount the camera to the ceiling
Pull the button of the security mount and unscrew the ceiling bracket from the
mount.
Install the bracket to the ceiling. Align the camera with the bracket and turn the
camera unit clockwise to lock it in position.
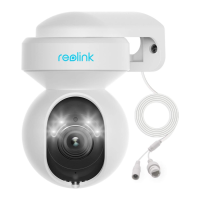
Mount Reolink Lumus
Rotate to separate parts
from the bracket.
Drill holes in accordance with the
mounting hole template and screw the
base of the bracket onto the wall. Next,
attach the other part of the bracket
onto the base.
Fasten the camera to
the bracket by turning
the screw identified in
the chart anticlockwise.
Adjust the camera
angle to get the
best field of view.
Secure the camera by
turning the part on the
bracket identified in the
chart clockwise.

Other manuals for Reolink E1

Questions and Answers:

Question and Answer IconNeed help?

Do you have a question about the Reolink E1 and is the answer not in the manual?

Reolink E1 Specifications

General IconGeneral
Pan & Tilt355° Pan, 50° Tilt
AudioTwo-way audio
StoragemicroSD card slot (up to 128GB)
Image Sensor1/2.7" CMOS Sensor
Wireless StandardIEEE 802.11b/g/n
Wireless SecurityWPA-PSK/WPA2-PSK
EthernetNo
Operating Temperature-10°C to 55°C (14°F to 131°F)
Weight200g
Motion DetectionYes
Resolution2304x1296 (3MP)
Night Vision40 ft (12m)
ConnectivityWi-Fi
PowerDC 5V/1A
IR Distance40 ft (12m)
Day/Night ModeAuto-switching
Viewing AngleHorizontal: 87.5°, Vertical: 47°, Diagonal: 100°

Related product manuals