Model Two Owner’s Manual
Copyright 2014 © Retro Manufacturing, LLCPage 10
Installation Instructions
NOTE: Geng the unit to t perfectly into your dash is probably the most
dicult poron of the install. Paence and persistence is the key. If you sll
have problems, please contact us at support@retrosound.com or
702-483-2222
The InniMount system oers nearly unlimited installaon opons to accom-
modate your t needs.
To begin, locate the removable InniMount sha system and the InniMount
“L” brackets, as well as two each large and small washers (see “What’s in the
Box” on page 5). For more advanced installaons, please visit our website:
retrosoundusa.com or email support@retrosound.com.
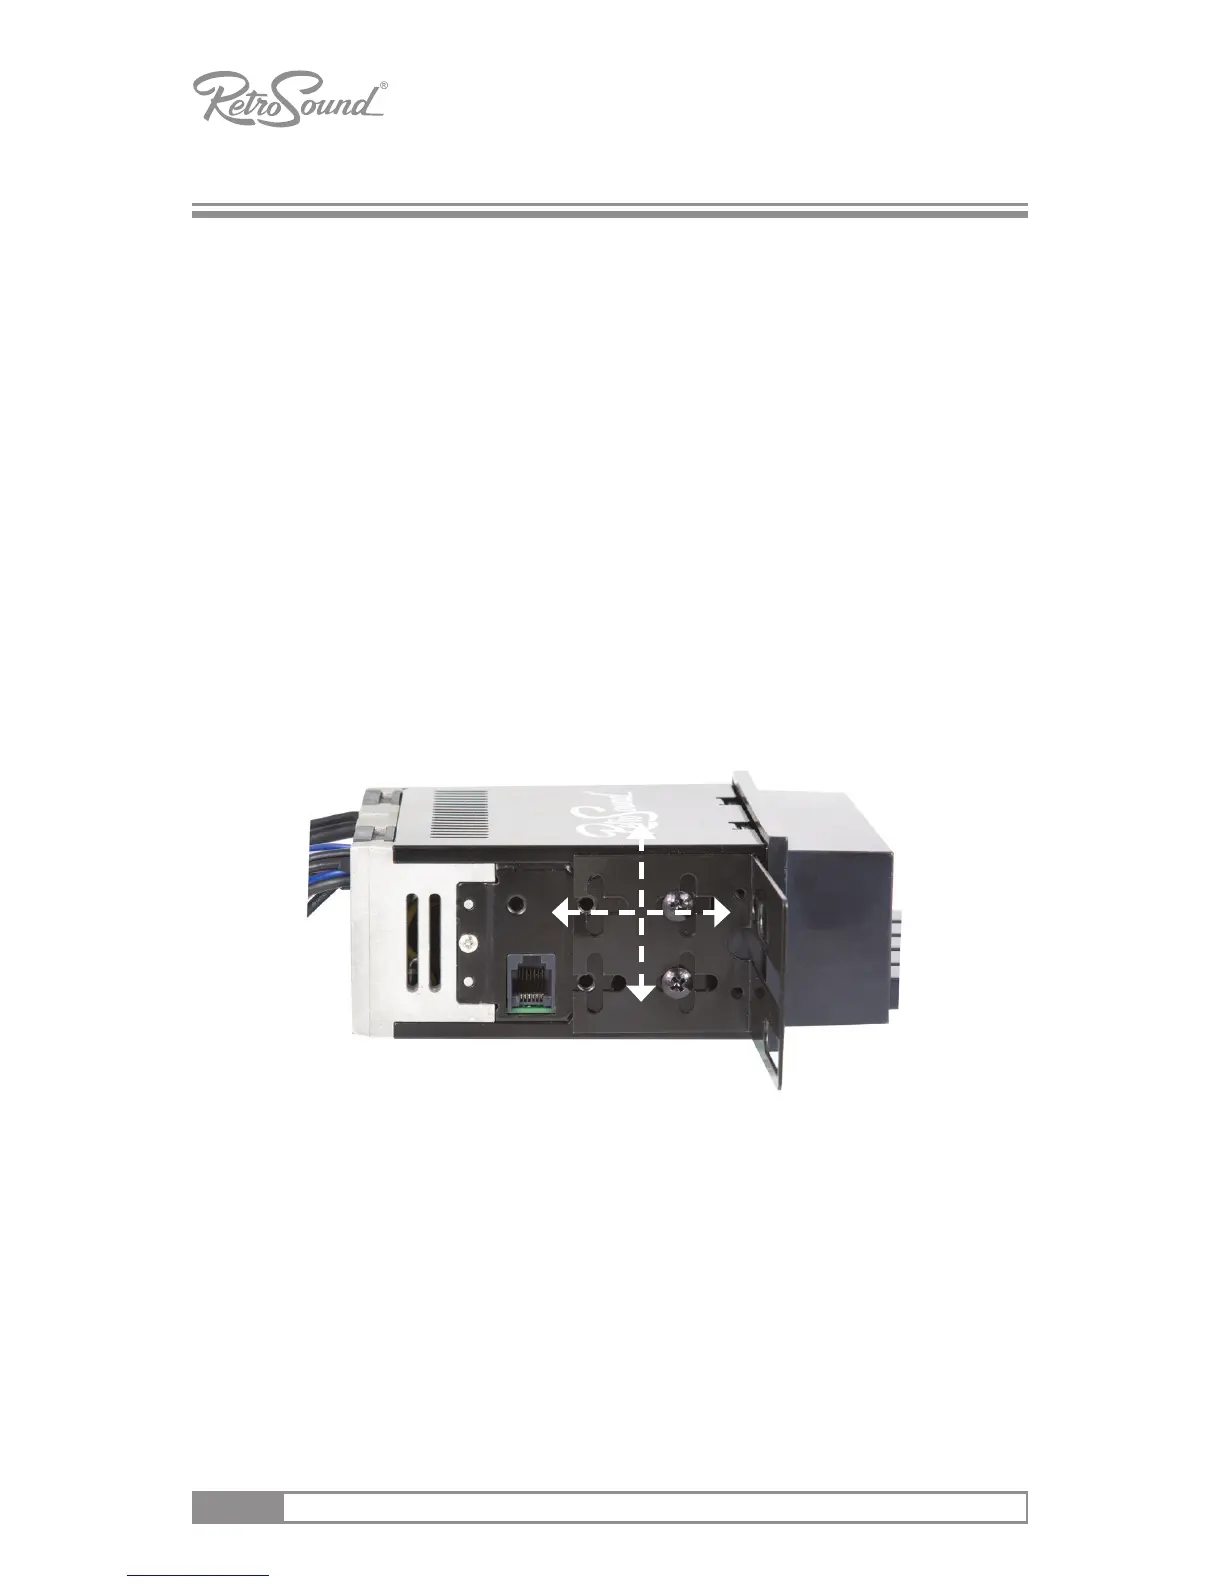
STEP 1: Install InniMount Brackets
Aach each InniMount bracket using the supplied screws. Before ghtening,
adjust the brackets forward or backward, or rotate to achieve the perfect t.
Complete the assembly with 2 or 4 screws ghtened on either side.
Figure 1 - Attach InniMount Brackets
NOTE: You can move our brackets forward or backward and move them in
any direcon. You can even cut, trim or bend the bracket or create your own
bracket for a more challenging installaon. For more advanced installaons,
please visit our website: www.retrosoundusa.com or email support@
retrosound.com.