Drive Disassembly —
(Refer To Parts Drawing Figure 19)
Prior to initiating any disassembly or repair, clean accumulated
dirt and grime from the surface of the drive housing. Clean the
exposed portion of the input and output shafts with a solvent
and a non-abrasive cloth. If only the seals are being replaced,
proceed to Step 5. If the drive will be disassembled for
inspection or repair, remove input side seal covers, Ref. #13 &
15, as illustrated in Figure 16, then skip to Step 9.
CAUTION: Do not damage shaft. New seals will leak if seal
contacting surface is marred. Do not use abrasive material on
shaft seal contacting surface.
5. SEAL REMOVAL — The input side low speed and high
speed shaft seals, Ref. #19 & 20, respectively, can be
replaced without removing drive from the driven shaft.
Remove input side seal covers, Ref. #13 & 15, as
illustrated in Figure 16.
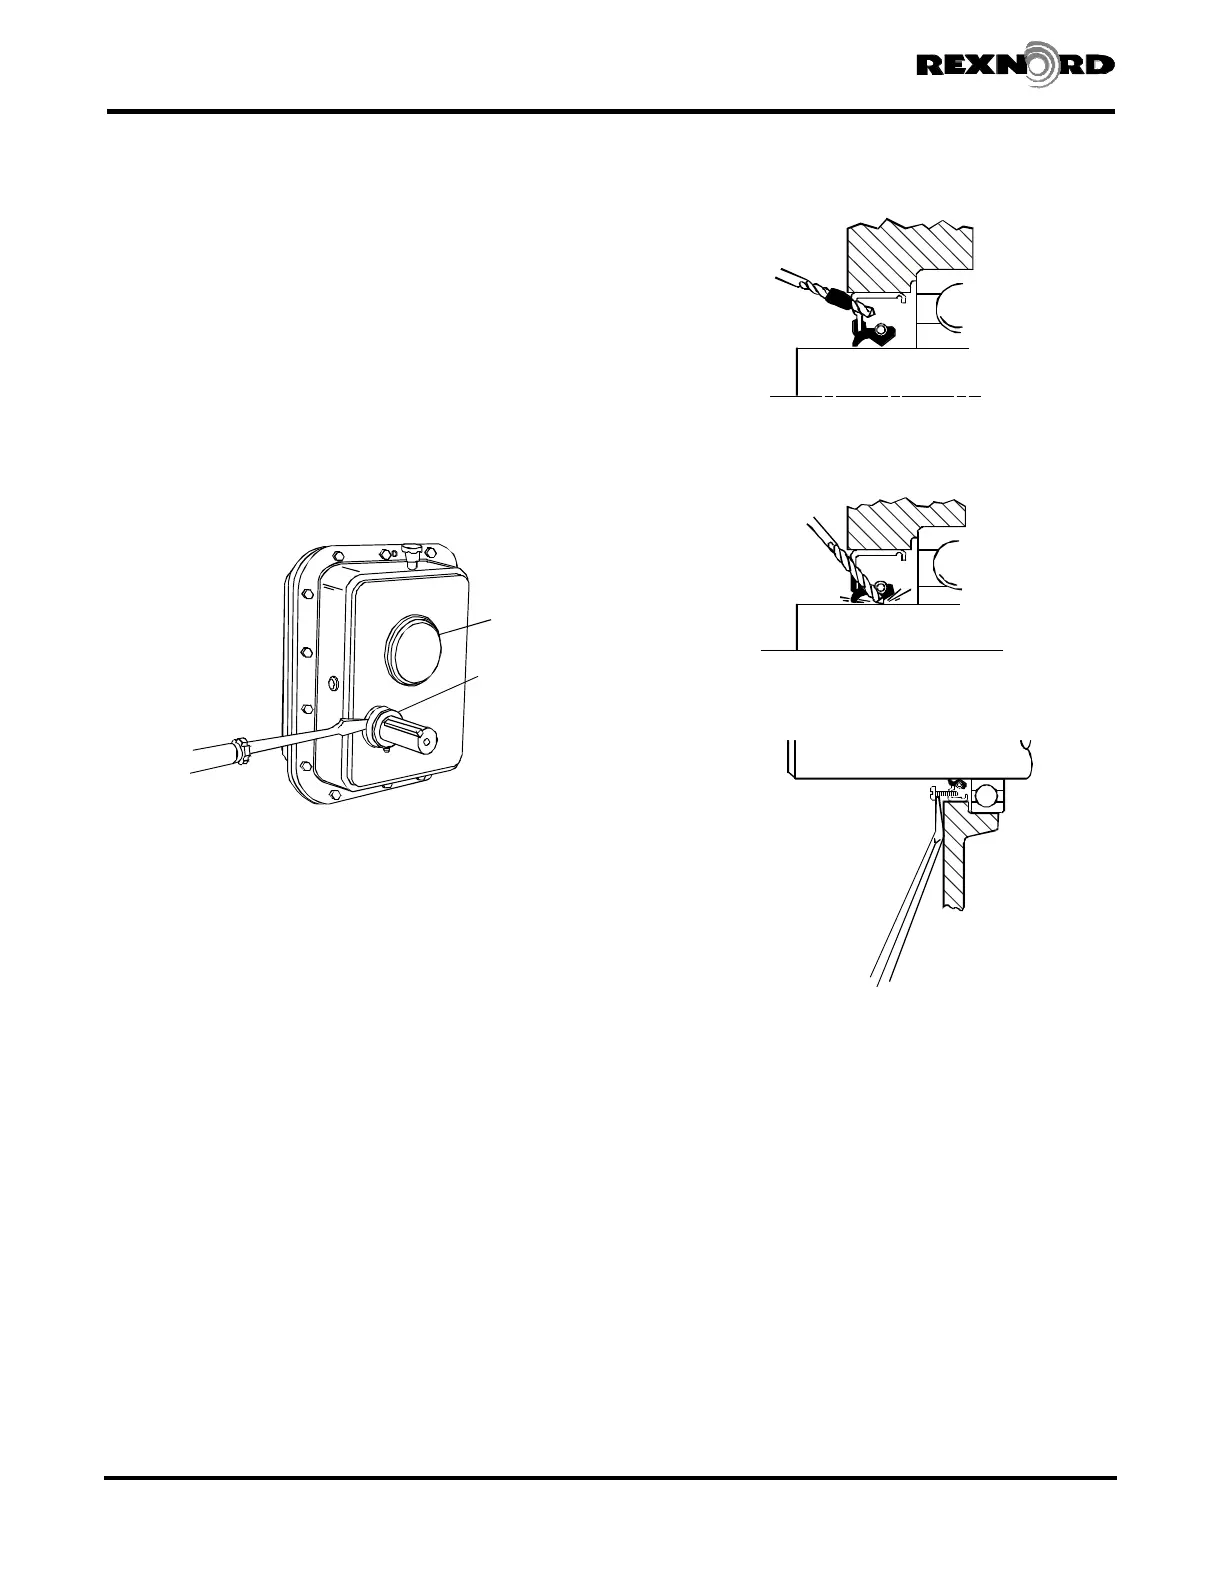
a. Remove all sharp edges from shaft extension. Use a
sharp center punch to lightly punch the seal case as a
guide for drill bit. NOTE: Seals are not axially restrained.
DO NOT drive seal into bore too deep, or disassembly
of drive may be required to extract seal.
b. Wrap several turns of tape around the drill bit
approximately .250" (6 mm) from the drill point to
prevent the drill bit from entering too deeply into the
housing and damaging the bearing. Grease or
magnetize the drill bit to help retain the chips. Drill two
.125" (3 mm) diameter holes in the seal case 180° apart.
Control the angle of the drill as illustrated in Figure 17 to
prevent damage to the shaft.
c. Insert two #10-.750" (M5 x 20) sheet metal screws into
the seal case leaving .5" (13 mm) of the screw protruding
above the seal face. DO NOT drive the screw more than
.25" (6 mm) beyond seal face or bearing damage may
occur. Use a claw type pry bar under the screw head as
shown in Figure 17 to lift seal out. Remove all metal
chips. Use a magnet to remove the metal chips that fall
into the bore. Flush the drive to remove chips from the
bearing. Remove Permatex from the housing bore.
6. SEAL SURFACE CONDITION — Carefully inspect
polished surface of shaft where the seal makes contact. If
the seal surface shows any sign of a nick, scratch, spiral
swirl or groove, the shaft should be replaced or refurbished
to prevent leakage of the lubricant. (In many instances the
seal surface can be restored by use of a thin wall wear
sleeve. Check with your local seal supplier and follow the
manufacturer’s instructions for installing the wear sleeve).
Rexnord Industries, LLC 3001 W. Canal St., Milwaukee, WI 53208-4200 USA378-200 (PN-2128394)
Telephone: 414-342-3131 Fax: 414-937-4359November 2010
e-mail: info@rexnord.com web: www.rexnord.comSupersedes 6-07
Shaft Mounted Drives Model A
(Page 12 of 44) Sizes 5107-5315
REF. #13
REF. #15
Figure 16
Figure 17
RIGHT WAY
WRONG WAY