mini-pro Quick Start
and the size of the layer can be quickly adjusted by the up and down keys.
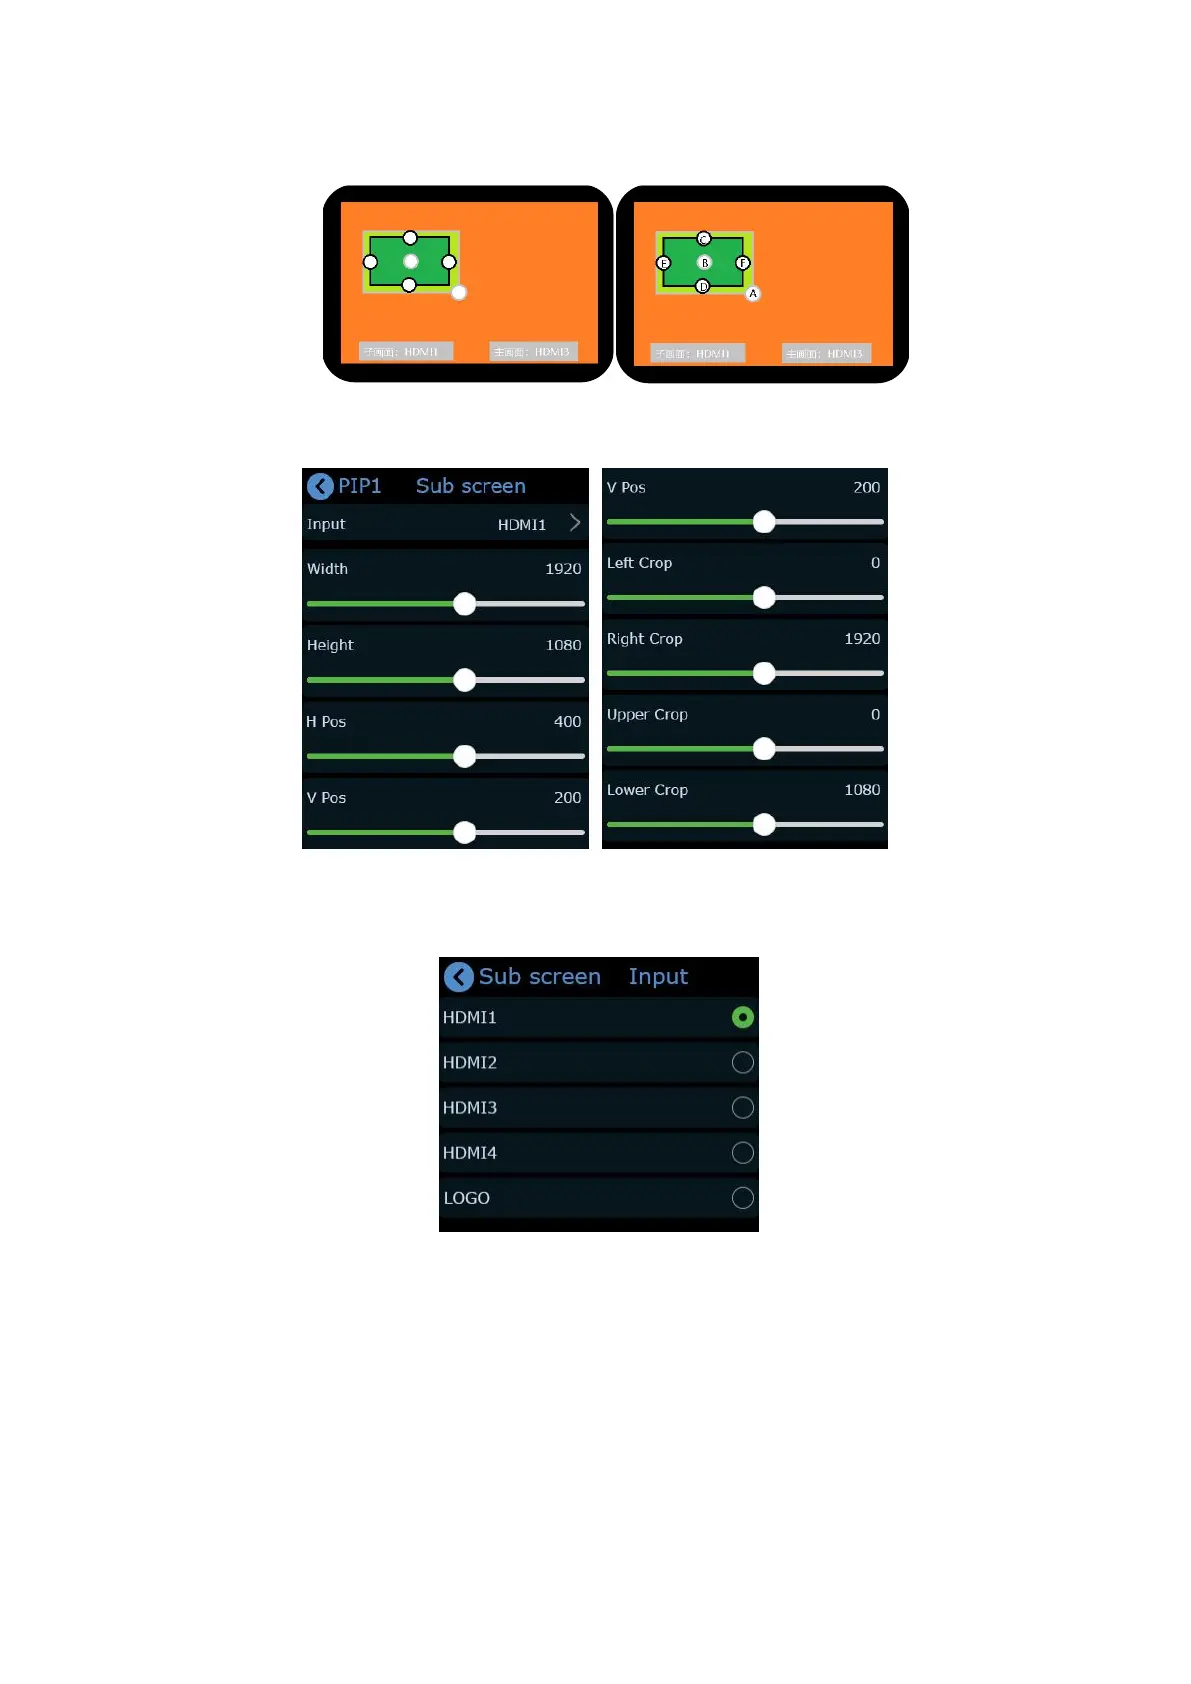
If detailed adjustment is required, tap the sub-screen and main-screen buttons at the bottom
or return to PIP【Adjust】menu and tap【Sub Screen Adjust】or【Main Screen Adjust】.
After entering the settings of the sub-screen, the first item is the signal source selection. You
can directly press the signal source button for quick selection, or you can press and hold the ">" on
the right to slide the screen to select, or tap ">" and press the up and down button to select.
PIP defaults the sub-screen in the upper left corner, tap the ">" to the right quickly set the
position of the sub-screen, positions including upper left corner, upper right corner, and lower left
corner ,the lower right corner, central right, and left and right picture by picture layouts.
If the sub-picture needs more detailed size and position adjustment, you can continue to use
the following setting items. In addition to adjustment by moving the slide rail, you can also use the
up and down keys to quickly adjust the size of the sub-picture, and use the joystick to quickly adjust
the position of the sub screen.
If you need to quickly switch to the PGM, you can press the joystick.