MAINTENANCE
172 08/12 Maintenance Section 5-24
© 2012 Alamo Group Inc.
MAINTENANCE
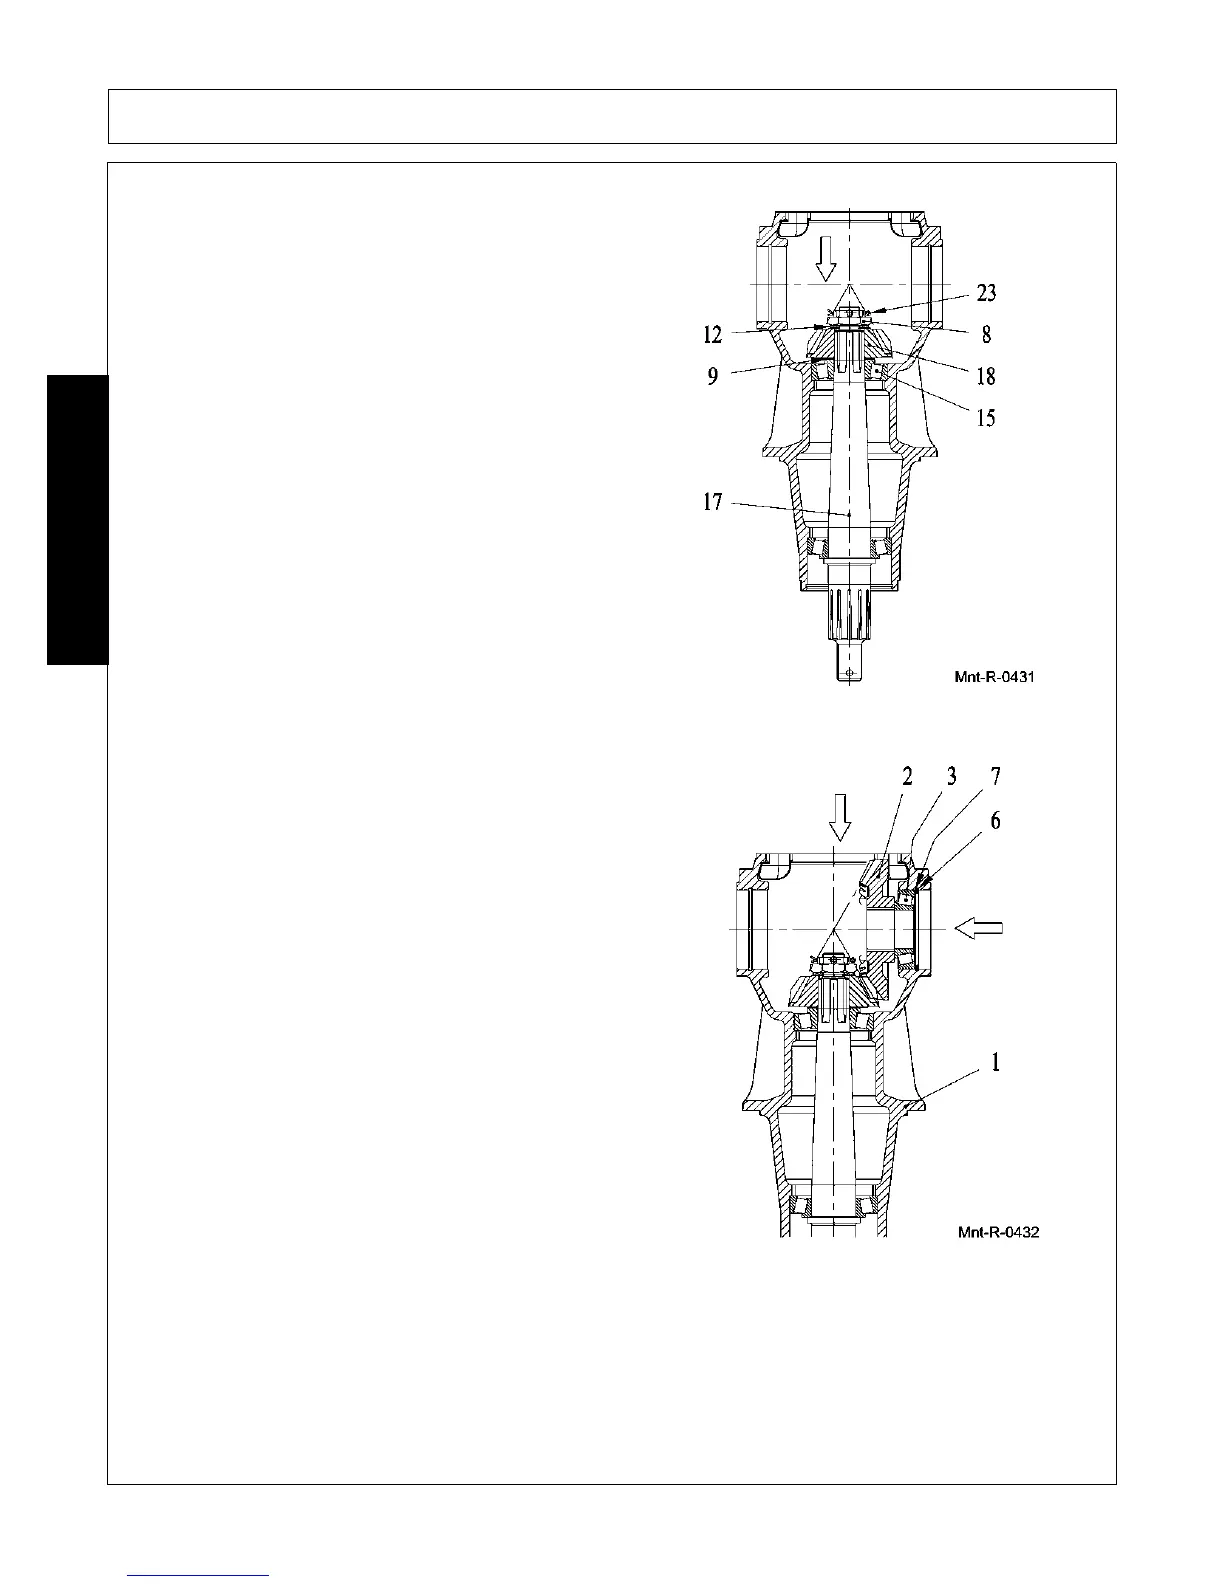
4. Assemble inner ring (15) using pipe and
hammer, shim (9), pinion (18) using pipe and
hammer, shim (12) castle nut (8) and tighten
manually.
5. Check the assembled axis preload, using a
torquemeter, that must be to 5÷10 kgcm.
6. Assemble cotter pin (23) and bend it, unscrew
the castle nut (8) against cotter pin (23).
7. Hit the shaft (17) in order to set the axis, from
both sides, using a hammer.
8. If necessary change the shims setting (9) and
repeat the assembling previous phases, in
order to obtain the right value.
9. Caulk the cotter pin (23) using a pliers.
10. Assemble snap ring (6) using pliers, shims (7)
and outer ring (3) using pipe and hammer.
11. Insert inner ring (3) and crown wheel (2) inside
the housing (1).
 Loading...