No. Icon Description
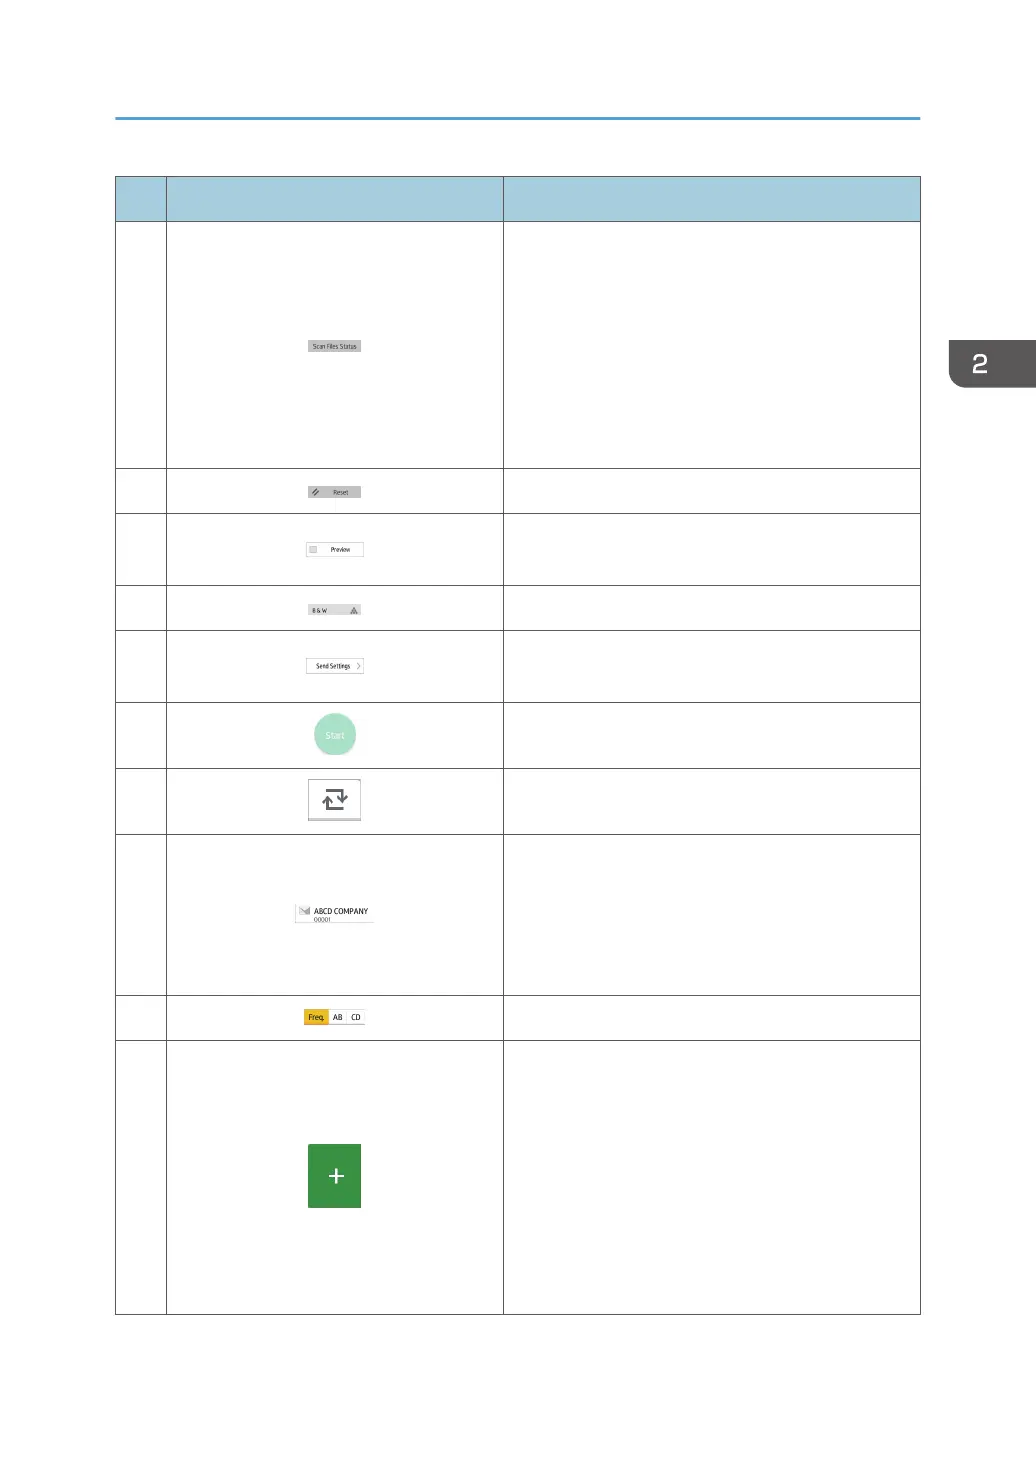
4
Press to display the transmission results screen.
In the transmission results screen, you can do the
following:
• Check sent jobs
• Check error descriptions
• Cancel transmission of a document in standby
• Print a list of transmission results
5 Press to clear your current settings.
6
Press to display the preview screen after scanning
originals.
7 You can check the settings in Send Settings.
8
Press to open the send settings screen. For details,
see page 50 "[Send Settings] screen".
9
Press to scan originals and start sending.
10
Press to switch the section of the Address Book.
11
Shows the destinations in the Address Book.
If a password or protection code is specified to a
folder destination, enter the password or protection
code on the screen displayed after tapping the
folder destination.
12 The sections of the Address Book.
13
Press to add a destination.
Destinations can be added as follows:
• Input destinations manually
• Select from the transmission history
• Specify a registration number from the
Address Book
• Search for a destination in the Address Book
or on the LDAP server
How to Use Each Application
49


 To Next Page