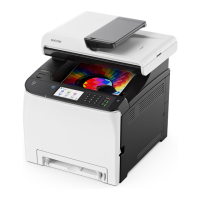
RICOH SP C250SF/SP C252SF Color Multifunction Printers
Getting Started Guide
34
4.2 Network Scanning
This section explains how to perform a basic Network Scan to Folder operation. First, you’ll create a new
folder on your computer, and within that folder’s Properties screen, share the folder. This enables the
printer (serving as a scan device) to route the electronic file to that folder. Lastly, you will add that folder as
a Scan Destination to the printer’s Address Book, so the printer and computer can communicate. Once
configured, you can easily perform Network Scan to Folder. For details on Scan to Email and Scan to FTP,
please refer to the Operating Instructions, p129.
4.2.1 Create New Folder and Share
1. Create a New Folder, where scanned documents will
go. For example, to have a folder easily accessible, you
can create one on your desktop. Right-click and select
[New]
[New Folder]. Name the folder, e.g., Invoices.
2. Right-click Folder name, and select [Properties].
 Loading...