K
Kara HoffmanSep 23, 2025
How to improve black gradation on Ricoh SP C252DN?
- AArthur NelsonSep 23, 2025
Only when using PostScript 3 with your Ricoh Printer, select [CMY + K] for [Gray Reproduction] in the printer driver's dialog box.
How to improve black gradation on Ricoh SP C252DN?
Only when using PostScript 3 with your Ricoh Printer, select [CMY + K] for [Gray Reproduction] in the printer driver's dialog box.
Why does Ricoh SP C252DN Printer take so long to print?
Your Ricoh Printer may take a long time to complete the print job because photographs and other data intensive pages take a long time to be processed, so simply wait when printing such data. Changing the settings with printer driver may help to speed up printing. The data may be so large or complex that it takes a long time to be processed. If the Data In indicator is flashing, the data is being processed. Just wait until it printing is resumed. If the Data In indicator on the control panel is flashing, the printer is warming up. Wait for a while. The printer is adjusting the color registration. Wait for a while.
How to fix Ricoh Printer when it is not automatically recognized?
If your Ricoh Printer is not automatically recognized, the USB cable might not be connected properly. To resolve this, disconnect the USB cable from your computer, then turn off the main power switch of the printer. Turn the main power switch back on. After the printer has fully booted up, reconnect the USB cable.
What to do if Ricoh SP C252DN Printer does not recognize the USB connection?
If your Ricoh Printer doesn't recognize the USB connection even when the cable is inserted, it might be because the USB cable was connected while the printer was off. Press the operation switch to turn on the printer, and then disconnect the USB cable from the computer. Once the printer is in the ready condition, reconnect the USB cable.
How to make paper feed smoothly in Ricoh Printer?
To ensure paper feeds smoothly in your Ricoh Printer, use supported types of paper. Load paper correctly, ensuring the paper guides are properly adjusted. If the paper is curled, straighten it. Take the paper out of the tray, fan it well, reverse the top and bottom of the paper, and then put it back in the tray.
How to match print to computer display on Ricoh Printer?
To match the printed image to the computer's display on your Ricoh Printer (only when using PCL 5c/6), select [Raster] in the "Graphics Mode" list on the printer driver's [Print Quality] tab.
How to fix color degradation on Ricoh SP C252DN?
Color degradation may occur in color printing with your Ricoh Printer after it is moved or a large number of pages are printed. In this case, adjust color registration by executing [Color Dens/ Reg] in [Maintenance].
How to resolve smudged print on Ricoh SP C252DN?
To resolve smudged printed images on your Ricoh Printer: PCL 5c/6: On the printer driver's [Paper] tab, select [Bypass Tray] in the "Input Tray:" list and choose a proper paper type in the "Paper Type:" list. PostScript 3: On the printer driver's [Paper/Quality] tab, select [Bypass Tray] in the "Paper Source" list and select a proper paper type in the "Media" list.
Why are images printed diagonally on Ricoh SP C252DN Printer?
If images are printed diagonally on pages from your Ricoh Printer, adjust the paper guides to remove any gaps between the paper and the guides.
How to fix wrinkled paper from Ricoh SP C252DN?
If the paper from your Ricoh Printer is wrinkled, the paper being used may be damp; use paper that has been stored properly. The paper might also be too thin. If there are gaps between the paper and the paper guides, adjust the paper guides to remove the gaps. Check that both the left and right fusing unit levers have been raised to the plain paper mark.
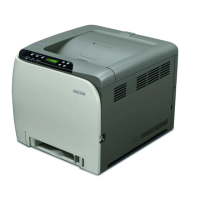
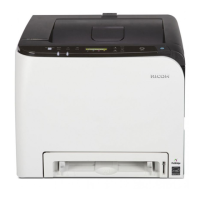
Overview of machine parts including exterior views, interior components, and the control panel.
Instructions on proper placement, environmental conditions, and space requirements for the machine.
Procedure for attaching optional hardware, specifically the paper feed unit.
Details on using the control panel and Web Image Monitor for machine configuration and status checks.
Guidance on setting IP addresses, sharing the printer, and configuring wireless LAN connections.
Enabling and configuring settings to restrict machine functions based on user authentication.
Details on paper types, sizes, weights, and capacities supported by the machine's trays.
Detailed specifications for various paper types, including thickness and duplex support.
List of paper types that should not be used to avoid malfunctions or poor print quality.
Diagrams showing the printable area on paper and envelopes, including feed directions.
Step-by-step instructions for loading paper into various trays, including envelopes and custom sizes.
Guide to initiating and configuring print jobs through the document application.
Procedures for canceling print jobs before printing starts or while printing is in progress.
Resolving errors when paper size or type settings do not match the loaded paper.
Instructions to reset a print job, typically after an error occurs.
Features for password-protecting print jobs, storing, printing, and deleting locked files.
Connecting digital cameras for direct photo printing, including setup and troubleshooting.
Exploring print quality adjustments, color settings, image printing, and output options.
Navigating the machine's menu system using the control panel keys and display.
Listing of all configurable parameters available within the machine's menus.
Configuring paper size, type, and tray priority for different paper sources.
Procedures for printing configuration pages, test pages, font lists, and maintenance reports.
Accessing settings for color density adjustment, toner level notifications, and humidity control.
Configuring auto continue, copies, duplex printing, energy saver modes, and default settings.
Managing timeouts, network settings, IPsec, MAC address, and Wi-Fi configurations.
Adjusting PCL settings like orientation, fonts, pitch, symbol sets, and resolution.
Configuring PostScript settings for resolution and color profiles.
Changing the display language for the machine's menus and interface.
Introduction to remotely managing machine status and settings via a web browser.
Steps to launch a web browser and access the machine's Web Image Monitor interface.
Selecting the desired language for the Web Image Monitor interface from a list.
Viewing machine status, toner levels, component life, page counts, and firmware versions.
Customizing tray paper settings, priority, I/O timeouts, and print priority settings.
Detailed settings for network status, IP addresses, DNS, email notifications, SNMP, SMTP, POP3, and wireless.
Setting up IPsec for secure network communication, including global and policy settings.
Managing administrator passwords, resetting settings, backing up/restoring configurations, and configuring energy saver/PCL6 modes.
Step-by-step guide for removing old and installing new toner cartridges.
Instructions for safely removing and replacing the waste toner bottle.
Procedures for replacing key internal components like the transfer unit and fusing unit.
Important safety and operational guidelines to follow when cleaning the machine's exterior and interior.
Steps to clean the toner density sensor for optimal print quality.
Procedure to clean rollers for preventing paper feed issues like multi-feeds or misfeeds.
Steps to clean rollers and trays to resolve print quality issues like white dots.
Detailed procedures for clearing paper jams from the fusing unit, trays, and transfer unit.
Solutions for common problems like machine not turning on, error messages, or no printing.
Diagnosing and resolving issues like paper not feeding, frequent jams, multiple feeds, wrinkles, or curling.
Addressing print quality problems such as smudged images, blurred output, and color degradation.
Resolving issues related to printing errors, slow printing, incorrect output, and improper paper feeding.
Explanation of control panel messages, their meanings, and recommended actions for resolution.
Interpreting the meaning of various indicator lights on the printer's control panel.
Overview of functions and network settings supported in an IPv6 environment.
Details on IPsec protocol, encryption, authentication, security association, and configuration steps.
Information on third-party toner, print cartridge replacement, and toner lifetime.
Cautions and procedures for safely moving the machine for short and long distances.
Guidance on the correct disposal of the machine, referring to sales or service representatives.
Information on contacting sales or service representatives for further assistance.
Details on print cartridge yield, replacement, and waste toner bottle capacity and replacement.
Technical details including configuration, print process, paper sizes, power, and dimensions.
Technical specifications for optional hardware, such as the Paper Feed Unit TK1010.
Legal copyright notices for software applications included with the machine.
List of registered trademarks and trademarks mentioned in the manual.
| Color | Yes |
|---|---|
| Print technology | Laser |
| Time to first page (black, normal) | 14 s |
| Print speed (black, normal quality, A4/US Letter) | 20 ppm |
| Printing colors | Black, Cyan, Magenta, Yellow |
| Maximum duty cycle | 65000 pages per month |
| Number of print cartridges | 4 |
| Page description languages | PCL 5c, PCL 6, PostScript 3 |
| Total input capacity | 251 sheets |
| Total output capacity | - sheets |
| Maximum input capacity | 751 sheets |
| Duplex media weight | 60 - 90 g/m² |
| Paper tray media types | Bond paper, Card stock, Envelopes, Labels, Plain paper, Pre-Printed, Recycled paper, Thick paper, Thin paper |
| Paper tray media weight | 60 - 160 g/m² |
| ISO A-series sizes (A0...A9) | A4, A5, A6 |
| ISO B-series sizes (B0...B9) | B5, B6 |
| Multi-purpose tray media types | Letterhead |
| Maximum ISO A-series paper size | A4 |
| Network ready | - |
| Wi-Fi standards | 802.11b, 802.11g, Wi-Fi 4 (802.11n) |
| Standard interfaces | Ethernet, USB 2.0, Wireless LAN |
| USB 2.0 ports quantity | 1 |
| Processor family | Intel® Celeron® M |
| Processor frequency | 350 MHz |
| Maximum internal memory | - MB |
| Product color | Black, White |
| AC input voltage | 220 - 240 V |
| AC input frequency | 50 Hz |
| Power consumption (max) | 1300 W |
| Power consumption (printing) | - W |
| Power consumption (PowerSave) | 3.8 W |
| Sustainability certificates | ENERGY STAR |
| Mac operating systems supported | Mac OS X 10.6 Snow Leopard, Mac OS X 10.7 Lion, Mac OS X 10.8 Mountain Lion, Mac OS X 10.9 Mavericks |
| Server operating systems supported | Windows Server 2008, Windows Server 2008 R2, Windows Server 2012 |
| Windows operating systems supported | Windows 7 Home Basic, Windows 7 Home Basic x64, Windows 7 Home Premium, Windows 7 Home Premium x64, Windows 7 Professional, Windows 7 Professional x64, Windows 7 Starter, Windows 7 Starter x64, Windows 7 Ultimate, Windows 7 Ultimate x64, Windows Vista Business, Windows Vista Business x64, Windows Vista Enterprise, Windows Vista Enterprise x64, Windows Vista Home Basic, Windows Vista Home Basic x64, Windows Vista Home Premium, Windows Vista Home Premium x64, Windows Vista Ultimate, Windows Vista Ultimate x64, Windows XP Home, Windows XP Home x64, Windows XP Professional, Windows XP Professional x64 |
| Depth | 450 mm |
|---|---|
| Width | 400 mm |
| Height | 320 mm |