Do you have a question about the RIDGID 1233 and is the answer not in the manual?
General safety practices for many types of power tools.
Guidelines for maintaining a safe and clean work environment during operation.
Precautions for safe electrical connections and usage of power tools.
Personal precautions for safe operation, including PPE and alertness.
Guidelines for correct usage, maintenance, and storage of power tools.
Information on servicing the power tool with qualified personnel.
Important safety information specific to these tools.
Specific safety guidelines for operating transportable threading machines.
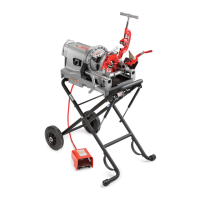
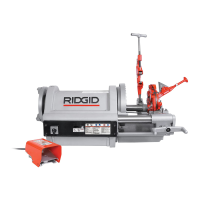
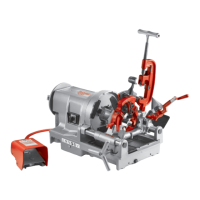
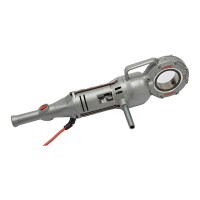
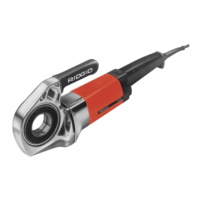
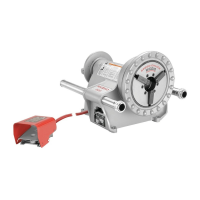
Overview of the RIDGID 300 Compact and 1233 Threading Machines' functionality.
Detailed technical specifications for the 300 Compact and 1233 threading machines.
Details on equipment supplied with specific machine catalog numbers.
Procedures for assembling and mounting the threading machines.
Instructions for mounting the threading machines on RIDGID Threader Stands.
Procedure for mounting the machine securely on a stable bench.
Steps for assembling the machine using pipe legs as a stand.
Essential checks before operating the threading machine.
Procedures for setting up the machine and preparing the work area.
Procedure for removing and installing the die head onto the carriage.
Steps for inserting and changing dies in quick-opening die heads.
How to adjust the thread size on quick-opening die heads.
How to open the die head at the end of threading.
Steps for inserting and changing dies in self-opening die heads.
How to adjust the thread size on self-opening die heads.
Procedure for adjusting the trigger slide on self-opening die heads.
How to open the die head at the end of threading.
Steps for inserting and changing dies in receding self-opening die heads.
Procedure for adjusting thread size on receding self-opening die heads.
How to adjust the thread length on receding self-opening die heads.
Steps to prepare the die head for threading operations.
How to automatically open the die head upon completing a thread.
How to properly chuck pipe into the threading machine for operation.
Step-by-step guide for cutting pipe using the threading machine.
Instructions for reaming pipe ends with the threading machine.
Procedure for threading pipe using the RIDGID threading machine.
Guide for threading bar stock and bolts with the machine.
Instructions for performing left hand threading operations.
Steps to safely remove threaded pipe from the machine.
How to visually inspect and check the quality of cut threads.
Steps to prepare the threading machine for safe transport.
General guidelines for maintaining the threading machine.
Procedures for cleaning the threading machine after use.
Guidelines for lubricating moving parts of the machine.
Steps for maintaining the machine's oil system and filter.
Procedure for replacing a dull or broken cutter wheel.
How to replace worn jaw inserts for proper gripping.
Procedure for checking and replacing worn motor carbon brushes.
List and description of optional equipment for the threading machines.
Recommendations for safe and secure storage of the threading machines.
Information on proper service, repair, and authorized technicians.
Guidelines for the proper disposal of threading machine components and waste oil.
Solutions for issues causing torn threads during pipe threading.
How to resolve issues causing out-of-round or crushed threads.
Troubleshooting steps for creating thin threads.
Solutions for problems related to the absence of cutting oil flow.
Diagnosing and fixing issues when the machine fails to run.
Resolving problems where pipe slips within the machine's jaws.
The RIDGID 300 Compact and 1233 Threading Machines are electric motor-driven tools designed for centering, chucking, and rotating pipe, conduit, and bolt stock while performing cutting, reaming, and threading operations. They are equipped with an integral oiling system with an adjustable flow rate to ensure the work is flooded with thread cutting oil during operation. With appropriate optional equipment, these machines can also be used for threading larger pipe sizes (2 1/2" - 4"), short or close nipples, or for roll grooving.
| Brand | RIDGID |
|---|---|
| Model | 1233 |
| Category | Power Tool |
| Language | English |