EasyManua.ls Logo

RIDGID 300-Compact/1233 - User Manual

RIDGID 300-Compact/1233
520 pages
Print Icon
To Next Page IconTo Next Page
Loading...
RIDGE TOOL COMPANY
Tools For The Professional
TM
300-Compact/
1233
P. 1
P. 21
P. 43
P. 67
P. 91
P. 115
P. 137
P. 161
P. 183
P. 205
P. 227
P. 247
P. 269
P. 291
P. 313
P. 335
P. 357
P. 381
P. 403
P. 425
P. 447
P. 473
P. 495
EN
FR
ES
DE
NL
IT
PT
SV
DA
NO
FI
PL
CZ
SK
RO
HU
EL
HR
SL
SR
RU
TR
KK
1233
300 Compact

Table of Contents

Questions and Answers

  • L
    Lisa PrinceAug 9, 2025
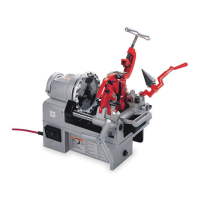
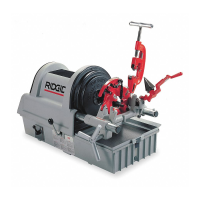
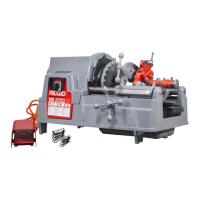
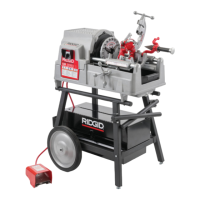
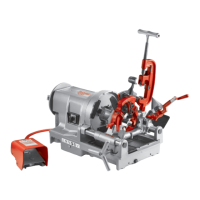
    What to do if there is no cutting oil flow in my RIDGID Industrial Equipment?
    • H
      Heather GrayAug 9, 2025
      To address the issue of no cutting oil flow in your RIDGID Industrial Equipment, start by filling the oil reservoir. If the problem persists, the oil may be dirty or contaminated; in this case, replace it with RIDGID® Thread Cutting Oil. Also, the Oil Screen may be plugged, so you should clean the screen. Finally, ensure that the oil flow rate is properly set and that the die head is in the threading position.
  • S
    samanthaolsenAug 16, 2025
    How to prevent pipe from slipping in the jaws of RIDGID 300-Compact/1233?
    • O
      omorganAug 16, 2025
      To fix pipe slippage in the jaws of your RIDGID Industrial Equipment, first, make sure the pipe is centered in the jaw inserts using the rear centering device. Next, ensure the chuck is tight on the pipe by using repeated and forceful counterclockwise spins of the handwheel to secure the pipe in the front chuck. Clean jaw inserts with wire brush. If the problem continues, the jaw inserts may be worn out and need replacement.
  • J
    Joseph GibbsAug 21, 2025
    What causes torn or crushed threads on RIDGID Industrial Equipment?
    • L
      Larry LopezAug 21, 2025
      If your RIDGID Industrial Equipment produces torn, out-of-round, crushed, or thin threads, the dies may be damaged, chipped, or worn out, requiring replacement. Ensure the die head is properly aligned and set to the correct size for threading. If the pipe wall thickness is insufficient, use schedule 40 or heavier pipe. Verify that the dies are inserted into the head in the correct order. Avoid forcing the carriage feed handle during threading; allow the carriage to self-feed. Check and tighten the die head cover plate screws if they are loose. Clean and lubricate carriage rails.
  • K
    kevinbrownAug 28, 2025
    What to do if my RIDGID 300-Compact/1233 machine will not run?
    • B
      Benjamin FreemanAug 28, 2025
      If your RIDGID Industrial Equipment machine will not run, it might be due to worn-out motor brushes, which need replacement. Ensure the die head is in the threading position. If the machine is set up for Left Hand Threading, reverse the oil pump hoses as described in the section on Left Hand Threading.
  • M
    martinezjosephNov 2, 2025
    Why does my RIDGID 300-Compact/1233 have torn threads and pipe slippage?
    • K
      kmorseNov 3, 2025
      If the pipe slips in the jaws of your RIDGID Industrial Equipment, ensure the pipe is centered in the jaw inserts using the rear centering device and that the chuck is tight on the pipe. Use repeated and forceful counterclockwise spins of the handwheel to secure the pipe in the front chuck. Also, clean jaw inserts with a wire brush or replace them if they are worn out. If the machine won't run, the motor brushes may be worn out, requiring replacement. Check that the die head is in the threading position and that the oil flow rate is properly set. Clean the oil screen if it's plugged, and reverse the oil pump hoses if the machine is set up for Left Hand Threading. For issues with cutting oil flow, fill the oil reservoir if the oil level is low, and consider replacing the cutting oil if it i...

Summary

General Safety Information

Safety Symbols Explained

Understand critical safety symbols used in the manual and on the product for hazard awareness.

Power Tool Safety Warnings

Essential warnings for safe operation of power tools, covering work area, electrical safety, and personal safety.

Specific Safety Information

Safety Instructions for Transportable Threading Machines

Safety guidelines for operating threading machines in various environments.

Product Overview and Specifications

Description

Overview of the RIDGID Model 300 Compact and 1233 Threading Machines.

Specifications

Detailed technical specifications for both 300 Compact and 1233 models.

Standard Equipment

Details on the equipment supplied with the threading machines.

Machine Assembly

Mounting Options

Instructions for mounting the machine on stands, benches, or pipe legs.

Die Head Set-Up and Use

Die Head Installation and Adjustment

Steps for installing, adjusting size, and operating die heads.

Opening the Die Head

Procedures for opening the die head after completing a thread.

Self-Opening and Receding Die Heads

Inserting and Changing Dies

Steps for inserting and changing dies in self-opening/receding die heads.

Adjusting Thread Size and Length

How to adjust thread size and length for self-opening/receding die heads.

Operating Instructions

Chucking and Securing Pipe

Procedures for securely chucking and positioning pipe for threading.

Cutting and Reaming Pipe

Detailed steps for cutting and reaming pipe using the machine.

Threading Operations

Process for threading pipe, bolt stock, or left-hand threads.

Machine Maintenance

Cleaning and Lubrication

Procedures for routine cleaning and lubrication of the machine.

Oil System Maintenance

Maintaining the oil system for optimal performance.

Component Replacement

Steps for replacing common wear parts like cutter wheels, jaw inserts, and brushes.

Troubleshooting Common Issues

Thread Quality Problems

Solutions for torn, out-of-round, crushed, or thin threads.

Machine Operation Issues

Troubleshooting no oil flow, machine not running, or pipe slipping.

RIDGID 300-Compact/1233 Specifications

General IconGeneral
Model300-Compact/1233
Power SourceElectric
Motor Power1/2 HP
Amperage7.5A
Frequency60 Hz

Related product manuals