13
R
E
M
O
V
E
ASSEMBLY
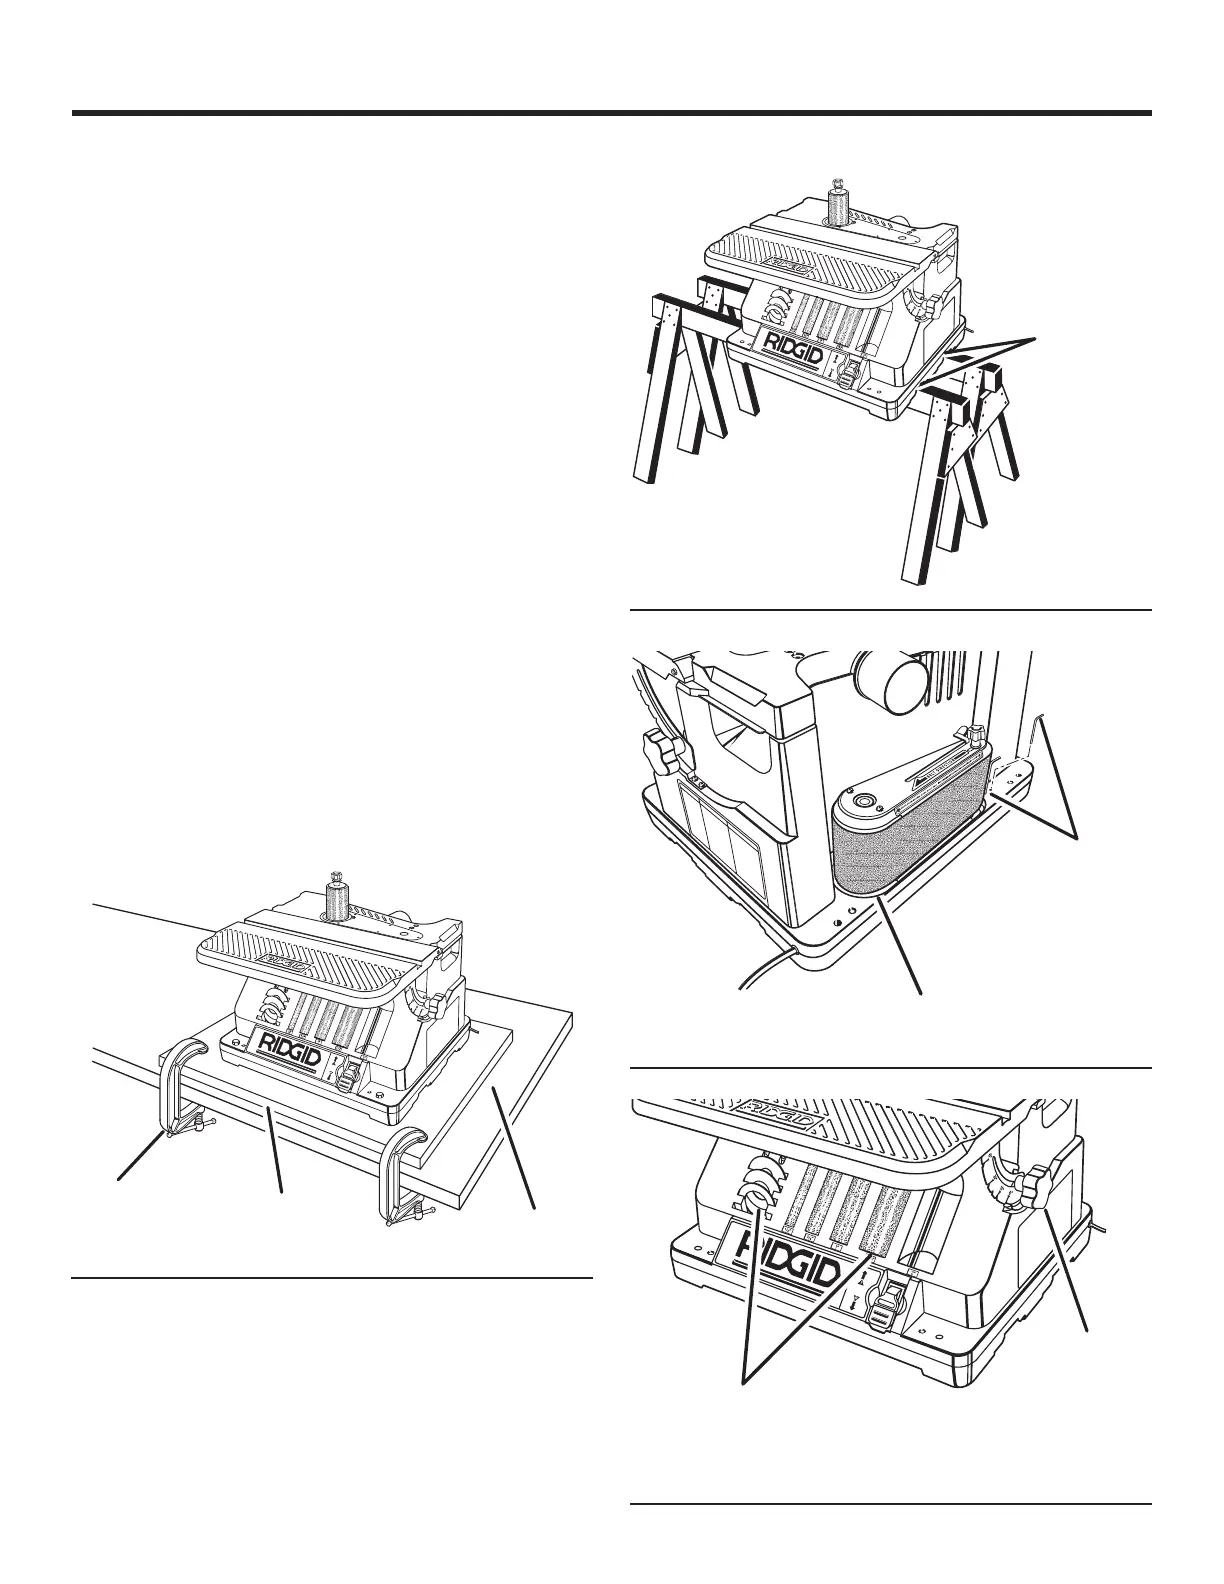
CLAMPING SANDER TO WORKBENCH
See Figure 7.
An alternative method of mounting is to fasten the sander
to a mounting board. The board should be sufficient size to
avoid tipping while in use. Any good grade of plywood or
chipboard with a 3/4 in. thickness is recommended. (Thinner
chipboard can break.)
Once sander is mounted to board, clamp to workbench.
NOTE: For proper stability, holes must be countersunk so
screw heads are flush with the surface of supporting board.
SUPPORTING OSCILLATING EDGE BELT/
SPINDLE SANDER TO SAWHORSES
See Figure 8.
The sander has provisions for being supported by saw-
horses. The sawhorse can be built with the crosspiece either
vertical or horizontal. Make sure the sawhorses are secure.
PARTS STORAGE
See Figures 9 - 10.
On board storage has been provided for all washers, spac-
ers, drums, sleeves and hex keys. All front loaded parts
can be protected from incidental dislodging by lowering
the table all the way down until it rests against the base and
tightening the knob.
Storage for the sanding belt assembly is provided in the
pocket on the rear of the base.
R
E
M
O
V
E
HEX KEY
STORAGE
AREA
SANDING SLEEVES /
THROAT PLATES / WASH-
ERS STORAGE AREA
aaaa
TABLE INSERT / SANDING
BELT STORAGE
TABLE LOCK
KNOB
SLOTS FOR
SAW HORSE
MOUNTING
Fig. 7
Fig. 9
Fig. 10
MOUNTING
BOARD
C-CLAMP
WORKBENCH
Fig. 8