R
richard28Sep 9, 2025
Why is the angle of cut not accurate on my RIDGID Saw?
- AAdriana WernerSep 9, 2025
The angle of cut might not be accurate on your RIDGID Saw due to misalignment.

Why is the angle of cut not accurate on my RIDGID Saw?
The angle of cut might not be accurate on your RIDGID Saw due to misalignment.
Why does the RIDGID MS1290LZ Saw power head wobble?
The RIDGID Saw power head wobbles likely due to loose pivot points.
Why does the RIDGID MS1290LZ Saw blade hit the table?
The RIDGID Saw blade hits the table because of misalignment.
| Type | Miter Saw |
|---|---|
| Blade Diameter | 12 inches |
| Arbor Size | 1 inch |
| Motor Power | 15 Amps |
| Amperage | 15 A |
| Voltage | 120 V |
| No Load Speed | 4000 RPM |
| Miter Capacity | 50 degrees left and right |
| Depth of Cut at 45 degrees | 2.5 inches |
| Cord Length | 6 feet |
Defines DANGER, WARNING, CAUTION terms to identify hazard levels.
Essential checks and warnings before initial operation and assembly.
Safety precautions for handling and relocating the saw to prevent injury.
Pre-operation inspection and safety checks to ensure proper function.
Measures to prevent injuries from material binding, slips, or projectiles.
Guidance on planning cuts and using protective gear for personal safety.
Proper attire and PPE recommendations for safe operation.
Steps for preparing the workpiece and saw before making a cut.
Proper techniques for holding and supporting the workpiece during cuts.
Safety measures to follow while the saw is running.
Procedures for safely shutting down and securing the saw after use.
Definitions of common terms used in the manual for clarity.
Details of voltage, amperage, RPM, and motor type for the saw.
Safety guidelines for electrical hookups and servicing the saw.
Explanation of the polarized plug and its correct usage for safety.
Measures to protect the motor from overload and electrical damage.
Recommended wire gauges for extension cords based on length.
List of tools required for setting up and assembling the saw.
Steps and warnings for safely unpacking the miter saw.
Inventory check of included parts and how to identify missing items.
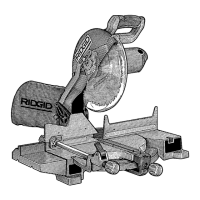
Describes upper/lower guards, table, and fence for safety and support.
Identifies miter/bevel indicators and locking levers for angle setting.
Explains on/off switch, slide lock, and fence lock mechanisms.
Details depth adjustment, arbor lock pin, and warning labels.
Covers switch interlock, carry handles, workpiece clamp, and cord brackets.
Step-by-step guide for safely installing and removing the saw blade.
Instructions for attaching the dust collection system to the saw.
Guide to installing the workpiece clamp accessory for secure holding.
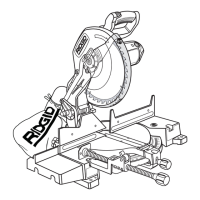
Introduction to the four main controls for adjusting and aligning the saw.
Repositioning the blade insert for alignment procedures.
Fine-tuning slide tubes for blade centering and play reduction.
Ensuring the blade is perpendicular to the fence for miter cuts.
Calibrating the miter scale for accurate angle readings.
Ensuring the blade is perpendicular to the table for bevel cuts.
Calibrating the bevel scale for accurate angle readings.
Positioning insert for minimal tear-out and chip control.
Fine-tuning the miter lock for secure angle retention.
Fine-tuning the bevel lock for secure angle retention.
Adjusting the bevel pivot for smooth operation and stability.
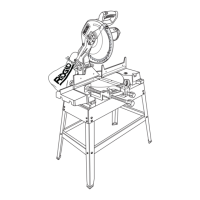
Securely attaching the saw to a workbench for stability.
Methods for securing the saw for portable use and transport.
Essential safety checks to perform before starting any saw operation.
Safety measures against material binding, slips, and projectile hazards.
Guidance for protecting eyes, hands, face, and ears during operation.
Proper clothing, footwear, and PPE for safe operation.
Inspecting and preparing the workpiece before making a cut.
Proper methods for holding the workpiece securely during cuts.
Precautions while the saw is running and after cuts.
Procedures for safely turning off and securing the saw.
Instructions for performing common slide and chop cutting techniques.
Detailed steps for executing a slide cut on the miter saw.
Detailed steps for executing a chop cut on the miter saw.
Correct posture and hand placement for safe operation.
How to set up and execute a miter cut using the saw's scale.
Guide to using miter scales for accurate angle settings.
How to set up and execute a bevel cut using the saw's tilt mechanism.
Techniques for positioning the sliding fence for optimal workpiece support.
Guide to using the bevel scale for precise angle settings.
Techniques for cuts involving both miter and bevel angles.
Procedures for safely cutting warped or bowed workpieces.
Instructions for correctly using the workpiece clamp accessory.
Techniques for supporting workpieces to prevent sag or movement.
How to attach and use an auxiliary fence for extended support.
Using the depth stop for creating dado grooves.
Techniques for cutting base moldings accurately.
Introduction to cutting crown moldings with the miter saw.
Detailed steps for cutting crown molding flat on the saw table.
Techniques for cutting crown molding angled to the fence and table.
Table providing miter/bevel angles for crown molding.
Steps for attaching the laser system accessory to the saw.
How to use the laser for precise cut alignment.
Procedure for replacing batteries in the laser system.
Routine care and cleaning procedures for the miter saw.
Guide to inspecting and replacing motor carbon brushes.
Maintenance and cleaning instructions for the lower blade guard.
Where and how to lubricate the saw's moving parts.
How to check and adjust the motor belt tension.
List of suitable and unsuitable accessories for the saw.
Warnings and instructions for using carbide blades safely.
Common issues and corrective actions for the saw.
Specific solutions for motor-related problems.
Electrical diagram and brake troubleshooting guidance.
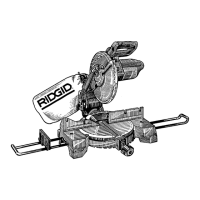
Exploded view and list of parts for the main saw assembly.
Diagram and list of parts for the base and table assembly.
Diagram and list of parts for the table assembly.
Diagram and list of parts for the base assembly.
Diagram and list of parts for the pivot assembly.
Diagram and list of parts for the tube pivot assembly.
Diagram and list of parts for the pivot sub assembly.
Diagram and list of parts for the arm guard assembly.
Diagram and list of parts for the lower guard assembly.
Diagram and list of parts for the motor assembly.
Policy details for satisfaction and return within 90 days.
Scope of the three-year warranty for defects in materials/workmanship.
Instructions for locating service centers and requesting repairs.
What the warranty does not cover and legal disclaimers.