RIGOL Chapter 1 Disassemble and Assemble
1-8 MSO4000/DS4000 Service Guide
To Disassemble the Power Supply and Interface
Board
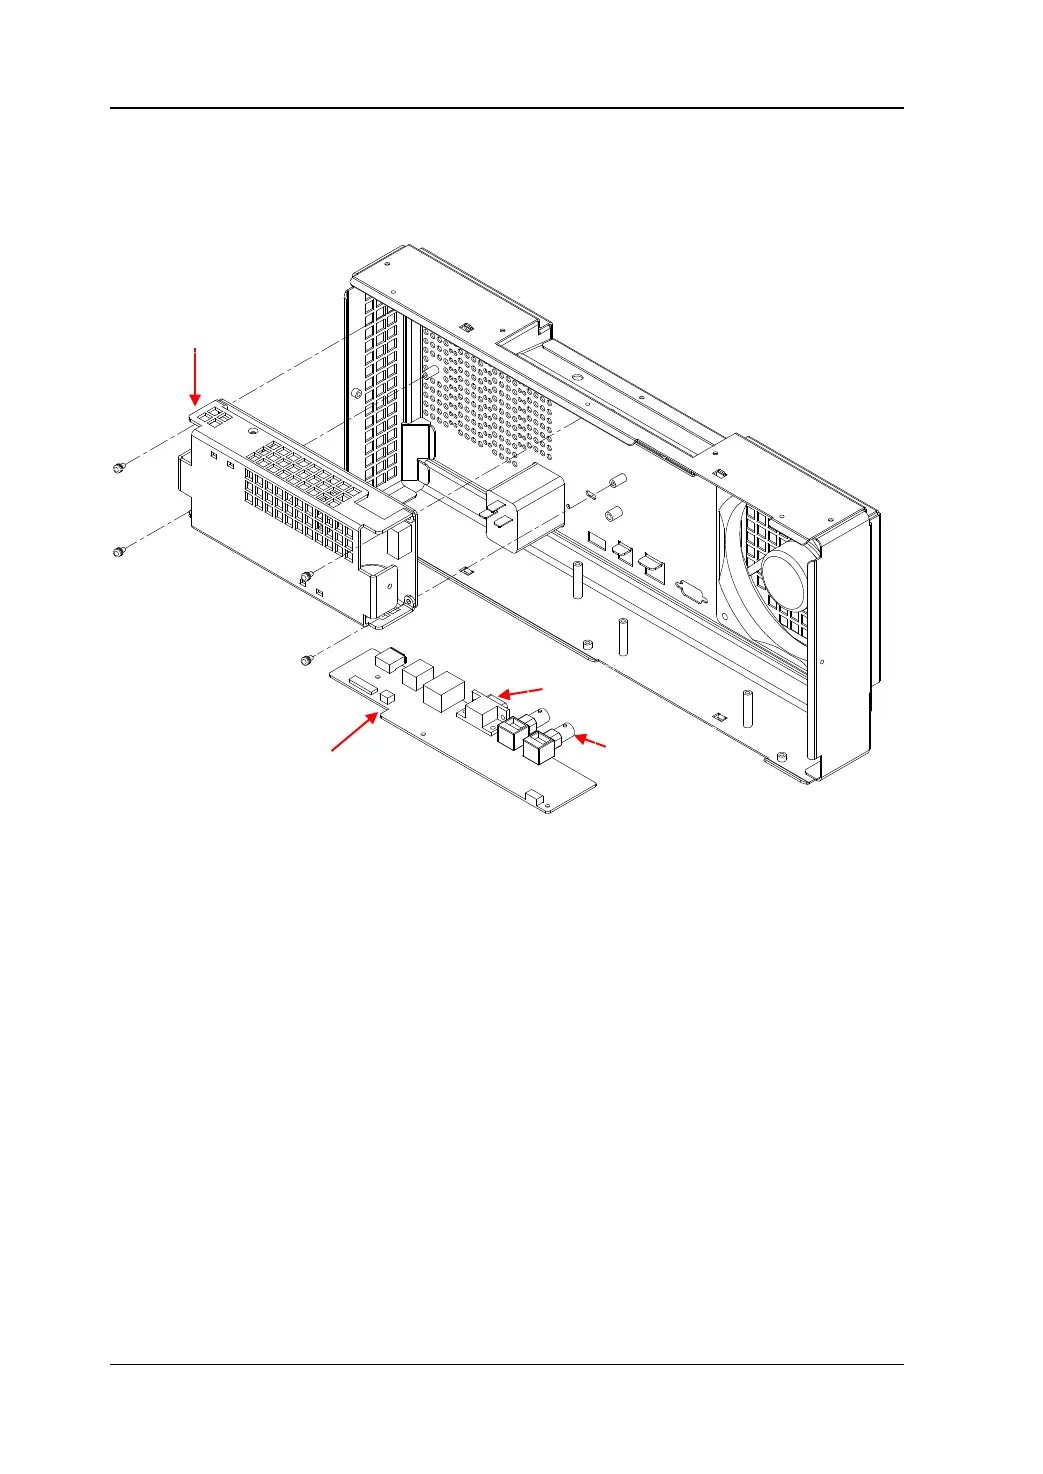
Figure 1-5 To Disassemble the Power Supply and Interface Board
Part Explanations:
① 4 screws (torx pan head screw #FM3*10) fixing the power supply.
② 3 screws (torx pan head screw assembly #FW3*6) fixing the rear interface board.
Disassemble Steps:
1. Remove the 2 nuts and washers at the BNC ports on the rear metal cover using
the BNC socket.
2. Remove the British System DB9 screws on both ends of RS232 using the 5mm
hexagon socket.
3. Remove the 4 screw (①) fixing the power supply using the screwdriver (T10).
4. Remove the 3 screws (②) fixing the rear interface board using the screwdriver
(T10).
5. Remove the power supply module and the interface board gently.
①
①
①
①
②
②