RIGOL Chapter 1 Disassemble and Assemble
1-12 MSO4000/DS4000 Service Guide
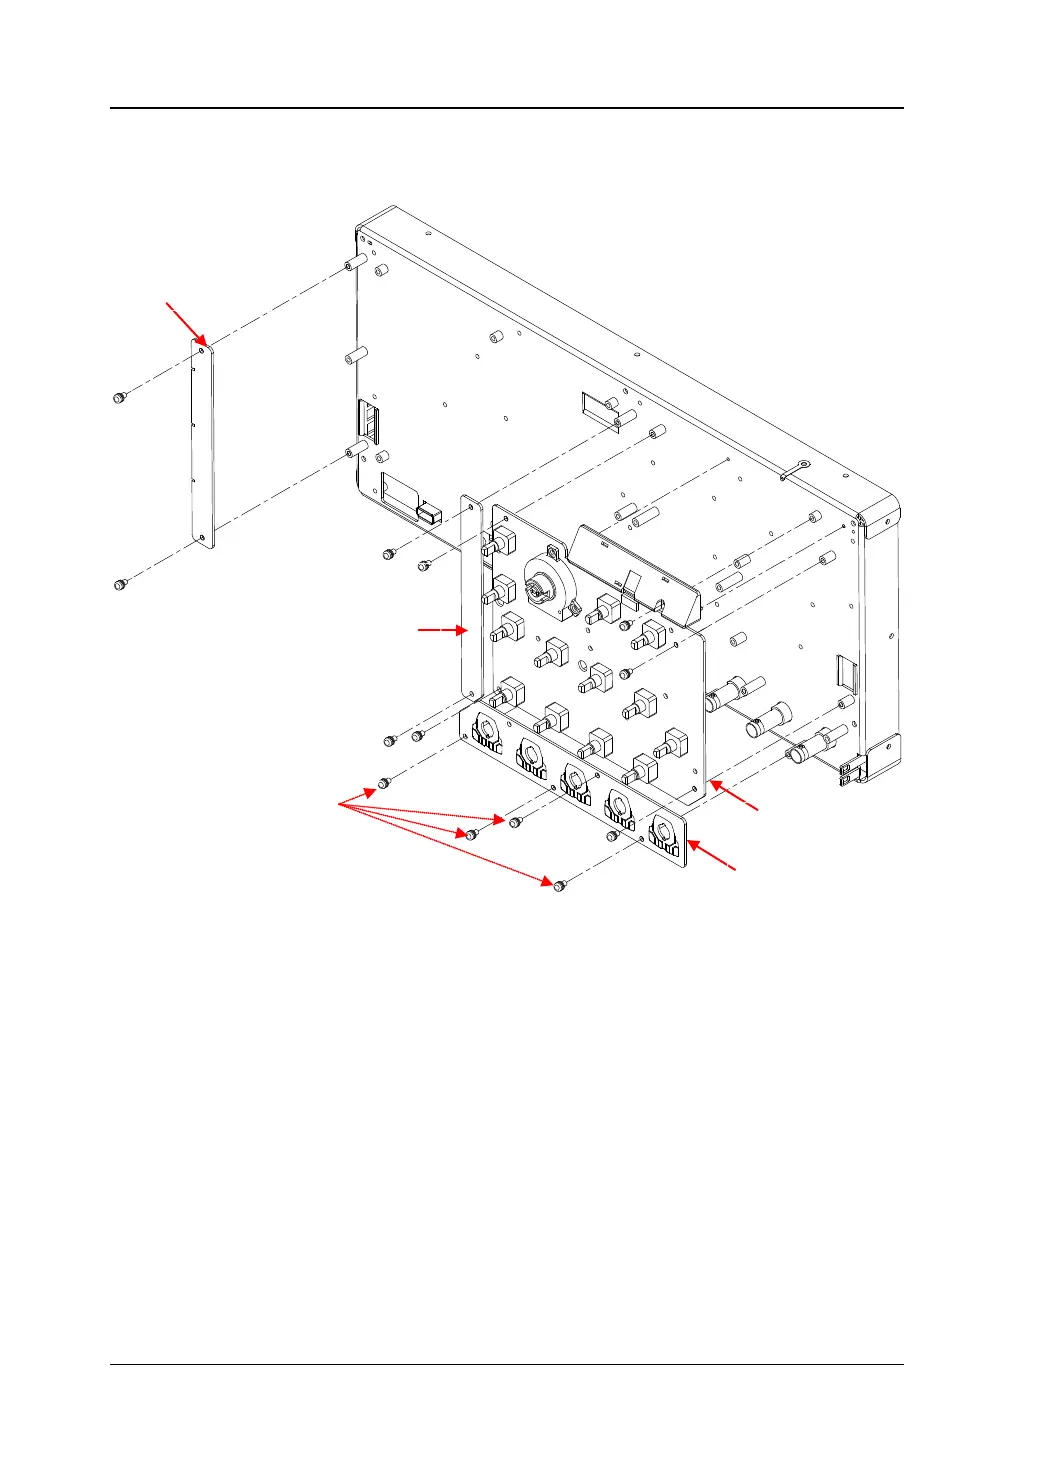
To Disassemble the Keyboards
Figure 1-8 To Disassemble the Keyboards
Part Explanations:
① 9 screws (torx countersunk head screw #FM3*6): 2 screws fixing the left and right
keyboards respectively and 5 screws fixing the main keyboard.
② 4 screws (torx pan head screw #FM3*6) fixing the probe pinboard.
Disassemble Steps:
1. Remove the 4 screws (①) fixing the left and right keyboards using the
screwdriver (T10).
2. Remove the 5 screws (①) fixing the main keyboard using the screwdriver (T10)
(the positions of some of the screws are not marked out in the figure above and
please disassemble them according to their actual positions).
3. Remove the 4 screws (②) fixing the probe pinboard using the screwdriver (T10).
4. Remove the keyboard cables and the probe pinboard cables connected to the
main board.
①
①
①
①
①
①
①
①
 Loading...