EasyManua.ls Logo

ring Video Doorbell 3 Plus - User Manual

ring Video Doorbell 3 Plus
11 pages
Print Icon
To Next Page IconTo Next Page
Loading...
Skip to content
Manuals+
User Manuals Simplified.
Ring Video Doorbell User Manual
Home » Rind » Ring Video Doorbell User Manual
Contents [ hide
1 Ring Video Doorbell 3 Plus User Manual
2 1. Charge the provided battery
2.1 Insert the battery.
3 2. Set up your Video Doorbell in the Ring app.
3.1 Download the Ring app.
3.2 Set up your Video Doorbell near your Wi-Fi router.
3.3 Grab your Wi-Fi password
3.4 Try it out!
4 3. Install your Video Doorbell.
4.1 Select your install height.
4.2 Steps for wiring to an existing doorbell
4.3 Insert the mini-level.
4.4 Install the anchors. (optional)
4.5 Connect the wires. (optional)
4.6 Attach the wire extensions. (optional)
4.7 Screw it in.
4.8 Install the faceplate.
4.9 Secure the faceplate.
4.10 File Downloads
4.11 Related Manuals
Ring Video Doorbell 3 Plus
User Manual
Question and Answer IconNeed help?

Do you have a question about the ring Video Doorbell 3 Plus and is the answer not in the manual?

Summary

Charge the Provided Battery

Insert the Battery

After charging, insert the battery in the bottom of your Video Doorbell until it clicks into place.

Set Up Your Video Doorbell in the Ring App

Download the Ring App

Search for "Ring" in the app stores or visit ring.com/app for setup and management.

Set Up Your Video Doorbell Near Your Wi-Fi Router

In the Ring app, select Set Up a Device, then Doorbells, and follow in-app instructions.

Grab Your Wi-Fi Password

Enter your Wi-Fi password during the in-app setup for a smooth process.

Install Your Video Doorbell

Select Your Install Height

Install the doorbell approximately four feet (1.20m) above the ground for optimal performance.

Steps for Wiring to an Existing Doorbell

Connect the doorbell to your existing doorbell wiring for continuous power.

Remove Your Existing Doorbell (Optional)

Shut off power at the breaker before removing the old doorbell and disconnecting wires.

Configure In-Home Chime

Follow in-app instructions to enable your existing chime or select the "No In-Home Chime" option.

Installation Details

Insert the Mini-Level

Use the mini-level to ensure your Video Doorbell is installed evenly.

Install Anchors (Optional)

For stucco, brick, or concrete, drill holes and insert anchors for secure mounting.

Connect the Wires (Optional)

Connect wires from your wall to the screws on the back of the doorbell.

Attach Wire Extensions (Optional)

Use provided wire extensions and nuts if connecting wires proves difficult.

Final Assembly Steps

Screw It In

Feed wires into the wall and secure the doorbell using four screws.

Install the Faceplate

Slot the faceplate into the top of the doorbell and click it into place.

Secure the Faceplate

Insert and tighten the security screw at the bottom of the faceplate.

File Downloads

Ring Video Doorbell 3 Plus User Manual

Download the official user manual for the Ring Video Doorbell 3 Plus.

Overview

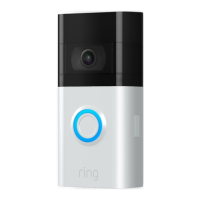
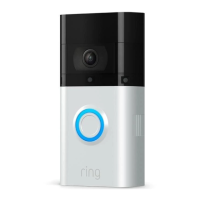
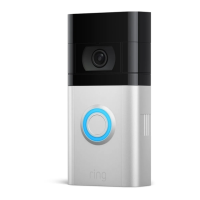
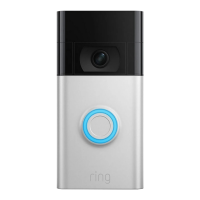
The Ring Video Doorbell 3 Plus is a smart home security device designed to provide enhanced monitoring and communication at your doorstep. This user manual outlines the steps for setting up, installing, and maintaining the device, ensuring optimal performance and user experience.

Function Description

The primary function of the Ring Video Doorbell 3 Plus is to allow users to see, hear, and speak to visitors from anywhere using their smartphone, tablet, or PC. It features a camera that captures video of the area outside your door, motion detection capabilities to alert you to activity, and two-way audio communication. When someone presses the doorbell button, or when motion is detected within its configurable range, the device sends an alert to your connected smart device. This enables you to respond to visitors, even when you're not at home, providing an added layer of security and convenience. The device is compatible with existing doorbell wiring for continuous power, but also operates on a rechargeable battery, offering flexibility in installation locations. It can also be integrated with existing in-home chimes, or used with Ring Chime or Chime Pro accessories for audible alerts within your home.

Usage Features

The Ring Video Doorbell 3 Plus offers a range of features designed to make home monitoring intuitive and effective:

  • Battery Charging: The device is powered by a rechargeable battery. To begin, the provided battery must be fully charged using the orange charging cable. A small light on the top of the battery will glow green once charging is complete, indicating it's ready for use. Once charged, the battery is inserted into the bottom of the Video Doorbell until it clicks securely into place.
  • App-Guided Setup: The setup process is primarily guided through the Ring app, which is available for download on both the Apple App Store and Google Play Store. Users are instructed to search for "Ring" or visit ring.com/app to download the application.
  • Device Pairing: Within the Ring app, users select "Set Up a Device" and then "Doorbells" to initiate the pairing process. It's recommended to perform this setup near your Wi-Fi router to ensure a stable connection during the initial configuration. The app will prompt for your Wi-Fi password, which is crucial for connecting the device to your home network.
  • Live View: After successful setup, users can push the button on the front of the Video Doorbell to access a live video feed from the camera within the Ring app. This allows for real-time monitoring of your doorstep.
  • Optimal Installation Height: For optimal performance, the Video Doorbell should be installed approximately four feet (1.20 meters) above the ground. This height ensures the camera's field of view and motion detection range are effectively utilized.
  • Wedge Mount for Angled Installation: If connecting to existing doorbell wiring that is higher than four feet, and thus limits the installation location, a provided wedge mount can be used to angle the Doorbell downwards, maintaining the optimal viewing angle.
  • Existing Doorbell Wiring Compatibility: The device is compatible with existing doorbell systems supplying 8-24 volts AC at 50 or 60Hz, 40VA max. Users are advised to shut off power at the breaker before removing their existing doorbell and disconnecting its wires. It is crucial not to wire the Video Doorbell to a DC-powered intercom system or other DC power source.
  • In-Home Chime Integration: If desired, the existing in-home chime can ring when the Ring Doorbell button is pressed. The Ring app provides instructions for this integration during setup. If an in-home chime is not present, or if the "No In-Home Chime" option is selected during setup, users can consider purchasing a Ring Chime or Chime Pro for audible alerts within their home. Wiring settings can be adjusted post-setup via Device Settings > Chime Connection.
  • Mini-Level for Accurate Installation: A mini-level is provided to ensure the Video Doorbell is installed evenly. It is inserted into the device before mounting.
  • Anchors for Masonry Installation: For installation on stucco, brick, or concrete, four drill holes should be marked. A provided masonry drill bit is used to drill these holes, and then the included anchors are inserted to secure the device. For wood installations, anchors are not required.
  • Wire Connection: The wires coming from the wall connect to the screws on the back of the Video Doorbell. The order of connection for the wires does not matter.
  • Wire Extensions: If there is difficulty connecting the wall wires to the Video Doorbell, provided wire extensions and wire nuts can be used to facilitate the connection.
  • Secure Mounting: After connecting the wires and feeding them into the wall, the Video Doorbell is secured to the wall using four screws.
  • Faceplate Installation: One of the provided faceplates is slotted into the top of the Video Doorbell and clicked into place to complete the aesthetic.
  • Security Screw: Finally, a security screw is inserted into the bottom of the faceplate and tightened with the star-shaped end of the provided screwdriver bit, securing the faceplate and completing the installation.

Maintenance Features

Maintaining your Ring Video Doorbell 3 Plus primarily involves ensuring its power source is adequate and keeping the software updated:

  • Battery Management: For battery-powered installations, regular charging of the battery is essential. The Ring app will typically notify you when the battery level is low, prompting you to remove and recharge it using the provided orange cable. A fully charged battery ensures continuous operation and reliable performance.
  • Software Updates: The Ring app automatically manages software updates for your Video Doorbell. These updates often include performance improvements, bug fixes, and new features, ensuring your device operates optimally and securely. It's important to keep your Ring app updated on your smartphone or tablet to receive these updates and maintain compatibility.
  • Cleaning: Periodically, the camera lens and the surrounding area of the doorbell may accumulate dust or dirt, which can affect video quality and motion detection. Gently wiping these surfaces with a soft, clean cloth can help maintain clear visuals. Avoid using harsh chemicals or abrasive materials that could damage the device.
  • Wi-Fi Connection Stability: A stable Wi-Fi connection is crucial for the doorbell's functionality. If you experience connectivity issues, checking your Wi-Fi router's placement, signal strength, and ensuring there are no obstructions can help. The Ring app often provides tools to diagnose and troubleshoot connectivity problems.
  • Troubleshooting: The Ring app and the Ring support website (ring.com/help) offer extensive troubleshooting guides and FAQs for common issues. For more complex problems, Ring's customer support is available via phone, with specific numbers provided for various regions (US, Canada, Worldwide, AU, NZ).
  • Warranty Information: Users can review their warranty coverage by visiting www.ring.com/warranty. Understanding the warranty terms is important for potential repairs or replacements.
  • Accessory Management: If using Ring Chime or Chime Pro, ensure these accessories are also properly maintained and connected to your Ring system for seamless integration and alerts.
  • Physical Inspection: Occasionally, a physical inspection of the doorbell and its wiring (if hardwired) can help identify any loose connections or potential damage that might affect its operation. Always ensure power is off at the breaker before inspecting wiring.

ring Video Doorbell 3 Plus Specifications

General IconGeneral
Video Resolution1080p HD
Field of View160° horizontal
Vertical Field of View84° vertical
AudioTwo-way audio with noise cancellation
PowerRechargeable battery
Connectivity802.11 b/g/n Wi-Fi connection @ 2.4GHz
FeaturesAdvanced Motion Detection
Night VisionYes
CompatibilityiOS, Android
Operating Conditions-5°F to 120°F (-20.5°C to 48.5°C), Weather Resistant

Related product manuals