NeoRIB2312installationguide:12148-D04-19|17
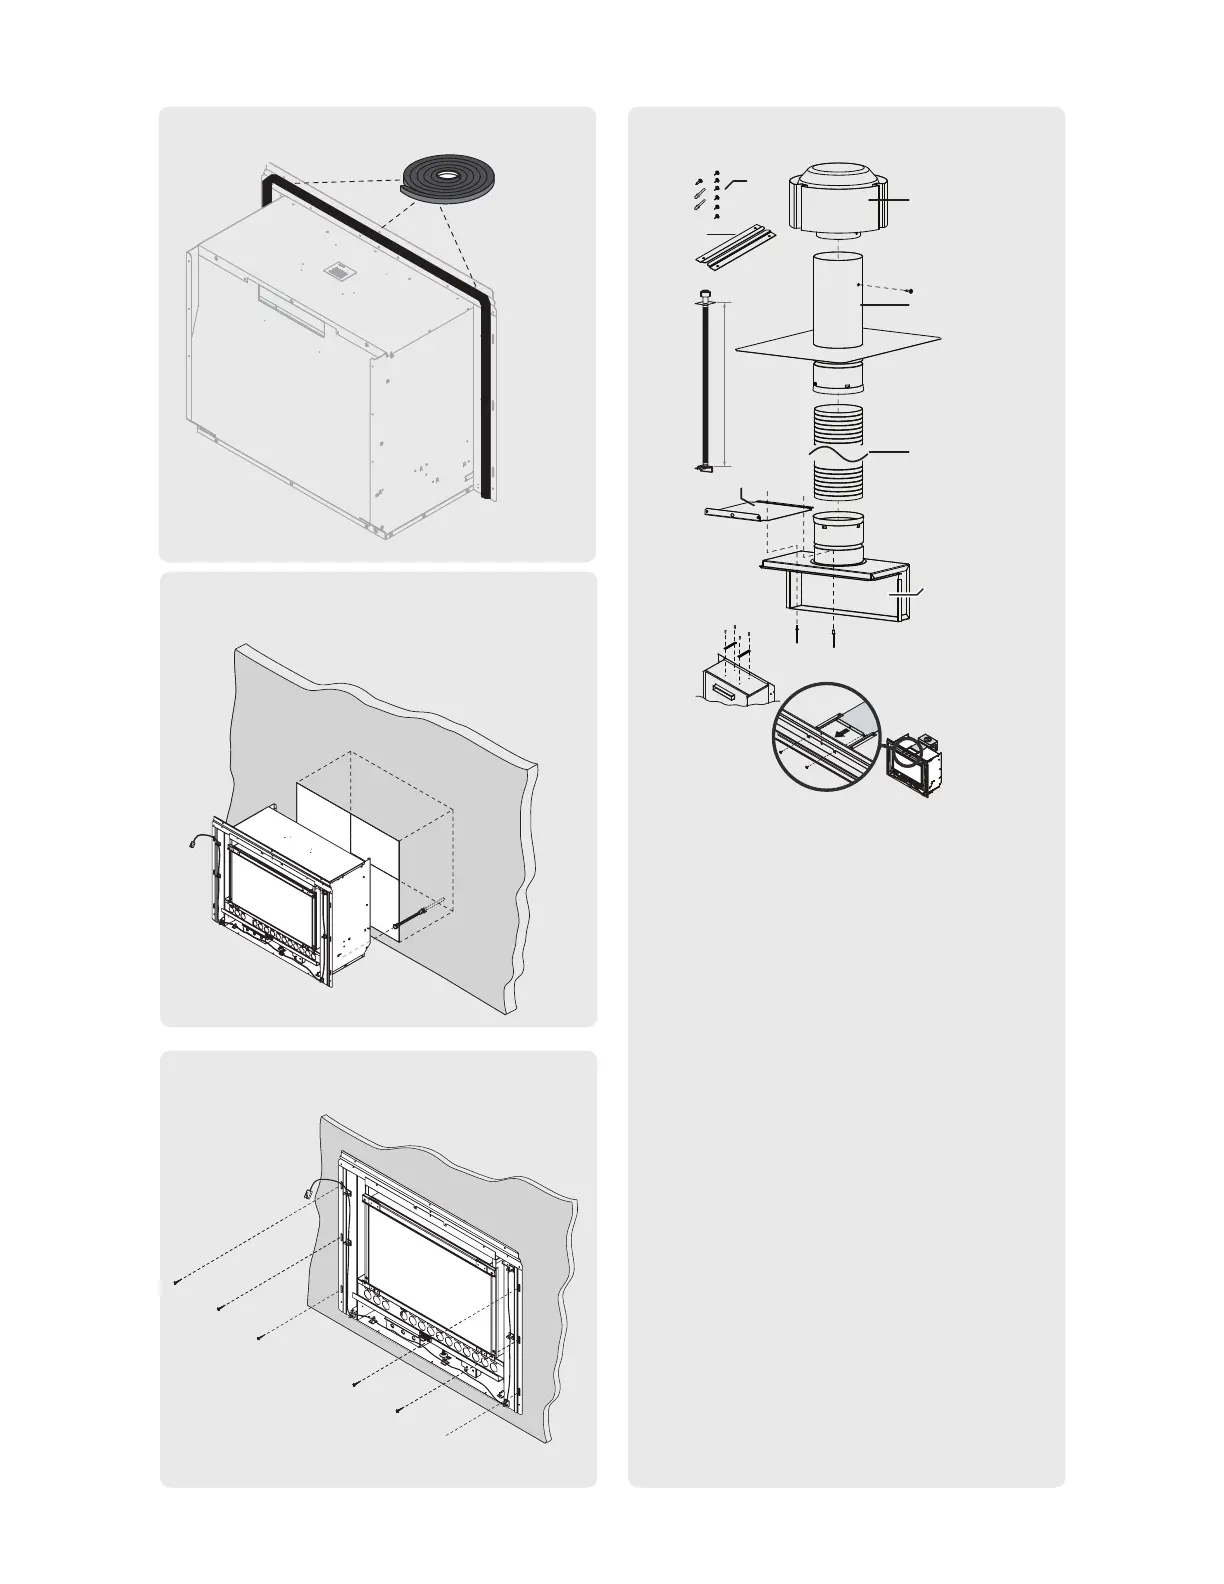
4. Preparing the engine
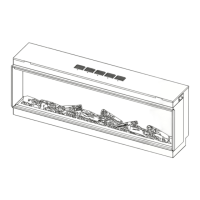
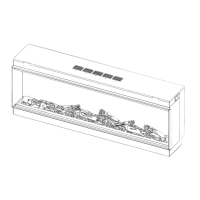
7. Inserting the engine into the fireplace.
10. Securing the heater
3.6 m
Fixings
R1760-2
Chimney cowl
Ø 100 mm
Guide rails
R1760-3
Flexi flue chimney
flashing plate
(400 x 300 mm)
R1760-6
Aluminium flexi flue
3.6 m
Guide plate
Flexi flue spigot adaptor
Attaching the flexiliner flue to the unit
1. Attach the guide rails to the heater
using the predrilled holes and four
screws.
2. Align the guide plate with the guide
rails and slide the flue assembly
forward until the front tab of the guide
plate is fully forward and against the
rear of the flange at the top of the
heater.
3. Ensure the guide plate is securely
fastened with two screws to the flue
access plate.
 Loading...