Installation and Programming Manual 2-5
Wiring the Zone Expansion Module(s)
TERMINALS COMMENTS
DIP Switches
each Zone Expansion Module must be given a unique I.D. number
identifying it to the system; if not yet done, use the table on page 2-4 to set
the DIP switches appropriately; the first Expansion Module must be given
the I.D. 01; the second I.D. 02, etc.
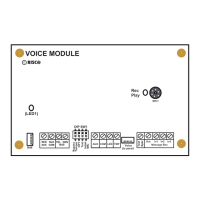
Bus Terminals
AUX (Red) COM (Blk)
BUS (Yel) BUS (Grn)
the first four terminals at the left of the Zone Expansion Module are for the
connection to the panel’s 4-wire BUS; use a quality 4-conductor cable with
an adequate gauge size to accommodate any voltage drops which may
occur when multiple modules and long wire runs are employed (see
Figures 2-5 and 2-6, on pages 2-11 and 2-11)
additional Zone Expansion Modules may be connected to the system at
any available point on the Expansion Bus
the maximum wire run permitted is 1000 feet for all legs of the BUS
depending on the cabinet housing the panel, it may be possible to mount
one or more Zone Expansion Modules inside (see Figure 2-1 on page 2-9)
if necessary, refer to the figure on page 1-6 for the "big picture"
Zone Terminals
Z1 through Z8
(8-Zone Expander)
connect the wiring for up to 8 hardwired zones using the wiring of your
choice (e.g. twisted pair, 4-conductor cable)
each zone must be wired to the appropriate zone terminal and the
adjacent common (COM) connection; for example, wire Zone 1 to the Z1
and COM terminals; wire Zone 2 to Z2 and the same (COM) terminal
for supervision against short circuits, it's recommended that you use a
2200Ω End-of-Line resistor (supplied) at the far end of each hardwired
zone (see Figure 2-4 on page 2-10 for examples of zone wiring)
unused zones must be terminated according to how the zone is
configured in programming (see the Zone Programming section on page
3-23)
for intrusion detectors requiring power (e.g. PIRs, photoelectric systems,
certain shock sensors, audio switches), you may want to incorporate the
zone wiring and the power wiring in the same cable; if so, be sure you
choose a wire gauge (e.g. 22-18) which takes into account the number of
detectors and the amount of wire required
only 4-wire Smoke Detectors are permitted on any zone
for proper 4-wire Smoke Detector supervision, a Power Supervision Relay
is required; wire the relay according to the layout in Figure 2-7 (on page 2-
12); by doing so, the loss of power to the detector(s) will de-energize the
relay, cause a break in the zone wiring, and a subsequent “Fire Trouble”
indication generated at the panel
Power to Auxiliary Devices
Continuous Auxiliary Power
AUX COM
(+) (–)
wire these terminals to power PIRs, glass-break detectors (4-wire types),
audio switches, photoelectric systems, and any device whose operation
requires a continuous supply of 12 Volts DC see Figure 2-5 on page 2-11
do NOT use these terminals to power Smoke Detectors
when many auxiliary devices are employed in an installation, consider the
use of the optional Power Supply Expansion Module
Power to 4-Wire
Smoke Detectors
Switched (Interruptible)
Auxiliary Power
S.AUX COM
(+) (–)
wire these terminals to power Smoke Detectors (4-wire types, ONLY) and
any device whose operation requires resetting after an alarm condition
(see Figure 2-7 on page 2-12)
do NOT use these terminals to supply power to devices requiring
continuous power like PIRs, audio switches, 4-wire glass break detectors,
photo-electric systems, etc.; you must use the continuous (non-
interruptible) supply discussed above
observe the wiring guidelines mentioned above, along with any applicable
requirements for Smoke Detectors in your locale