71
How to Use Useful Functions >> Printing Function Operations
3
3
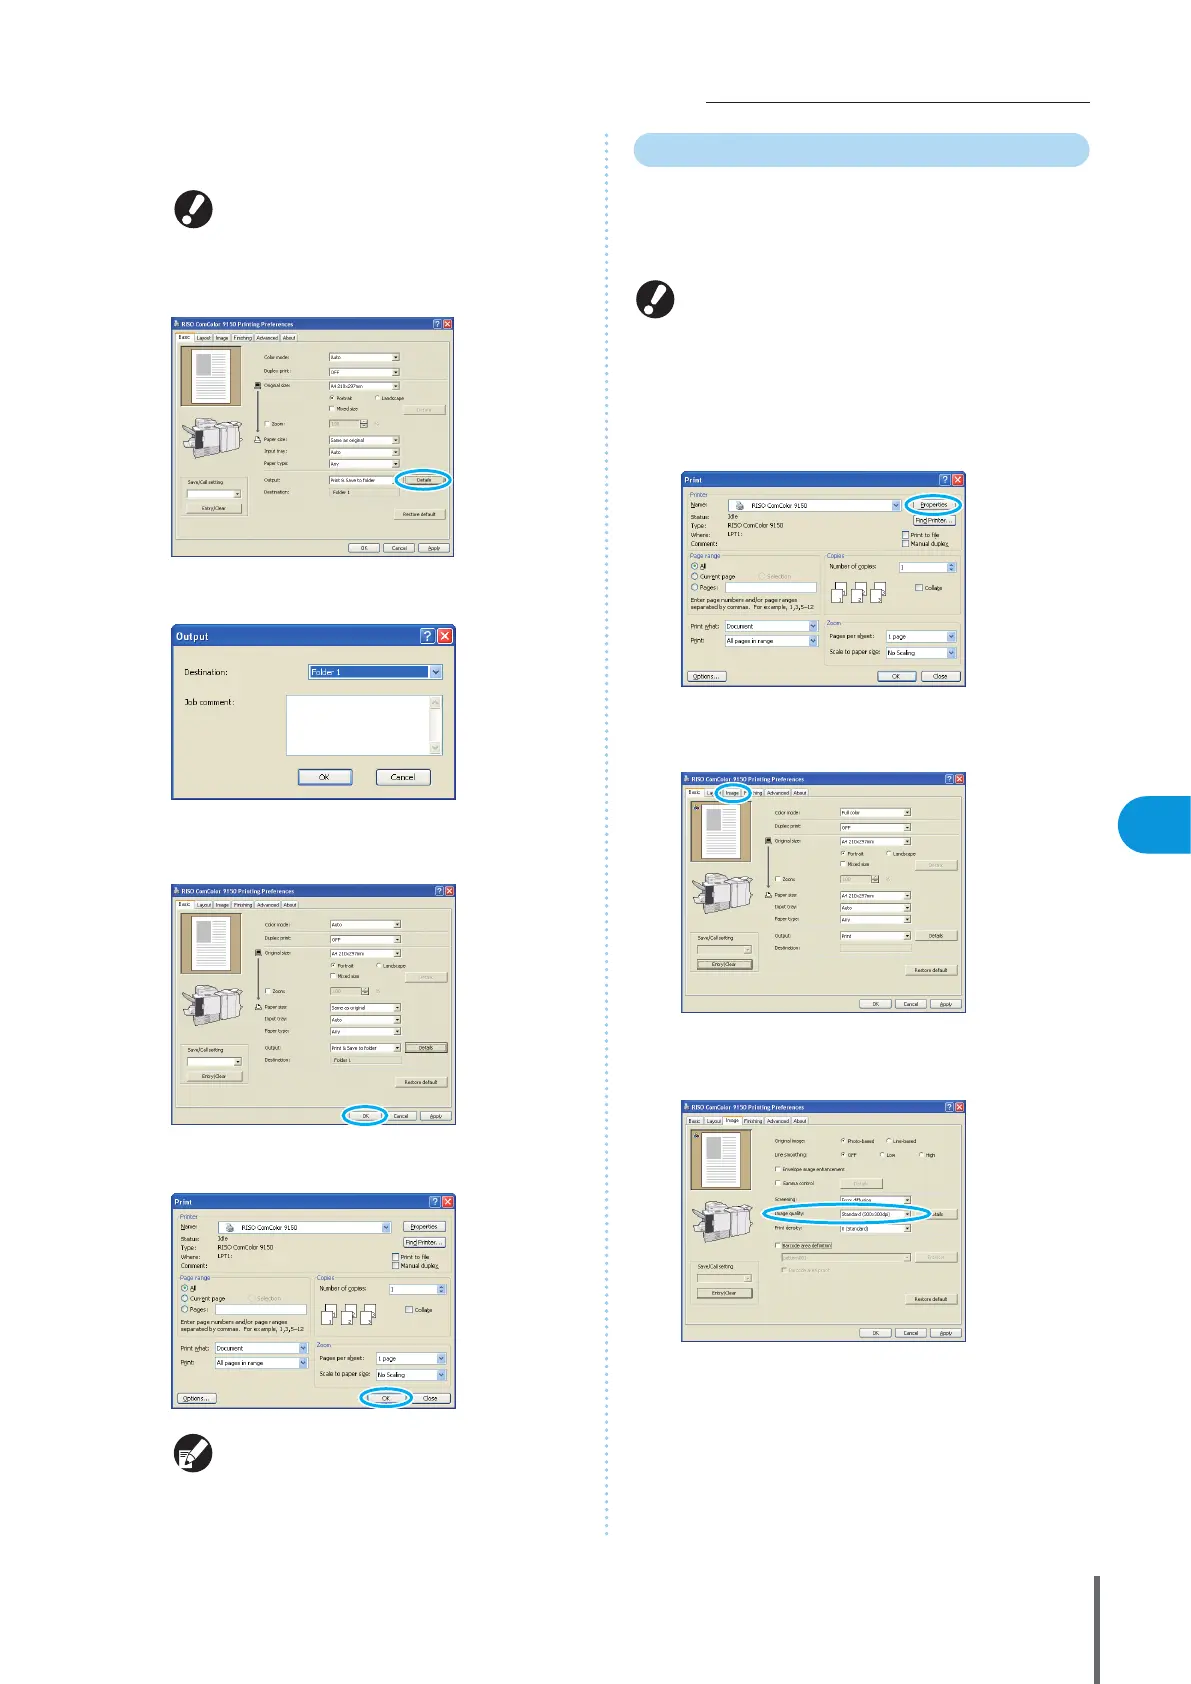
Click [Details] and select the destination in the
pull-down menu.
• [Destination] indicates the storage destination
specied in advance by a user with administrator
rights.
• If you select [Save to USB ash drive], the [Save to
USB ash drive] screen appears.
You can enter notes about the job in [Job comment], as
desired.
4
After input is nished, click [OK].
Complete other settings as needed.
5
In the printing dialog box, click [OK] (or [Print]).
• Jobs stored in job folders or USB folders can be
accessed on the folder screen in printer mode.
(See p.79.)
• Printing conditions (printer driver settings) are
also saved.
Adjusting the Image Quality and Printing
Specify the image resolution. You can adjust the amount of
ink used and the size of original data. Specify the
resolution if you want to improve processing speed and
use less ink rather than improve image quality.
• If you use less ink for printing, print density becomes
lower, and neutral colors become uneven.
• If you make original data smaller for printing, the
network communication speed increases, but neutral
colors become uneven.
1
Click [Properties] (or [Preferences]) in the printing
dialog box of the source application.
2
Click the [Image] tab.
3
Select [Standard (300x300dpi)] in the [Image
quality] pull-down menu.
ComColor Series Basic Guide 06
 Loading...