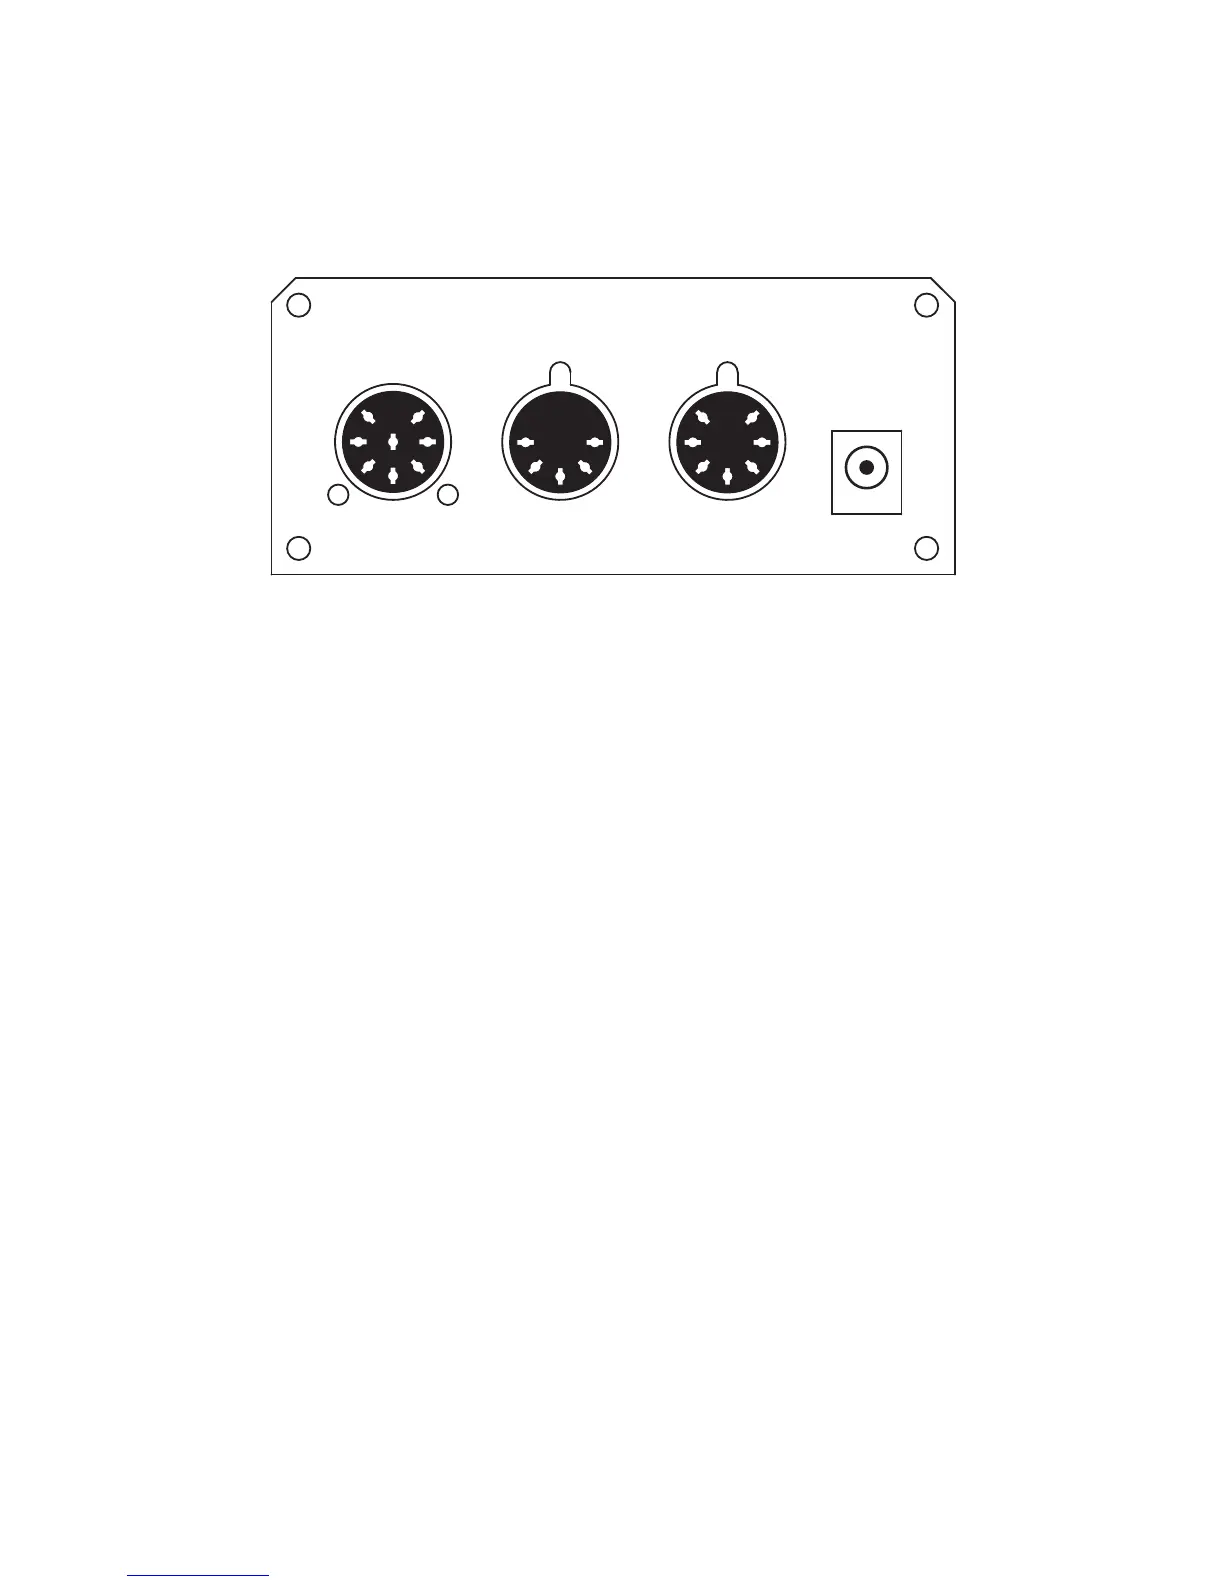
Back Panel
To Amplifier – Connect your custom amplifier interface cable here.
Use the cable end that has a yellow label reading “Rack Gizmo / Amp
Gizmo.” The other end of the cable plugs into your amp’s footswitch
jack. Before connecting, make sure that you have the cable that’s
made specifically for your amp, or the ¼” adapter cable if your amp
has ¼” footswitch jack(s). Cables are available for a variety of
amplifiers. Check our website for a list of currently available cables.
MIDI Thru/Out – All of the MIDI commands that are received at the
MIDI In jack are sent out through this jack. This jack also doubles as a
MIDI output when transferring SysEx data over MIDI. See the MIDI
Usage section for more details.
MIDI In – Jack for incoming MIDI commands. Connect your MIDI foot
controller here. The Mini Amp Gizmo will phantom power a
compatible MIDI controller if you use a 7-pin MIDI cable. The AC
adapter provided with the Mini Amp Gizmo can phantom power
many MIDI controllers provided that they can run on a 9V DC supply
and draw 250mA or less. Moving to a higher capacity power supply
will allow you to phantom power MIDI controllers with higher
current requirements – just add the current requirement of the
device with the Mini Amp Gizmo’s requirement (250mA) and make
sure your adapter can supply at least that amount of current.
 Loading...