DAY-TO-DAY OPERATION
Adjust the feet and the seat pad
continued from preceding page
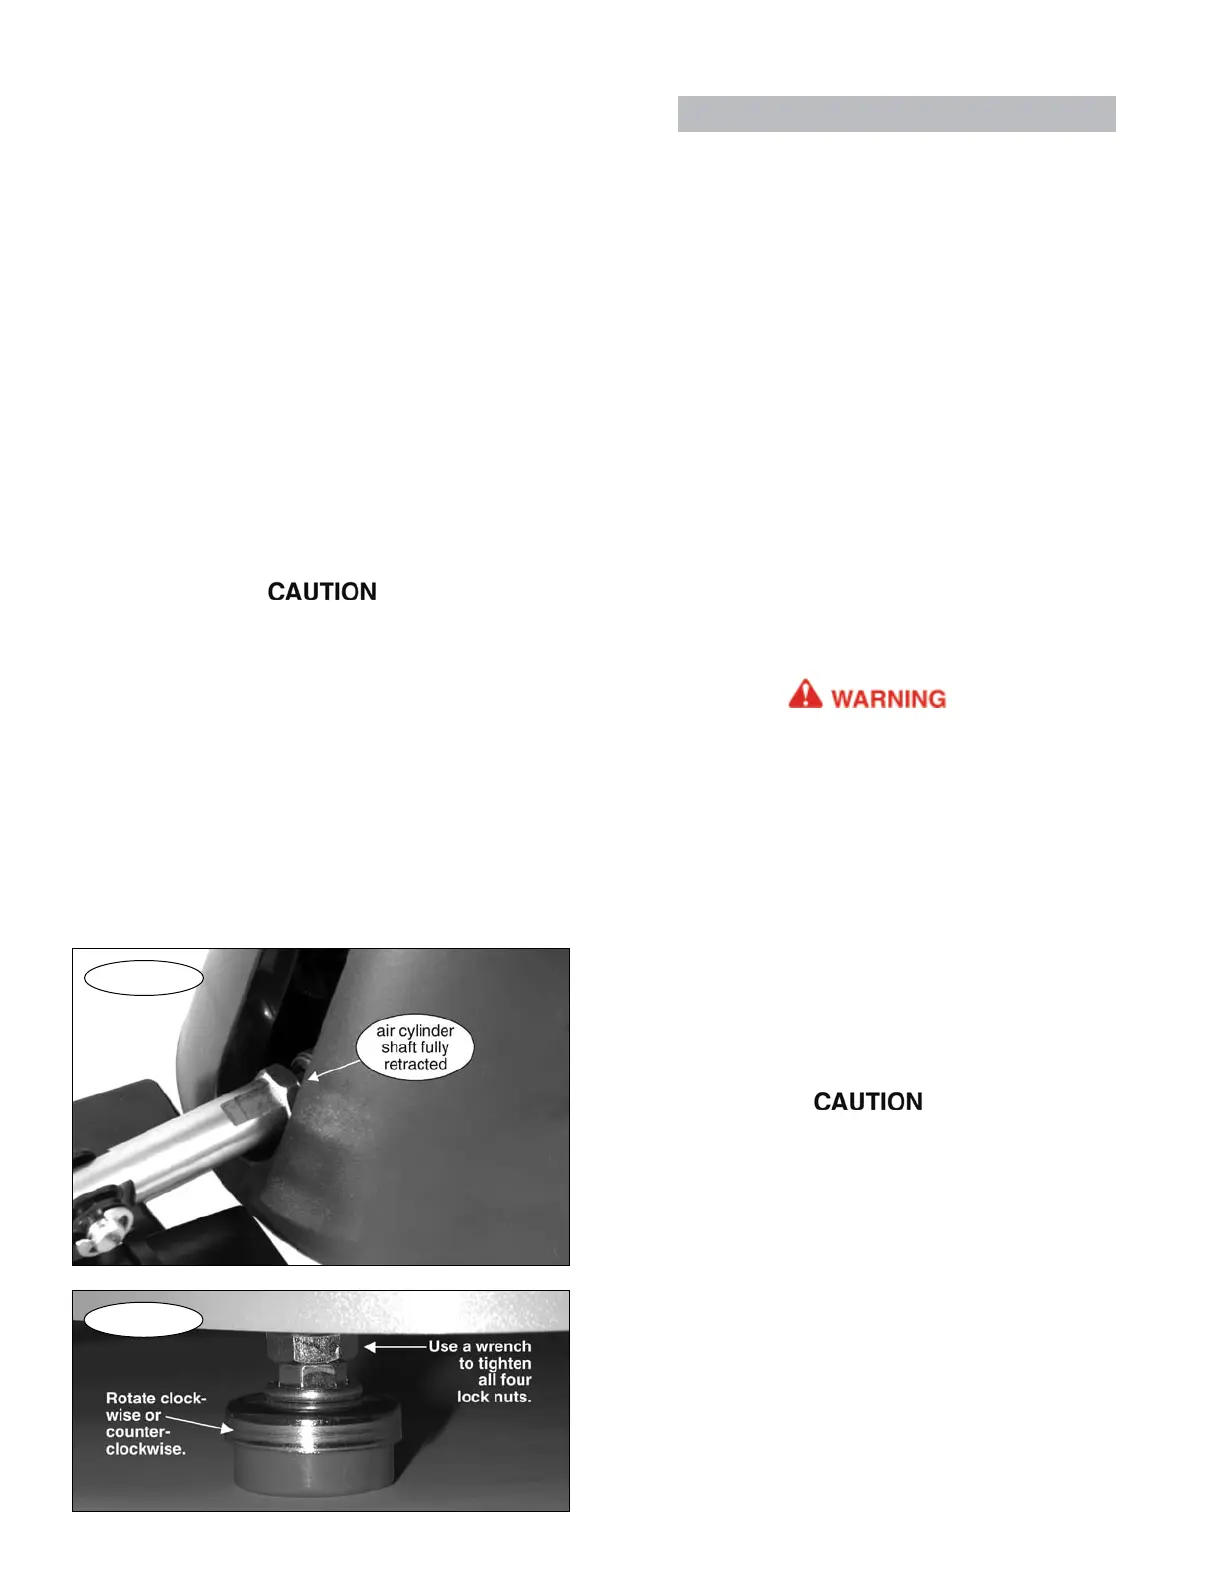
2. Ifnecessary,adjustthefeetonthebottomofAdd-
aBRAKE(oneateachcorner—Figure10)upordown:
with a wrench, loosenthe lock nutat thetop ofeach
foot,andthenturnthemclockwiseorcounterclockwise.
Makecertainthatallfourfeetaremakingcontactwith
the floor of the vehicle, and that AddaBRAKE is sta-
tionary — it should not rock back and forth. (In some
vehicles, it maybenecessarytoremoveoneormore
ofthefeet,oritmaybenecessarytoaddoneormore
optionalfootextensions—seethe“OptionalEquipment”
sectioninthismanual.)
3. With a wrench, tighten the lock nut at the top of
eachfootextension(Figure10).
Unless the lock nuts are tightened with a wrench,
the feet may vibrate loose during towing, and Add-
aBRAKE may shift from the installed position. Un-
less AddaBRAKE is properly positioned, it will not
function at full capacity — the pedal clamp will not
apply the proper braking pressure against the brake
pedal.
4. Findabracingpointonthefrontofthedriver’sseat
for the adjustable seat pad — the seat pad stabilizes
AddaBRAKE, keeping it down as it presses against
thebrakepedal.Pressthefrontoftheseattofindthe
firmestpointfortheseatpad.
Figure 10
Note: do not brace the adjustable seat pad against
plastic trim. The plastic will crack when AddaBRAKE
is activated.
Nowthatyouhaveselectedabracingpointforthe
adjustableseatpad,loosentheadjustmentknob(see
“Components,”pagetwo)atthebackoftheseatpad,
andmovetheseatpadupordownuntilthetopofthe
seatpadmatchestheheightofthebracingpoint.
Note: the seat pad may be rotated 180 degrees or
removed entirely for a better fit. There are also two
anchor holes that the adjustment knob on the seat pad
may be threaded into, for additional fit options.
Oncetheheightisadjusted,tightentheadjustment
knobontheseatpad.
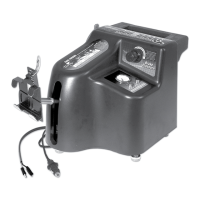
5. Next, slide the driver’s seat forward, until it just
touchestheadjustableseatpad.Ifnecessary,allowa
smallgap,ratherthanallowingAddaBRAKEtodepress
thebrakepedal.MakecertainthatAddaBRAKEisnot
depressingthetowedvehicle’sbrakepedal.
The driver’s seat must not be too far forward,
to the extent that the AddaBRAKE pedal clamp is
depressing the towed vehicle’s brake pedal.
If the brake pedal is depressed, the brakes will
be applied continuously, which will cause severe
tire and/or brake system damage, as well as other
consequential, non-warranty damage.
Failure to follow these instructions may cause
property damage, personal injury or even death.
Step C
Plug in the power cord
Check the 12-volt outlet socket before plugging
in the AddaBRAKE 12-volt power cord, to make cer-
tain that the socket has been wired correctly. The
contact point at the bottom of the socket should
be positive, and the outer shell around the top of
the socket should be negative. If the positive and
negative connections have been reversed, the fuse
in the AddaBRAKE power cord will blow when the
cord is plugged into the 12-volt outlet.
1. Plugthe12-voltpowercordintothe12-voltoutlet,
andsecureitbypressingthecordlock(Figure11)into
the12-voltoutlet.
continued on next page
Figure 9
14