3 Assembly
24
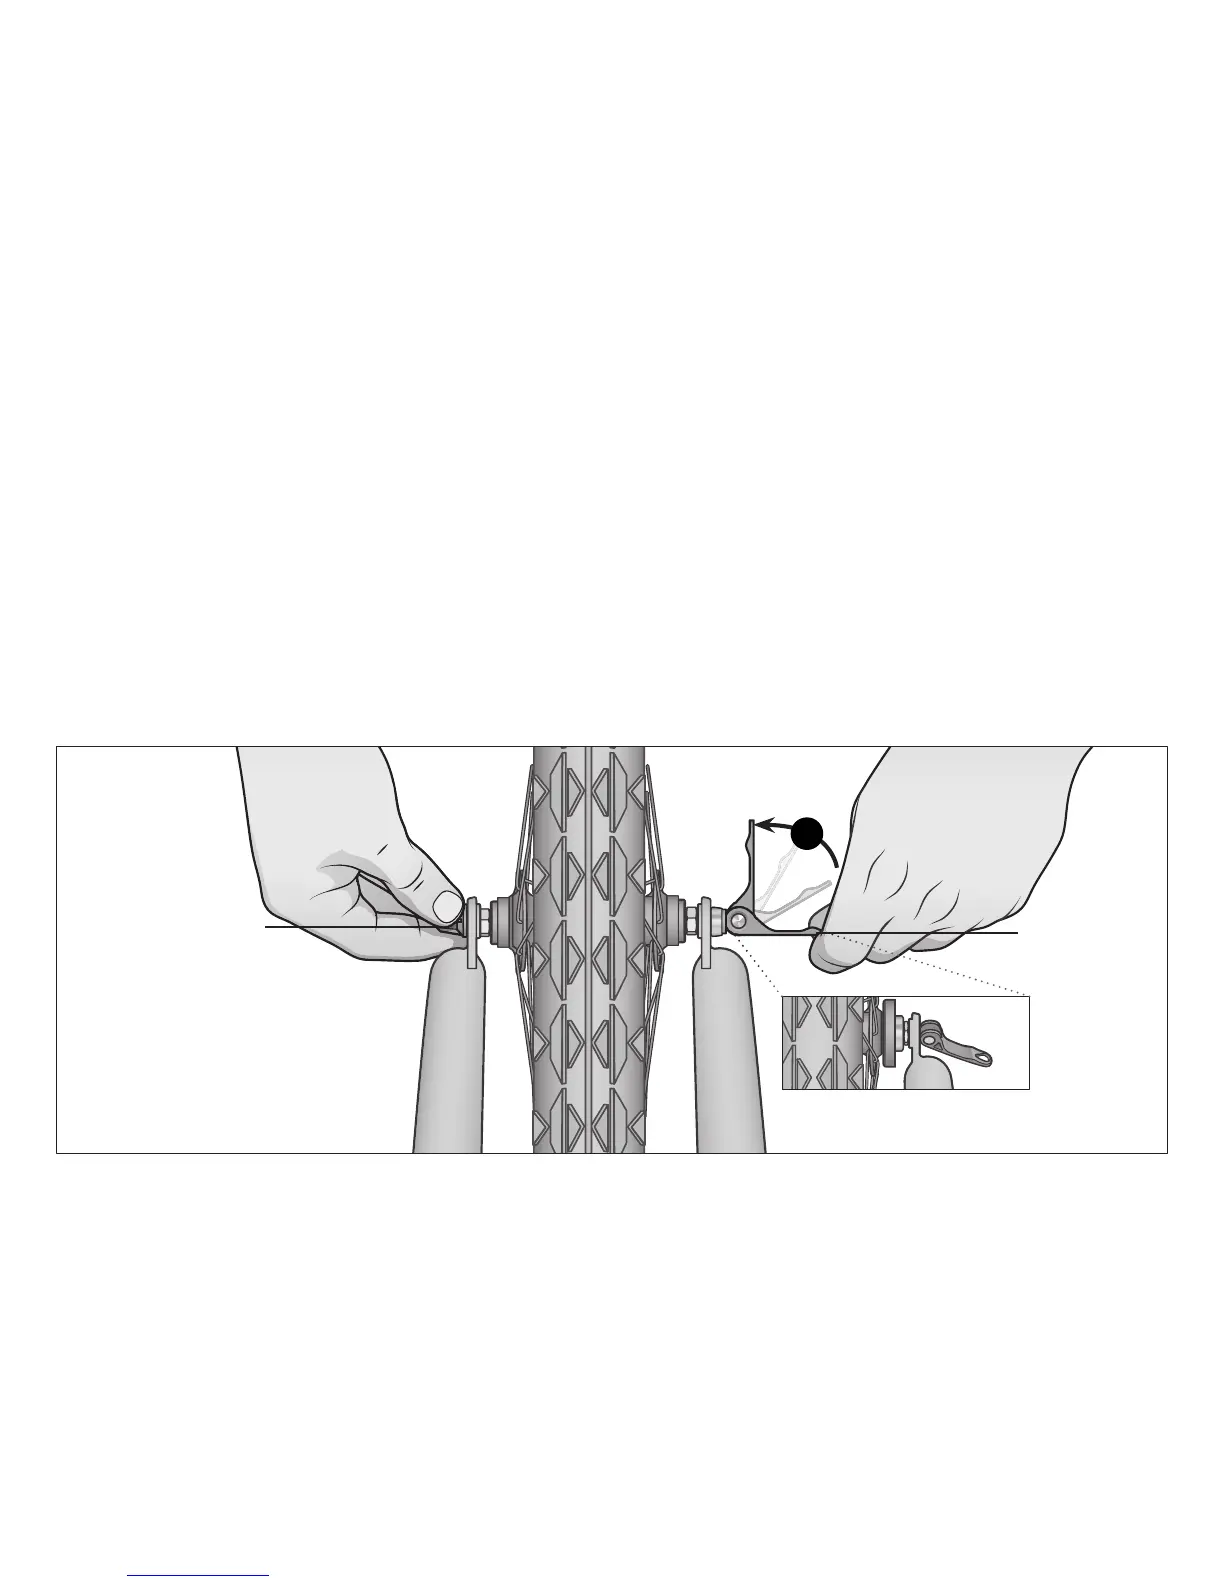
Figure 3.13
❼ Movethequick-releaseleverintotheopenposion.With
onehandonthequick-releaseleverandonehandonthe
adjustmentnut,starttohandghtentheadjustmentnut
unlyoustarttofeelsomeresistanceagainstthefork.
Figure 3.13
❽ Trytoclosethequick-releaselever.Ifitcloseseasily,open
itupandghtentheadjustmentnutfurther.Ifitistoo
diculttoclose,openthequick-releaseleverupand
loosentheadjustmentnutalileandtryagain.Do not
aempttoghtenbyturningthequick-releaselever.The
quick-releaseleverisforclosing,theadjustmentnutisfor
adjusngthetension.
Important! Youshouldfeelresistancewhenyouclose
thequick-releaseleverthatshouldleaveatemporary
impressiononyourngers.Openandclosethehandleto
ensurethewheelissecurelylockedinplace.
❾ Re-checkthatthehandlebarsareperpendiculartothefront
wheel.Adjustifneeded.
Quick-release
leverinclosed
posion
Important! Onlyghten
thequick-releasewiththe
adjustmentnut.
Quick-release
leverinthe
openposion
7