Assembly 3
25
25
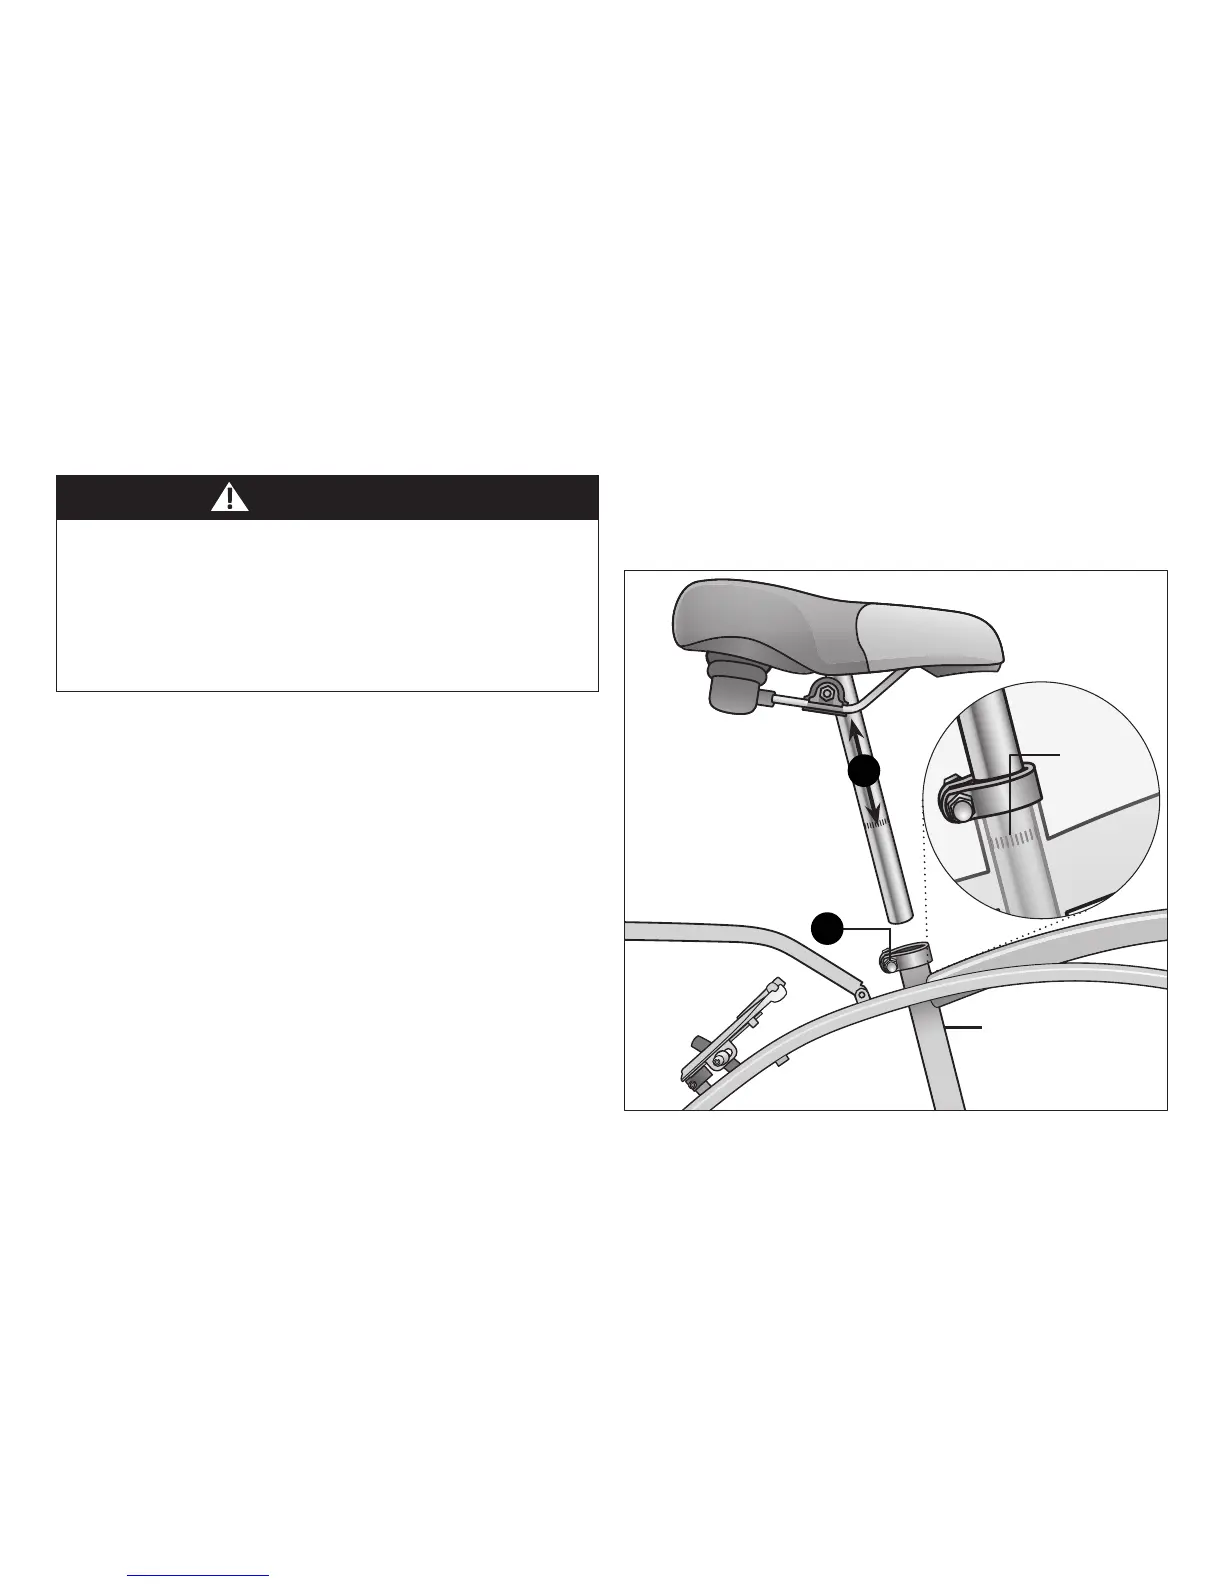
Figure 3.14
ATTACH THE SEAT
Improperlyadjustedseatheightcouldaecttherider’sability
toreachthehandlebarandpedalsmayresulnginunexpected
movement,lossofcontrolandseriousinjuryordeath.Follow
theseguidelineswhenadjusngtheseatheight.Always
ensuretheseatpostminimum inseron marksarebelowthe
seatclampandcannotbeseen.Ensuretheseatclampis
lockedandtheseatcannotmove.
WARNING!
Therearetwokindsofseatclamps;boltedandquick-release,
andtwokindsofseatpostsstandardandmicro-adjust.Theseat
assemblyshouldbeadjustedwiththeseatcenteredontherails
andlevel.Itisrecommendedtoaddsomegreasetoallthreads
andbindersonabicycle,especiallyontheoutsideoftheseat
post.Otherwiseitmaycorrodeovermeandnotbeabletobe
adjustedagain.
BoltedSeatClamp
❶ Usinga5mmAllenwrench,loosentheseatclampboltand
inserttheseatpostintotheseattube.Figure 3.14
❷ Adjusttheseatheightupordownunltheriderfeelsthey
havecontrolofthebicycleandiscomfortable.
Important!Besuretheminimum inseron marksdonotgo
pastthetopoftheseatclampandarenotvisible. See
Secon 1, Fig. 1.2: Seat Height and Handlebar Reach.
❸ Tightentheseatclampbolttolocktheseatinplace.
❹ Checktheseattobesureitdoesnotmove.
Minimum
inseron
marks
Seattube
Usea5mmAllen
wrenchtoloosenand
ghtentheseatclamp
2
1