4 Adjustments
38
WARNING!
Figure 4.16
Figure 4.17
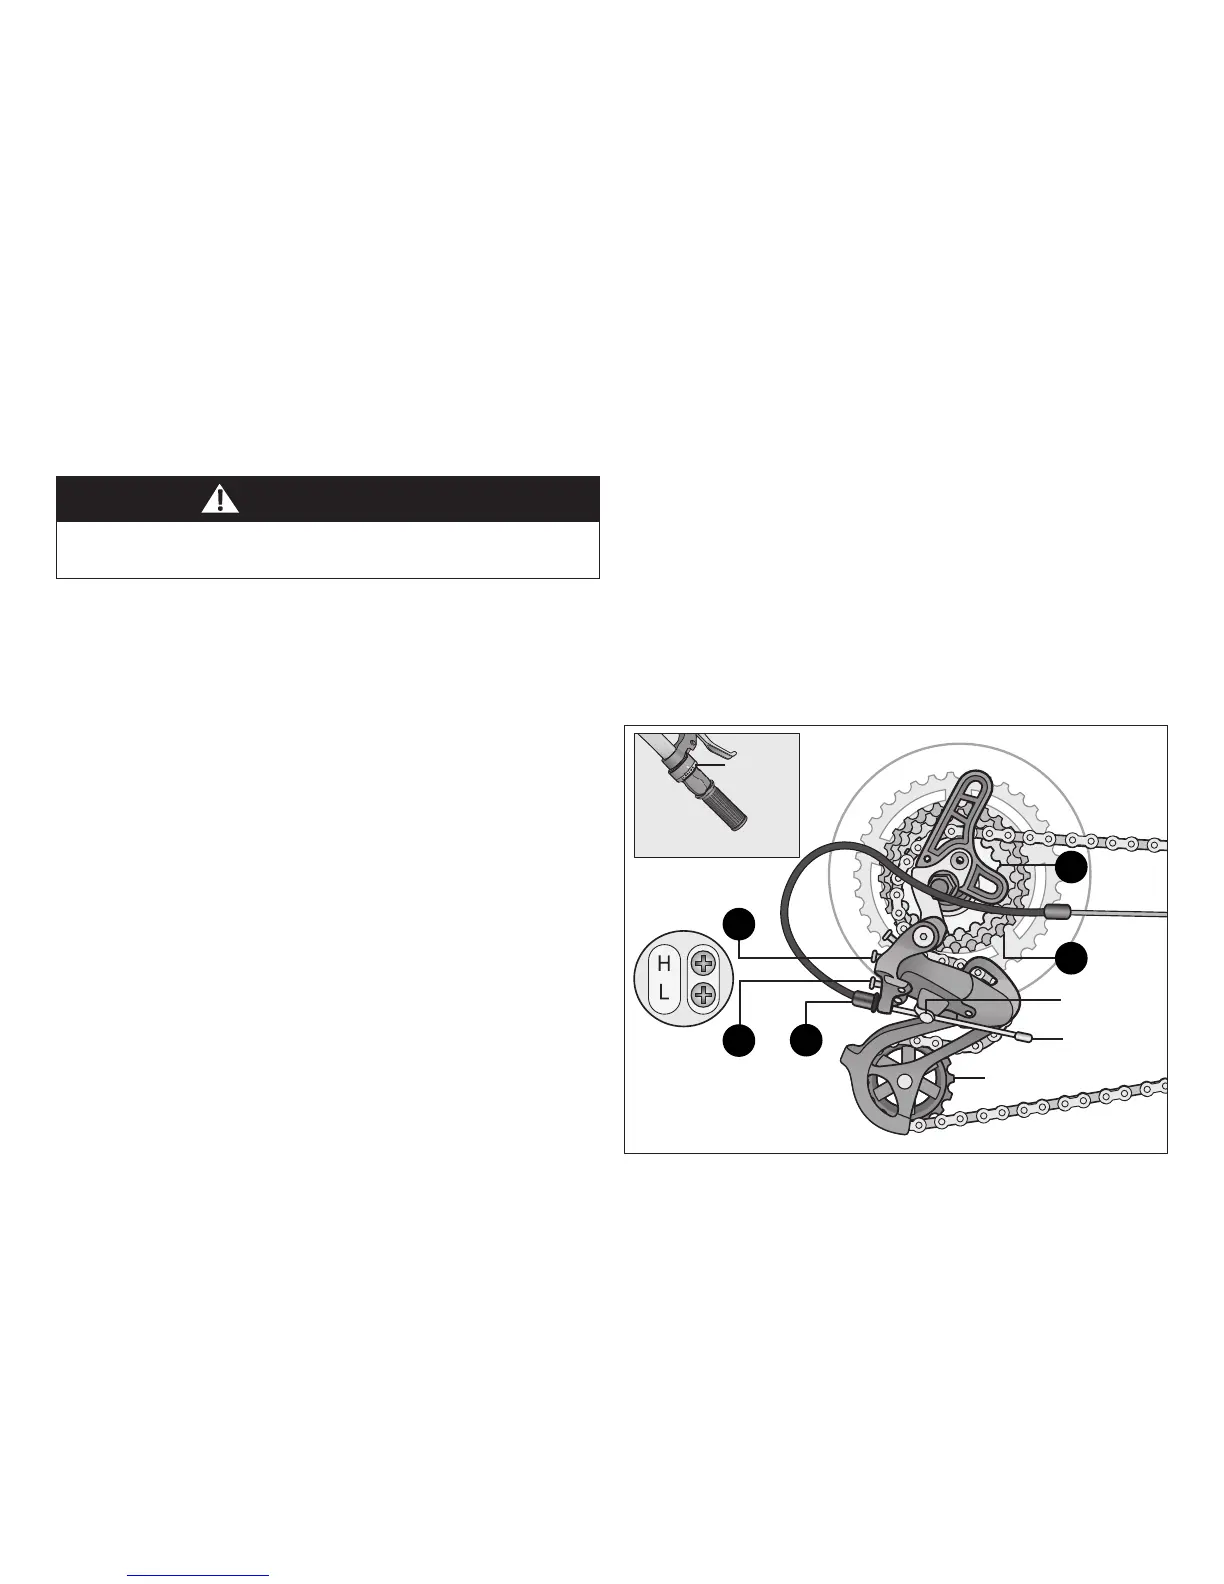
ADJUSTING THE REAR DERAILLEUR
Ensure all bolts are secured ghtly and the chain does not fall
o in either direcon.
Although the rear derailleur is inially adjusted at the factory,
you will need to inspect and re-adjust it before riding the bicycle.
Adjust the Rear Derailleur
❶ Begin by shiing the rear shier to largest number indicated
and place the chain on the smallest sprocket. Figure 4.16
❷ Adjust the high limit screw so the guide pulley and the
smallest sprocket are lined up vercally. Turn the high limit
screw clockwise to move the pulley away from the frame
Counter-clockwise to move the pulley towards the frame
Figure 4.17
❸ Shi through the gears, making sure each gear achieved is
done quietly and without hesitaon. If necessary, use the
barrel adjuster to ne-tune each gear by turning it the
direcon you want the chain to go. For example, turning
clockwise will loosen the cable tension and move the
chain away from the wheel, while turning counter-clockwise
will ghten cable tension and direct the chain towards
the wheel.
❹ Shi the rear shier to gear one and place the chain on the
largest cog.
❺ Adjust the low limit screw in quarter turn increments unl
the guide pulley and the largest cog are aligned vercally.
Turn the low limit screw clockwise to move the pulley closer
to the frame; counter-clockwise to move the pulley away
from the frame.
❻ Again, shi through each gear several mes, checking that
each gear is achieved smoothly. It may take several aempts
before the rear derailleur and cable is adjusted properly.
Anchor bolt
Low limit
screw
High limit
screw
Cable
Smallest
sprocket
Largest
sprocket
Rear
shier
Barrel
adjuster
Guide pulley
2
1
3
6
5