Adjustments 4
41
41
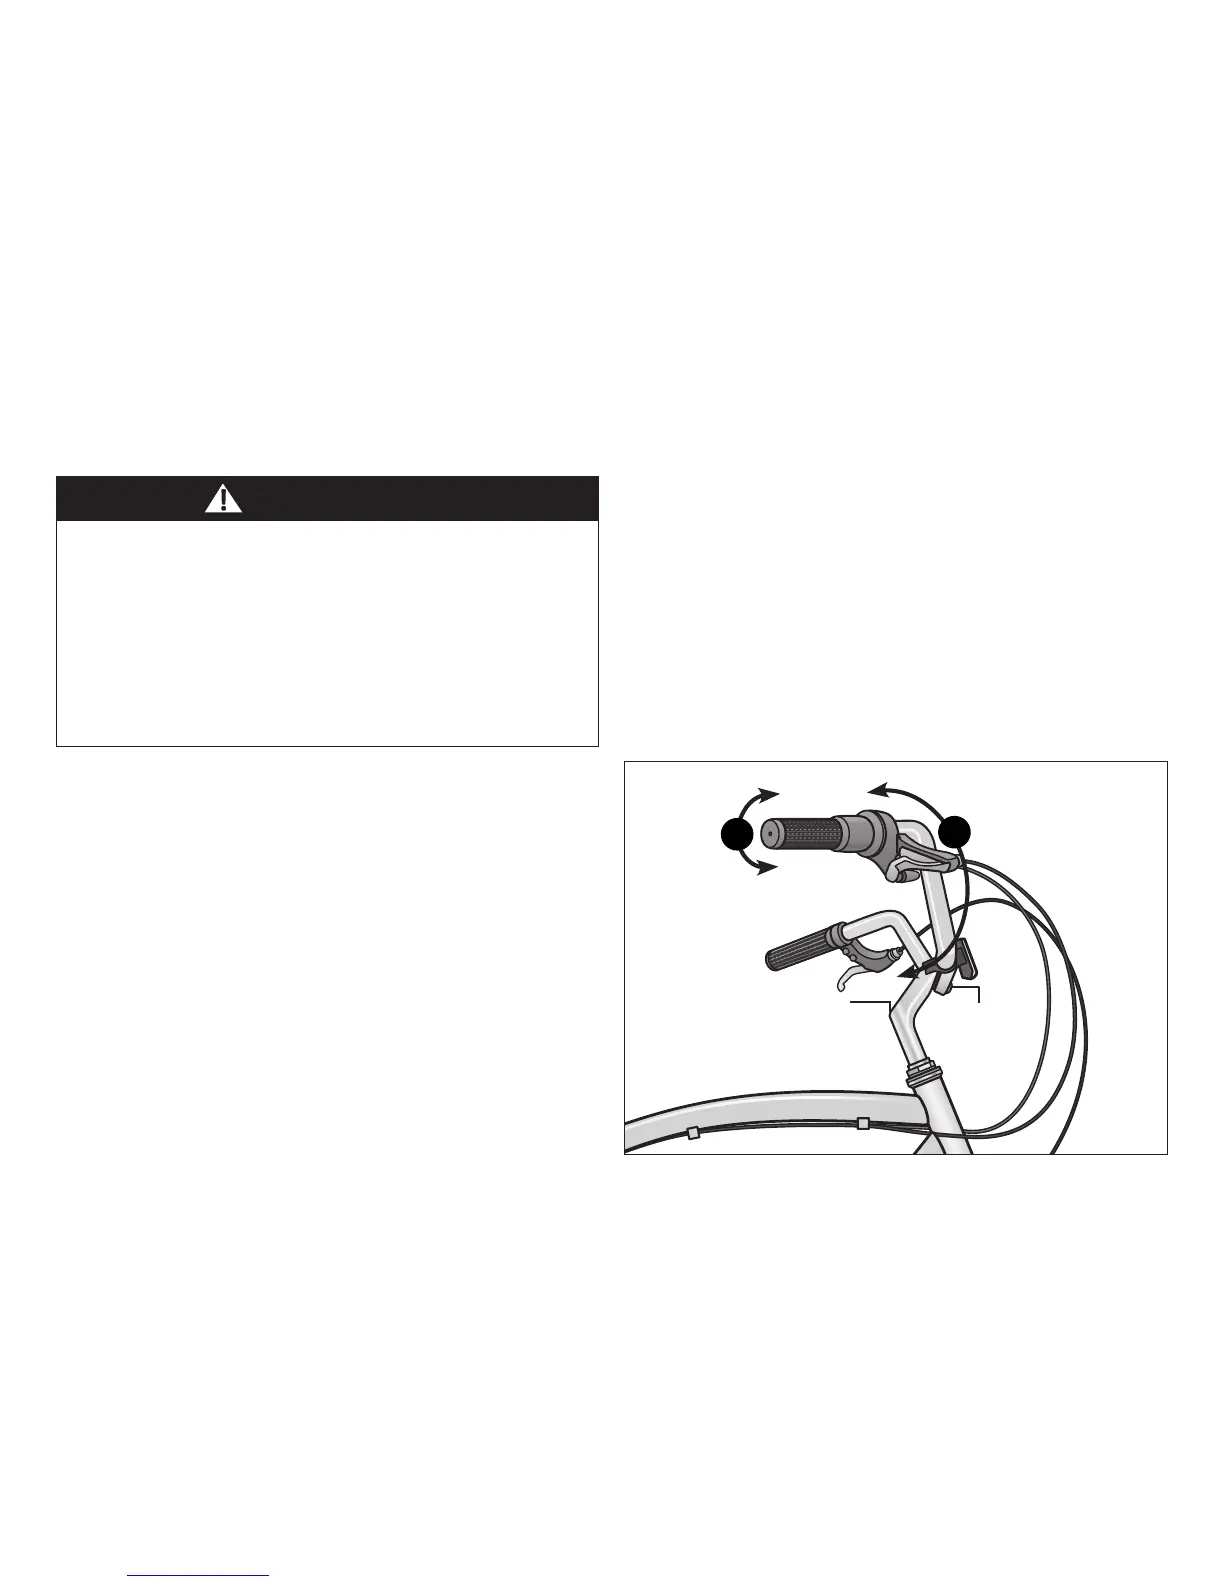
Figure 4.21
ADJUSTING THE HANDLEBAR
Adjusng the Handlebar Height
Refer to Secon 3: Aach the Handlebar for instrucons on
adjusng the handlebar height.
Align the Handlebar
❶ Stand in front of the handlebar and hold the front wheel
between your legs.
❷ Using a 6 mm Allen wrench, loosen the stem binder bolt and
move the handlebar le or right unl it is aligned with the
front wheel. Figure 4.21
❸ Tighten the stem binder bolt and check the handlebar is
securely aached and cannot move.
WARNING!
• Improper adjustment of the handlebar may result in
damage to the stem post, steerer tube and result in loss of
control, serious injury or death. Ensure the minimum
inseron marks on the stem post are not visible above the
top of the headset.
• Failure to properly ghten handlebar components may
result in loss of control, serious injury or death. Always
check the handlebar cannot move and is secured to the
frame before riding the bicycle.
Adjust the Handlebar Angle
❹ Using a 6 mm Allen wrench loosen the handlebar binder
bolt(s).
❺ Rotate the handlebar into the desired posion. Figure 4.21
❻ Check that the handlebar is centered to the frame and front
wheel. Sit on the seat and check your reach to grips, shiers
and brakes. Refer to Secon 1, Fig. 1.2: Seat Height and
Handlebar Reach for guidelines.
❼ Tighten the handlebar binder bolt(s) and check the
handlebar is securely aached and cannot move.
2
Loosen stem
binder bolt
Move handlebar
le to right
5
Loosen
handlebar
binder bolt(s)
Rotate handlebar
to desired posion