3 Assembly
26
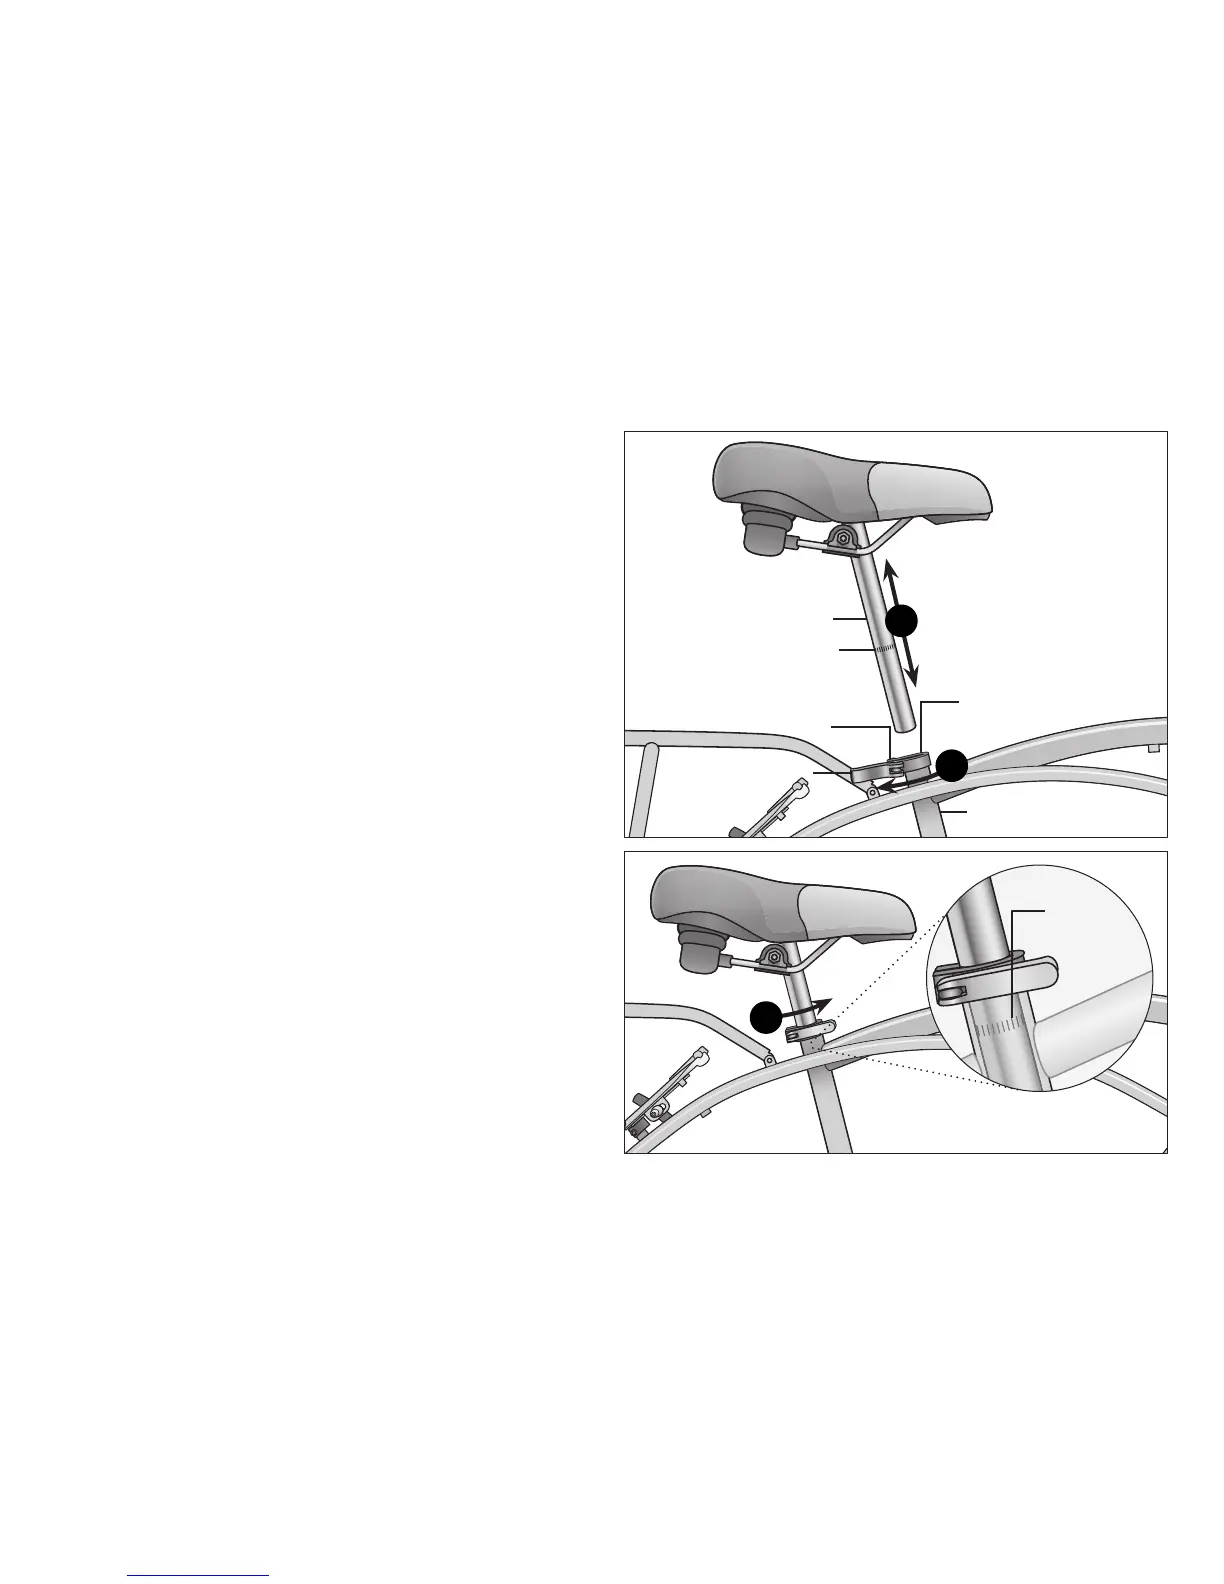
Figure 3.15
Figure 3.16
Quick-release Seat Clamp
❶ Unlockthequick-releaseleverandinserttheseatpostinto
theseattube.Figure 3.15
❷ Adjusttheseatheightupordownunltheriderfeelsthey
havecontrolofthebicycleandiscomfortable.
Important!Besuretheminimum inseron marksdonotgo
pastthetopoftheseatclampandarenotvisible. See
Secon 1, Fig. 1.2: Seat Height and Handlebar Reach.
❸ Closethequick-releaseleverandlocktheseatinplace.
Ifthereisnotenoughpressuretoholdtheseatinplace
openthequick-releaselever.Withonehandonthequick-
releaseleverandonehandontheadjustmentnut,startto
handghtentheadjustmentnutunlyoustarttofeelsome
resistanceagainsttheseatpostclamp.Do notaemptto
ghtenbyturningthequick-releaselever.Thequick-release
leverisforclosing,theadjustmentnutisforadjusngthe
pressure.Figure 3.16
❹ Trytoclosethequick-releaselever.Ifitcloseseasily,openit
upandghtentheadjustmentnutfurther.Ifitistoo
diculttoclose,openthequick-releaseleverupandloosen
theadjustmentnutalileandtryagain.
Important! Youshouldfeelresistancewhenyouclose
thequick-releaseleverthatshouldleaveatemporary
impressiononyourngers.Openandclosethehandleto
ensuretheseatissecurelylockedinplace.
Minimum
inseron
marks
Minimuminseronmarks
ontheseatpost
Seatpost
Quick-releaselever
Quick-release
seatclamp
Adjustmentnut
Seattube
2
1
3