10
A12-1—Power Cord Storage Slot
A12-2—Power Port
A12-3—Cord Outlets
A12
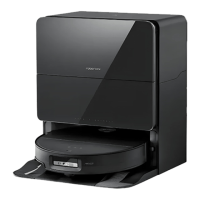
Empty Wash Fill Dock (Back
View)
Power cord can exit at either side.Note:
A11-6—Drying Air Outlets
A11-7—Dock Base
A11-8—Water Filter
A11-9—Filter
A11-10—Charging Contacts
A11-11—Robot Refill Port
A11-12—Cleaning Tray of Edgewise
Mopping Module
A11-13—Dirty Water Tank
A11-14—Status Indicator Light
A11-15—Mop Washing Module
A11-15-1—High-Speed Maintenance
Brush
A11-15-2—Washing Strip
A11-15-3—Clean Water Dispensers
A11-15-4—Maintenance Brush Latch
A11-16—Cleaning Solution Cartridge
A11-17—Dust Bag Slot
A11-18—Dock Location Beacon
A11-19—Suction Inlet
• Breathing: Emptying/Mop washing
• Red: Dock error
• Off: Powered off/Charging
Installation
B
B1-1—Tidy cords, hard or sharp objects
(such as nails and glass), and loose
items from the ground and move
any unstable, fragile, precious,
or dangerous items to prevent
personal injury or property damage
due to items becoming tangled in,
struck by, or knocked over by the robot.
When using the robot in a raised
area (such as in a duplex apartment),
always use a physical security
barrier to prevent accidental falls
that may result in personal injury or
property damage.
B1-2—
B1
Important Information
• When using the robot for the first time, follow it
throughout its whole cleaning route and watch for
potential problems. The robot will be able to clean by
itself in future uses.
• To prevent excessive buildup of dirt on the mop cloths,
floors should be vacuumed at least three times before
the first mopping cycle.
Notes:
B2
Assembly
B2-1—Remove the foam used to secure the
mop washing module in shipment at
the bottom of the dock.
B2-2—Attach the dock base by pressing
down both sides of the base and the
connecting part in the middle firmly
until you hear a click.
B2-3—Connect the power cord to the back
of the dock, and keep the excess
cord inside the storage slot.
Power cord can exit at either side.Note:
B3
Positioning the Dock
Place the dock on a hard, flat floor (wood/tile/
concrete etc.), flat against a wall, and reserve
a space of at least 0.8 m (2.62 ft) in height,
0.42 m (1.38 ft) in width and 1 m (3.28 ft)
in depth. Make sure that the location has
good WiFi coverage for a better experience
with the mobile app. Plug in and make sure
that the status indicator light is on.
Notes:
• If the power cord hangs vertically to the ground, it
may be caught by the robot, causing the dock to be
moved or disconnected. Keep the excess cord inside
the storage slot.
• The status indicator light is on when the dock is
powered on, and off when the robot is charging.
• The status indicator light turns red if an error occurs.
• Place the dock on a hard, flat floor away from fire,
heat, and water. Avoid narrow spaces or locations
where the robot may be suspended in the air.
• Placing the dock on a soft surface (carpet/mat)
may cause the dock to tilt and cause docking and
departing problems.
• Keep the dock away from direct sunlight or anything
that may block the dock location beacon, otherwise
the robot may fail to return to the dock.
• Do not use the dock without clean water tank,
dirty water tank, high-speed maintenance brush,
disposable dust bag, cleaning tray of edgewise
mopping module, cleaning solution cartridge, or
water filter.
B3-1—More than 1 m (3.28 ft)
B3-2—More than 0.8 m (2.62 ft)
B3-3—More than 0.42 m (1.38 ft)