EasyManua.ls Logo

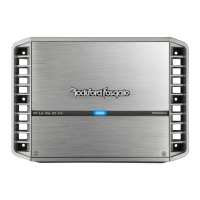
Rockford Fosgate PM600X4 User Manual

Rockford Fosgate PM600X4
10 pages
To Next Page IconTo Next Page
Page #1 background imageLoading...
Page #1 background image
Source
Unit
~----------------------~
I
I
I I
__
;;.--;
-
---------
=-
---•
I I
~---------
~-----------
©
+
_FRONT+
@-
LEFT-@-
LEFT--@
@-
RIGHT-@- RIGHT-@
I
,
,
,
+
O l
u'
*
Keep
grounds
as
short
as
possible
Switched
12V
to
REM
REM
ihCAUTION
NEG
Battery
Be
sure
to
connect
speakers
and
Punch
level
Control
-
PLC
(if
equipped)
after
amplifier
output
clip
adjustment.
(see
reverse)
Amplifier
Quick
Setup
)!.ess
than
18"
+
POS
REM
Connect
to
chassis
ground
of
vehicle
*
Keep
grounds
as
short
as
possible
----~
~~~~~-------------------------------------------------------------------~
·
~
sp
~
ec
~
ific
:
atio
~
ns
!
su
!
bje
~
ctt
:
oc
~
ha
:
nge
~
w
~
itho
~
ut
:
no
:
tice
~
.
f:
ma
:
ges
:
de
:
pic
~
tty
:
pic
:
al
:
set
:
up
j
.
~
~
Refer
to
manual
for
add
1
t1onal
wiring
options.
Question and Answer IconNeed help?

Do you have a question about the Rockford Fosgate PM600X4 and is the answer not in the manual?

Rockford Fosgate PM600X4 Specifications

General IconGeneral
Number of Channels4
Rated Power (RMS)75 W x 4
Power Output75 W
Frequency Response20 Hz - 20 kHz
Signal-to-Noise Ratio> 80 dB
Input Sensitivity150 mV - 4 V
Crossover50 Hz - 250 Hz
TopologyClass AB
Fuse Rating30 A
Dimensions2.5" x 11" x 9.5"
Total Harmonic Distortion (THD)< 1%
Bass Boost0-12dB @ 45Hz
Rated Power (RMS) Bridged150W x 2 @ 4 Ohms
Power Output Bridged150W x 2 @ 4 Ohms
Crossover TypeVariable HP/LP/AP

Summary

Source Unit and Amplifier Connections

Power and Ground Connections

Details how to connect the amplifier's power, ground, and remote turn-on wires to the battery.

Chassis Grounding

Explains the importance of a secure connection to the vehicle's chassis for safety and performance.

Amplifier Setup Procedure

Input Clip Indicator Setup

Procedure to set the source unit's volume to prevent input signal clipping.

Output Clip Indicator Setup

Procedure to set the amplifier's input level to prevent output signal clipping.

Final Connection Steps

Instructions for reconnecting speakers and any optional accessories after setup.

Performance Verification Report

Extended Warranty Program Details

Related product manuals