Do you have a question about the Rockville CUBE and is the answer not in the manual?
Prepare bracket, determine mounting area, mark, pre-drill holes, and secure the wall bracket using screws and anchors.
Attach safety chain, connect ball shaft to speaker, wire speaker terminals, and attach speaker to wall bracket.
Tighten molded nut, orient speaker, secure safety chain, and make final adjustments to the mounted speaker.
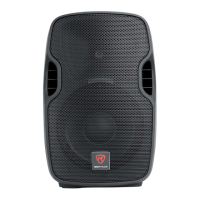
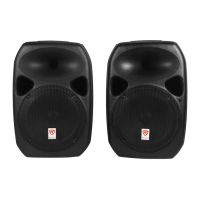
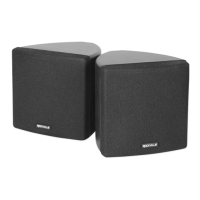
The Rockville CUBE 3.5" Speakers with Swivel Mounting Brackets are designed to provide high-quality audio with flexible placement options. These speakers are ideal for various indoor settings, offering a robust mounting system that allows for precise orientation and secure installation. The assembly process is straightforward, guided by clear instructions and requiring common household tools.
The Rockville CUBE speakers are designed to deliver audio output in a compact form factor. Their primary function is to reproduce sound, making them suitable for home audio systems, small commercial spaces, or any environment where discreet yet effective sound projection is desired. The integrated swivel mounting brackets are a key feature, enabling users to adjust the speaker's direction to optimize sound dispersion and coverage within a room. This flexibility ensures that the audio can be directed precisely where needed, enhancing the listening experience. The speakers are engineered to be durable, with components designed for long-term reliability. The mounting system is robust, ensuring that once installed, the speakers remain securely in place, even after adjustments.
The installation process begins with preparing the ball shaft and molded nut. The molded nut (A) is loosened and removed from the ball shaft by turning it counter-clockwise. A metal bar (B) can be used for leverage if needed, inserted into one of the holes on the molded nut. Once the molded nut is removed, the ball shaft is pulled out of the wall bracket.
Next, the mounting location needs to be determined. For optimal security, mounting to a wood stud (C) is recommended. If mounting on drywall, wall anchors (D) must be used and properly installed to ensure stability. After selecting the location, the wall bracket is aligned with a stud (E), and marks are made at the top and bottom left openings, as well as the top right opening (F).
Pre-drilling screw holes is crucial. The holes should align perfectly with the bracket (G). If using anchors, ensure the holes are deep and wide enough to accommodate them (H). Anchors can then be inserted and gently tapped in with a hammer if necessary. Three of the included screws are used to secure the top left, bottom left, and top right corners of the bracket. If anchors are used, ensure the correct screw type is used for the specific anchors.
Once the bracket is securely mounted, the safety chain is attached. The end with the largest opening slides onto the ball shaft. The lock nut is then threaded onto the shaft, with its round surface facing away from the ball. It should be tightened all the way onto the threaded shaft until it is flush with the ball. The ball shaft is then screwed into the threaded insert at the back of the speaker until it is fully seated against the opening.
The molded nut is screwed onto the wall bracket about one turn. It is important not to tighten it completely at this stage, as this would prevent the ball shaft ball from being inserted into the wall bracket. With both hands, the speaker is held firmly, and the ball is pushed into the wall bracket until it snaps into place. A check should be performed to ensure the ball is properly seated.
For wiring, a small flat-head screwdriver is used to loosen both terminal screws (I). Approximately half an inch of sheathing is stripped from the ends of the speaker wire. The stripped wires are then inserted into the terminal openings (J), ensuring proper polarity. The screws (K) are then tightened to secure the wires.
After wiring, the molded nut is hand-tightened, and the speaker is oriented in the desired direction. The final step involves securing the safety cable. The last screw is inserted into the open end of the safety cable. With the safety chain attached, this screw is then inserted into the lower right-hand hole and tightened.
For final orientation adjustments, the metal bar is inserted into one of the holes on the molded nut and tightened securely. It is important not to overtighten to avoid damage.
The Rockville CUBE speakers are designed for minimal maintenance. Regular dusting of the speaker enclosures and mounting brackets will help maintain their appearance. Periodically, it is advisable to check the tightness of the mounting screws and the molded nut to ensure the speaker remains securely in place. If any looseness is detected, gently re-tighten the components using the metal bar as needed, being careful not to overtighten. The robust construction of the swivel mechanism and mounting hardware ensures long-term stability, reducing the need for frequent adjustments. The use of high-quality materials in the construction of both the speakers and their mounting hardware contributes to their durability and reduces the likelihood of wear and tear under normal operating conditions. Should any issues arise, the modular design of the mounting system allows for individual components to be inspected or replaced if necessary, though this is rarely required given the sturdy build.
| Brand | Rockville |
|---|---|
| Model | CUBE |
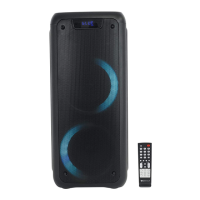
| Type | Portable Bluetooth Speaker |
| Bluetooth Version | 5.0 |
| Bluetooth | Yes |
| Microphone Included | Yes |
| Battery | Rechargeable Lithium-Ion |
| Impedance | 4 Ohms |
| Woofer Size | 6.5 inches |
| Tweeter Size | 1 inch |
| Inputs | AUX, USB |