Maintenance
Repair
MagneMover LITE Service Manual 113
Rockwell Automation Publication MMI-UM037A-EN-P - April 2020
Single Array Vehicles
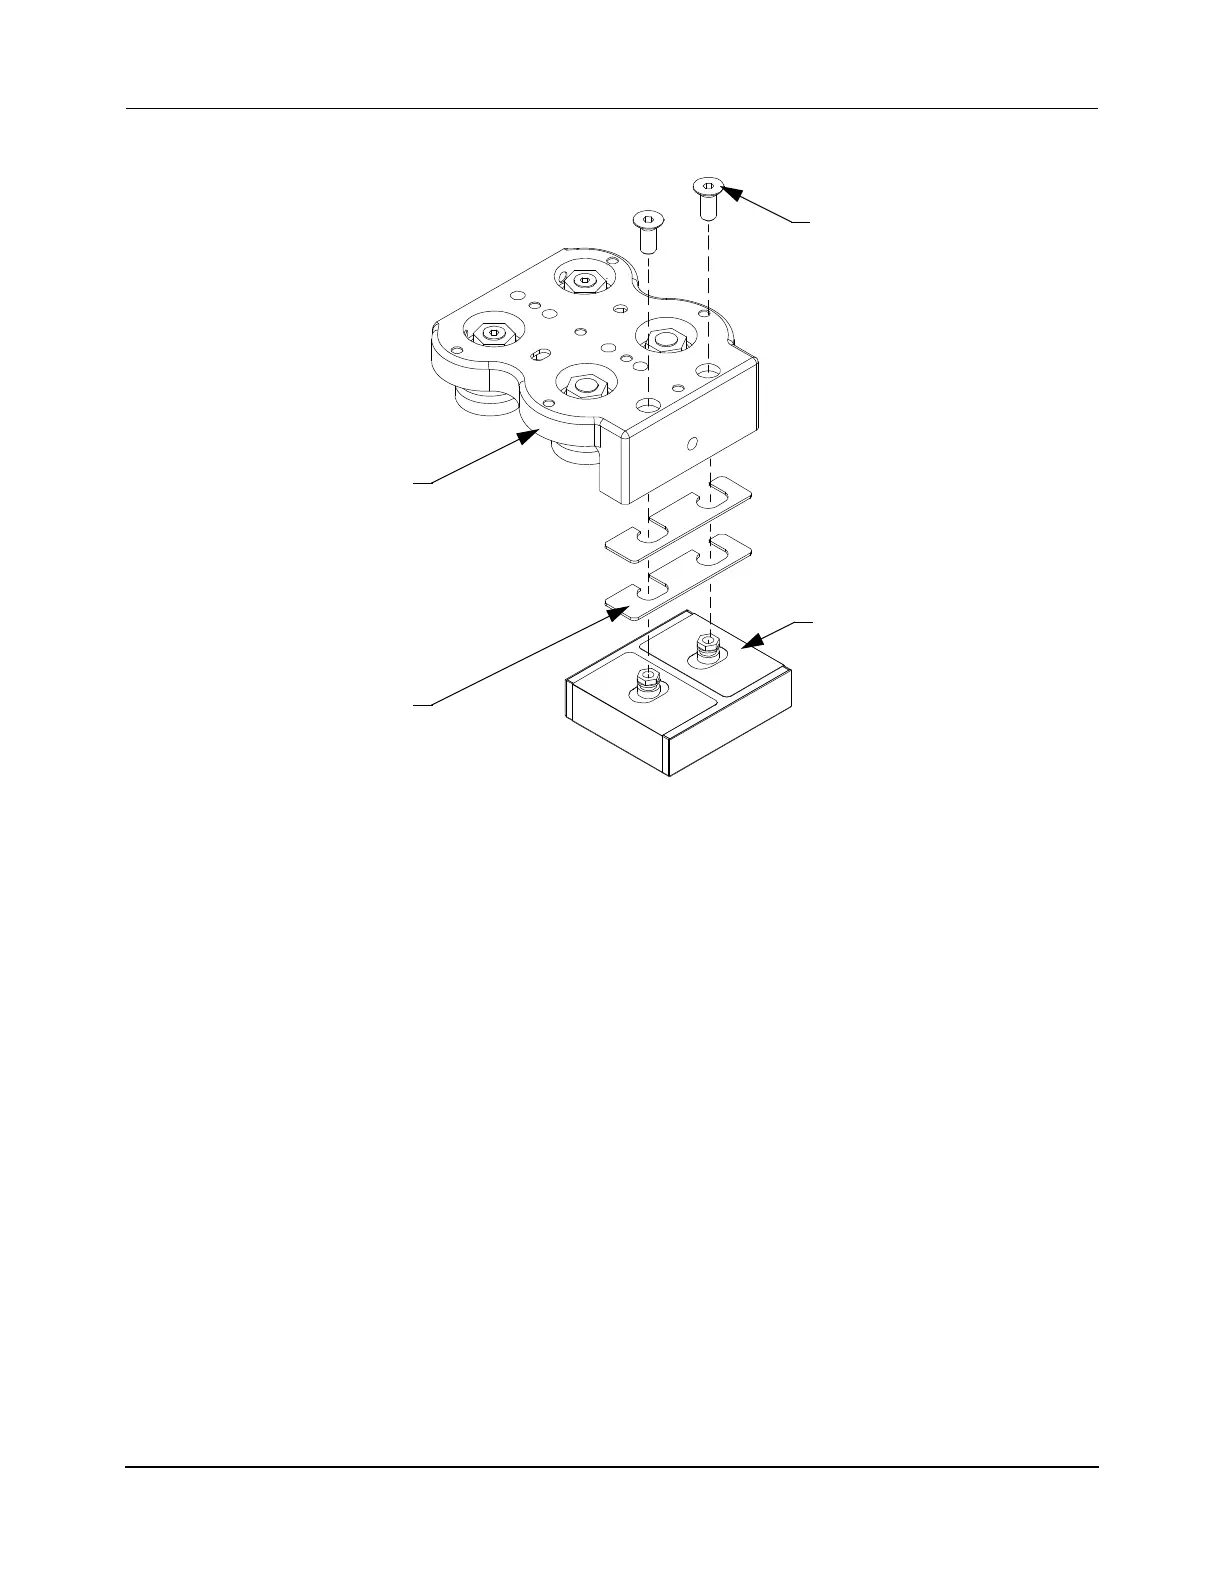
Figure 44: Single Array Precision Rail Vehicle Assembly
Required Tools and Equipment
• Hex wrench, 2.5 mm.
• Loctite 243, Thread locker Anaerobic Adhesive, Blue.
Procedure
1. Stop all motion on the path where the vehicle to be removed is located.
2. Remove the vehicle as described in Replace Precision Rail Vehicles on page 104.
3. Place the vehicle on a non-metallic work surface with the magnet array down. Keep
the magnet array at least three feet away from metal objects and tools. For safety rea-
sons, only remove and replace one magnet array at a time.
4. Remove the two M4 x 12 mm screws that secure the magnet array to the vehicle and
store them for reuse.
5. Grasp the array firmly with one hand while holding the vehicle firmly with the other
hand. Lift the vehicle off the array and place the array in the original shipping con-
tainer, or wrap it in bubble-wrap, for protection.
Single Array
Carriage
Shim, 1mm
(2X)
Magnet Array
M4 x 12mm Screw
(2X)
 Loading...


