Saving Data
Save the data you have created to a hard disk or the like.
At the toolbar, click . Alternatively, go to the [File] menu and select [Save As].
The [Save As] dialog box appears.
Specify the information for [Save in]
and [File Name], then click [Save].
Setting the Cutting Parameters
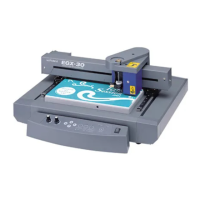
Before you carry out engraving, adjust the Speed control and Spindle Speed control on the switch panel of the EGX-20.
When you're performing engraving for the rst time, set the Speed control at the
central position and the Spindle Speed control at its maximum setting.
Also, if you're using acrylic material and the included blade, then you may leave the
settings for the EGX-20 driver at their default values.
Go ahead and try engraving using these settings.
In some cases it may not be possible to perform engraving smoothly. In such cases, ex-
amine the engraving results and adjust the settings for the cutting parameters, repeat-
ing this process of trial and adjustment until you obtain good engraving results.
General Suggestions for Making Adjustments
Depending on the engraving results, make the settings as described below. Use the Speed control and the Spindle Speed
control to make the adjustments.
• Ifengravedplacesarerough(notsmooth),thenlowerthespeed.
• Ifthematerialmeltsorsuersburring,lowerthespindlespeed.
• Ifthespindlespeedistoofast,thematerialmaymelt.Lowerthespindlespeed.Also,ifthereisbuildupofmeltedcuttings
in engraved grooves, you may be able to remove them by scrubbing with a toothbrush or the like.
• Increasingthespindlespeedwhenusinganarrowerbladeandreducingitwhenusingathickerblademayproduce
better results.
• Inmanycases,slowerspeedsproduceattractivenishedresults,butaspeedthatistooslowmaycausemelting.
Make the following adjustments with the driver.
• Thedefaultengravingdepthis0.1mm.Youcanengraveatagreaterdepthbychangingthevalueforthedriversetting[Z
Down Position]. The maximum depth at which you can engrave is 1.0 mm. (In the driver, you make the setting by specify-
ing a value prexed by a minus sign ["-"].) A greater engraving depth yields correspondingly wider lines. This means that
text characters also become thicker.
• Iftheengravingdepthistoodeep,itmaynotbepossibletoobtainattractiveresultsevenwhenthespeedandspindle
speed are adjusted.
• Onemethodforobtainingengravingresultsthatareattractiveyetdeepistoperformthesameengravingtwice.(For
example, setting [Z Down Position] to -0.18 mm and [Z Cutting Pitch] to 0.10 mm results in engraving in two passes, to
a depth of 0.18 mm. )
• Leave[ZUpPosition]setto0.50mmatalltimes.Lowervaluesresultinlesswastedmovement.
•
You can obtain attractive engraving results by setting [Fill Pitch] to 80% or less than the width of the cutter -- actually at about
50%.
P. 23, "Filling a Text String"
At the central
position
At maximum
25

 Loading...